
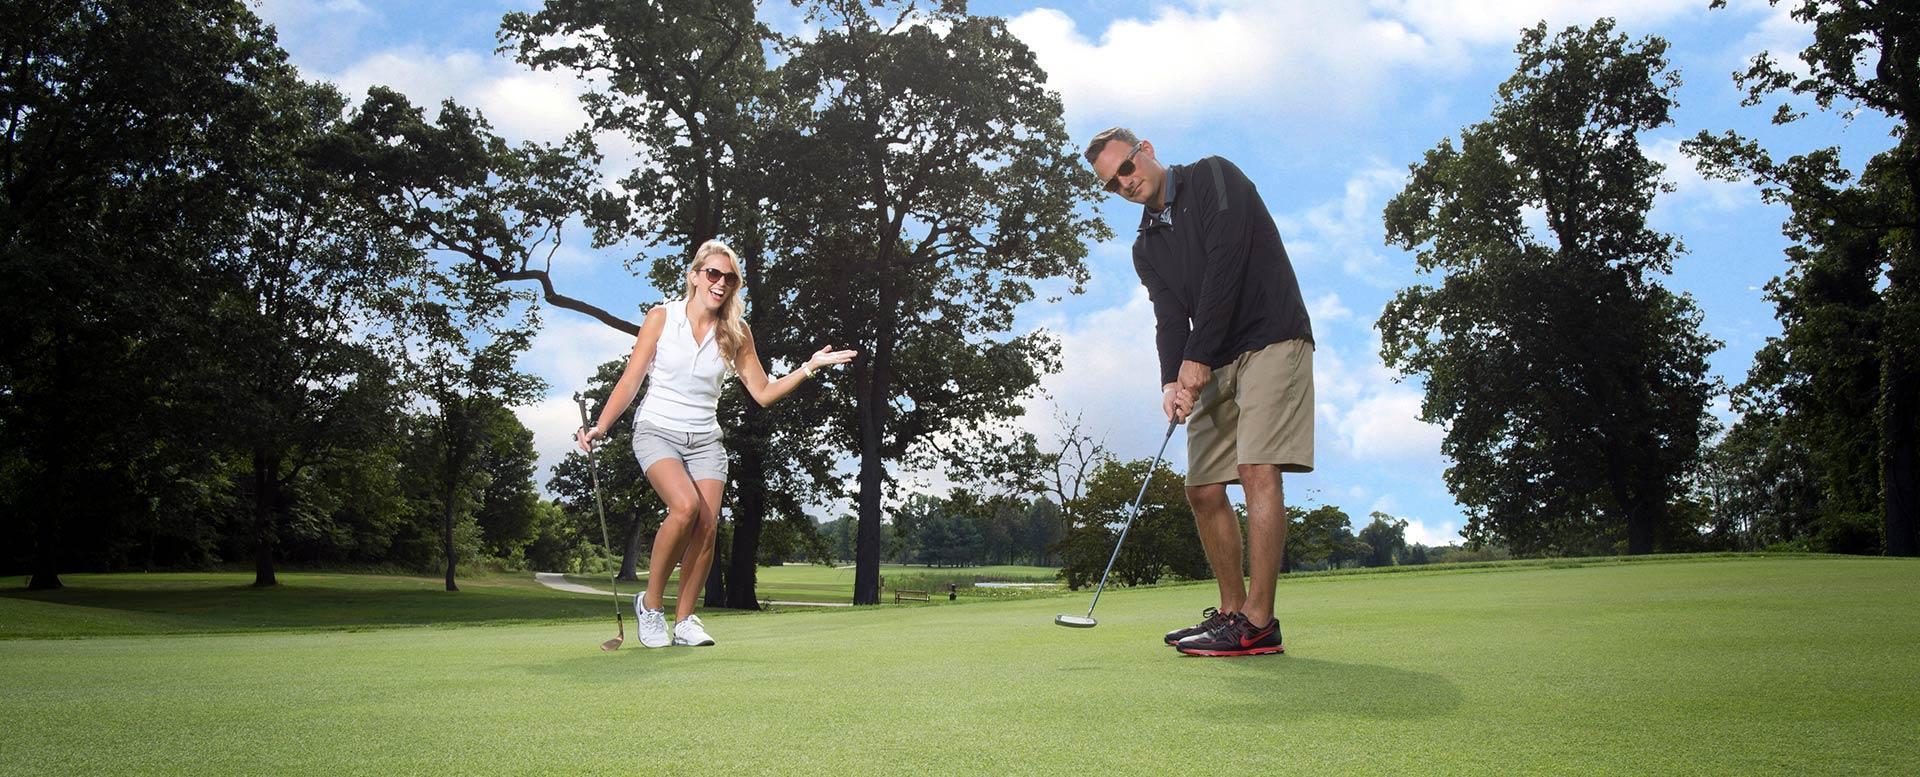
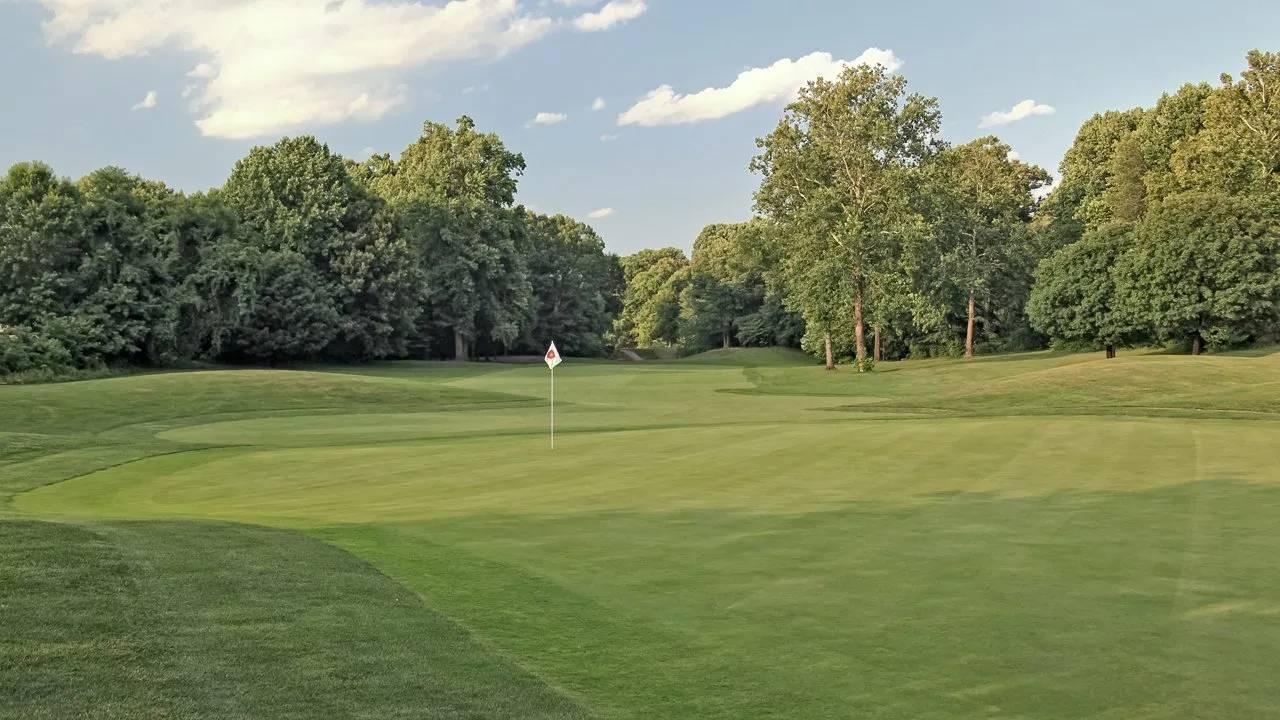
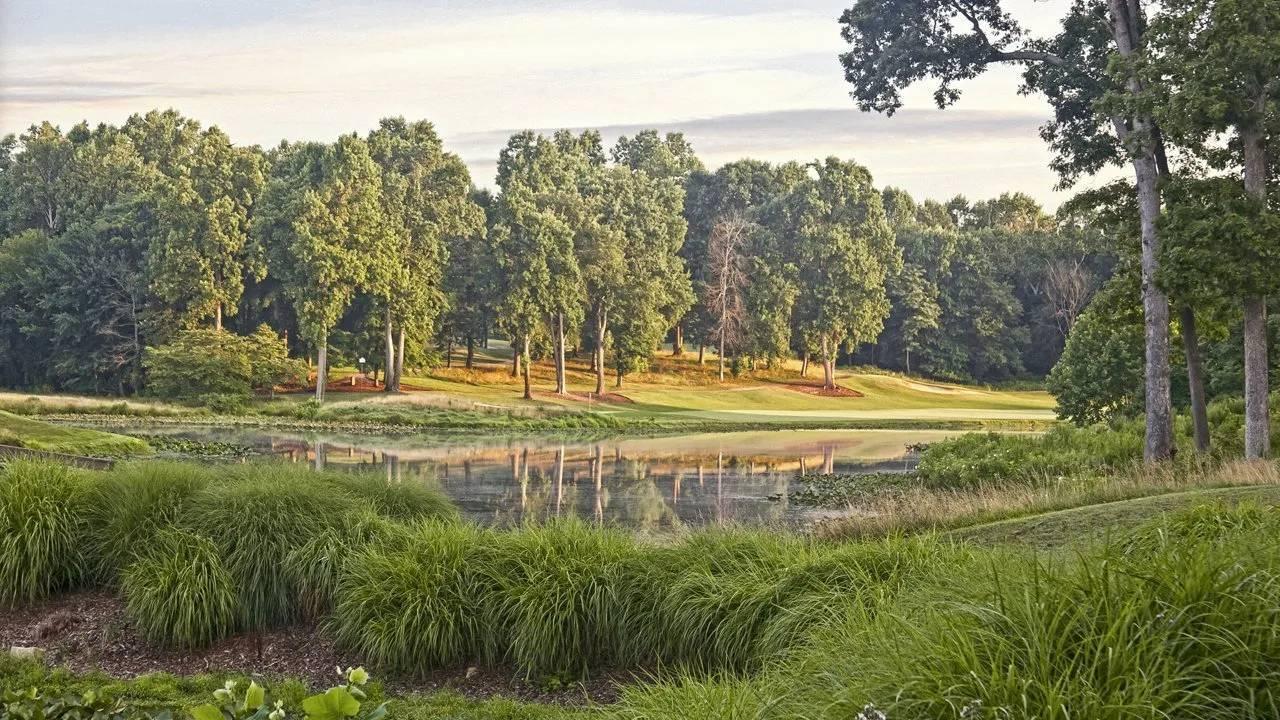
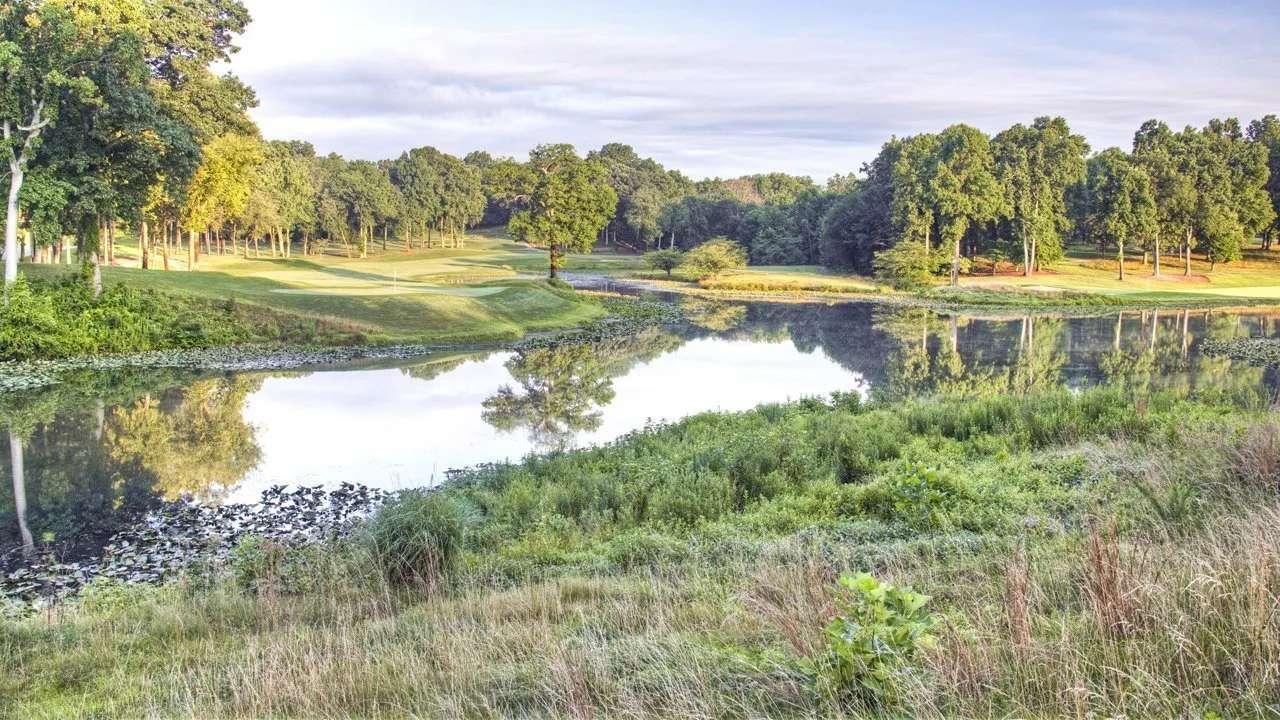
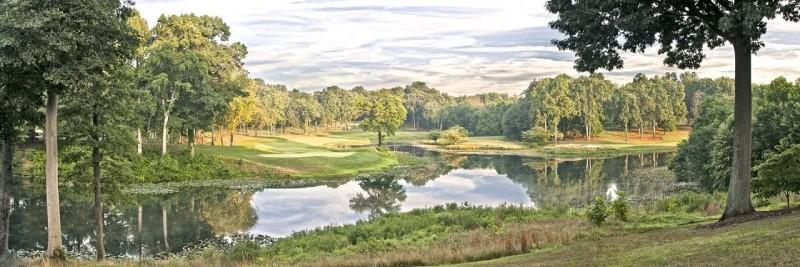
Creek Course
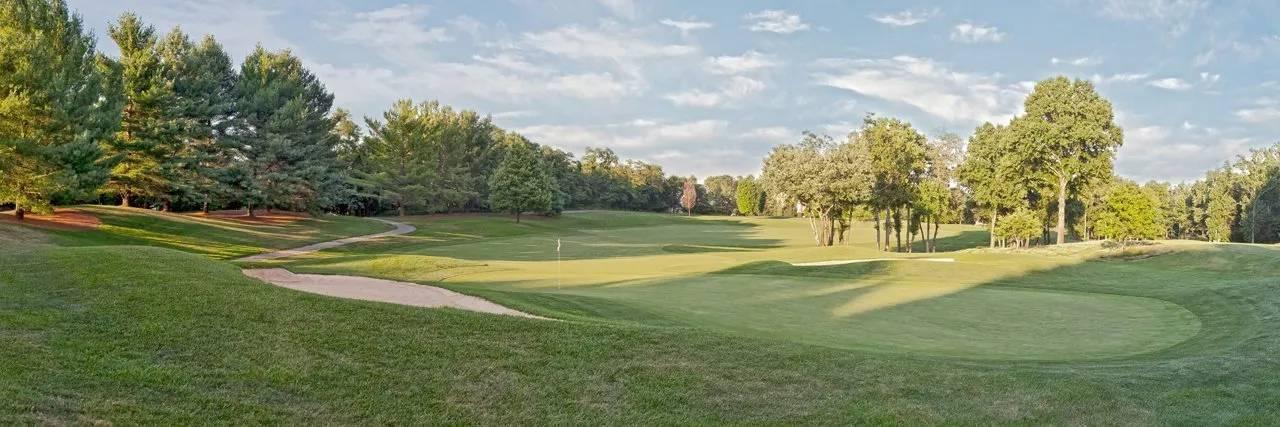
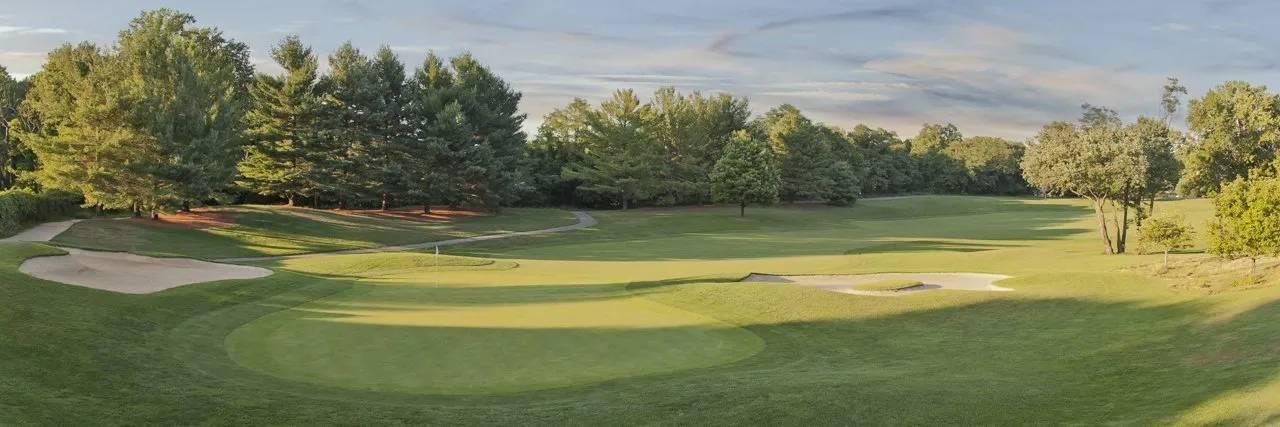
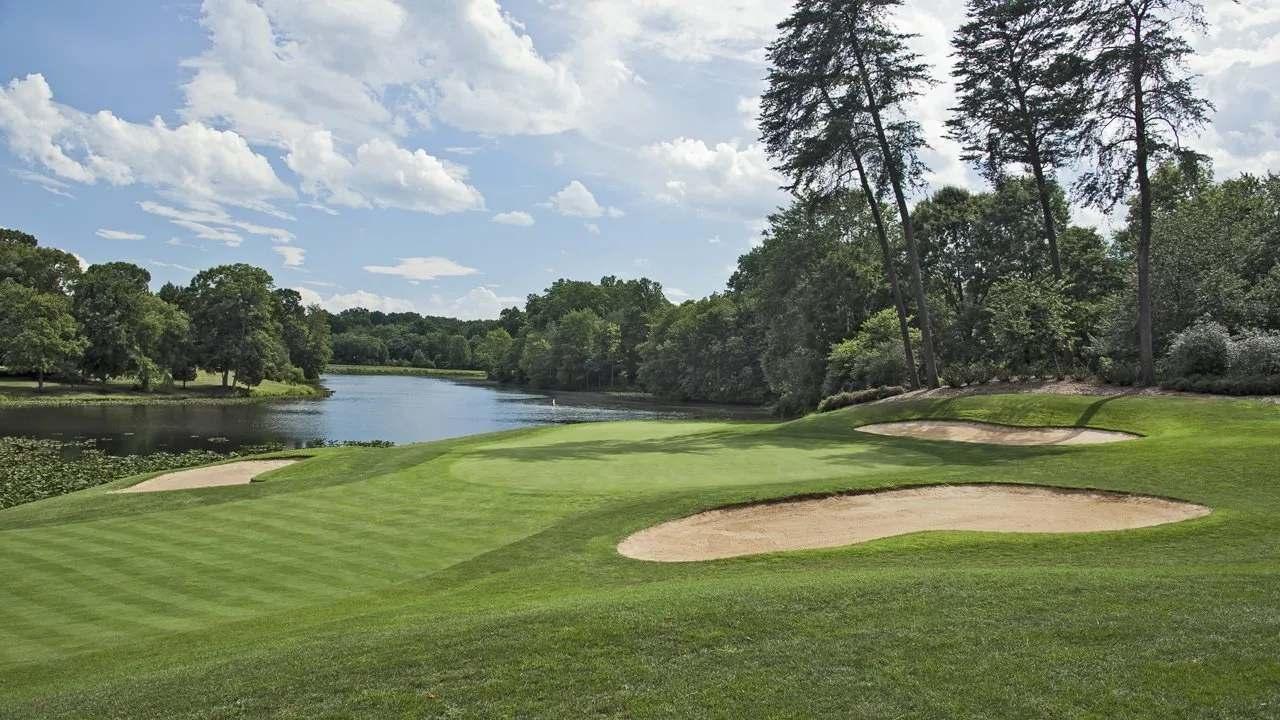
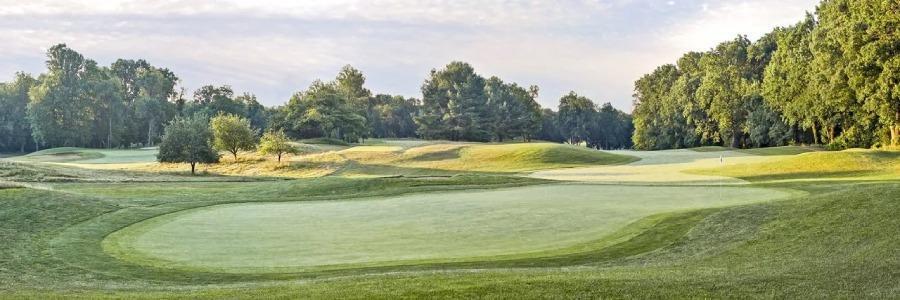
The first of the three nine-hole courses at Sand Creek is wrapped around the curves of Sand Creek and Lake Billington, into which the creek feeds. The course's highlights include the par 4 third hole, which allows long hitters the option of carrying the eastern edge of the lake from the tee. The fourth, a par 3, plays 190 yards over water from the back tees to a tiered green. Over all, the course puts a premium on club selection and accuracy, while winds off Lake Michigan, just north of Sand Creek, often come into play.
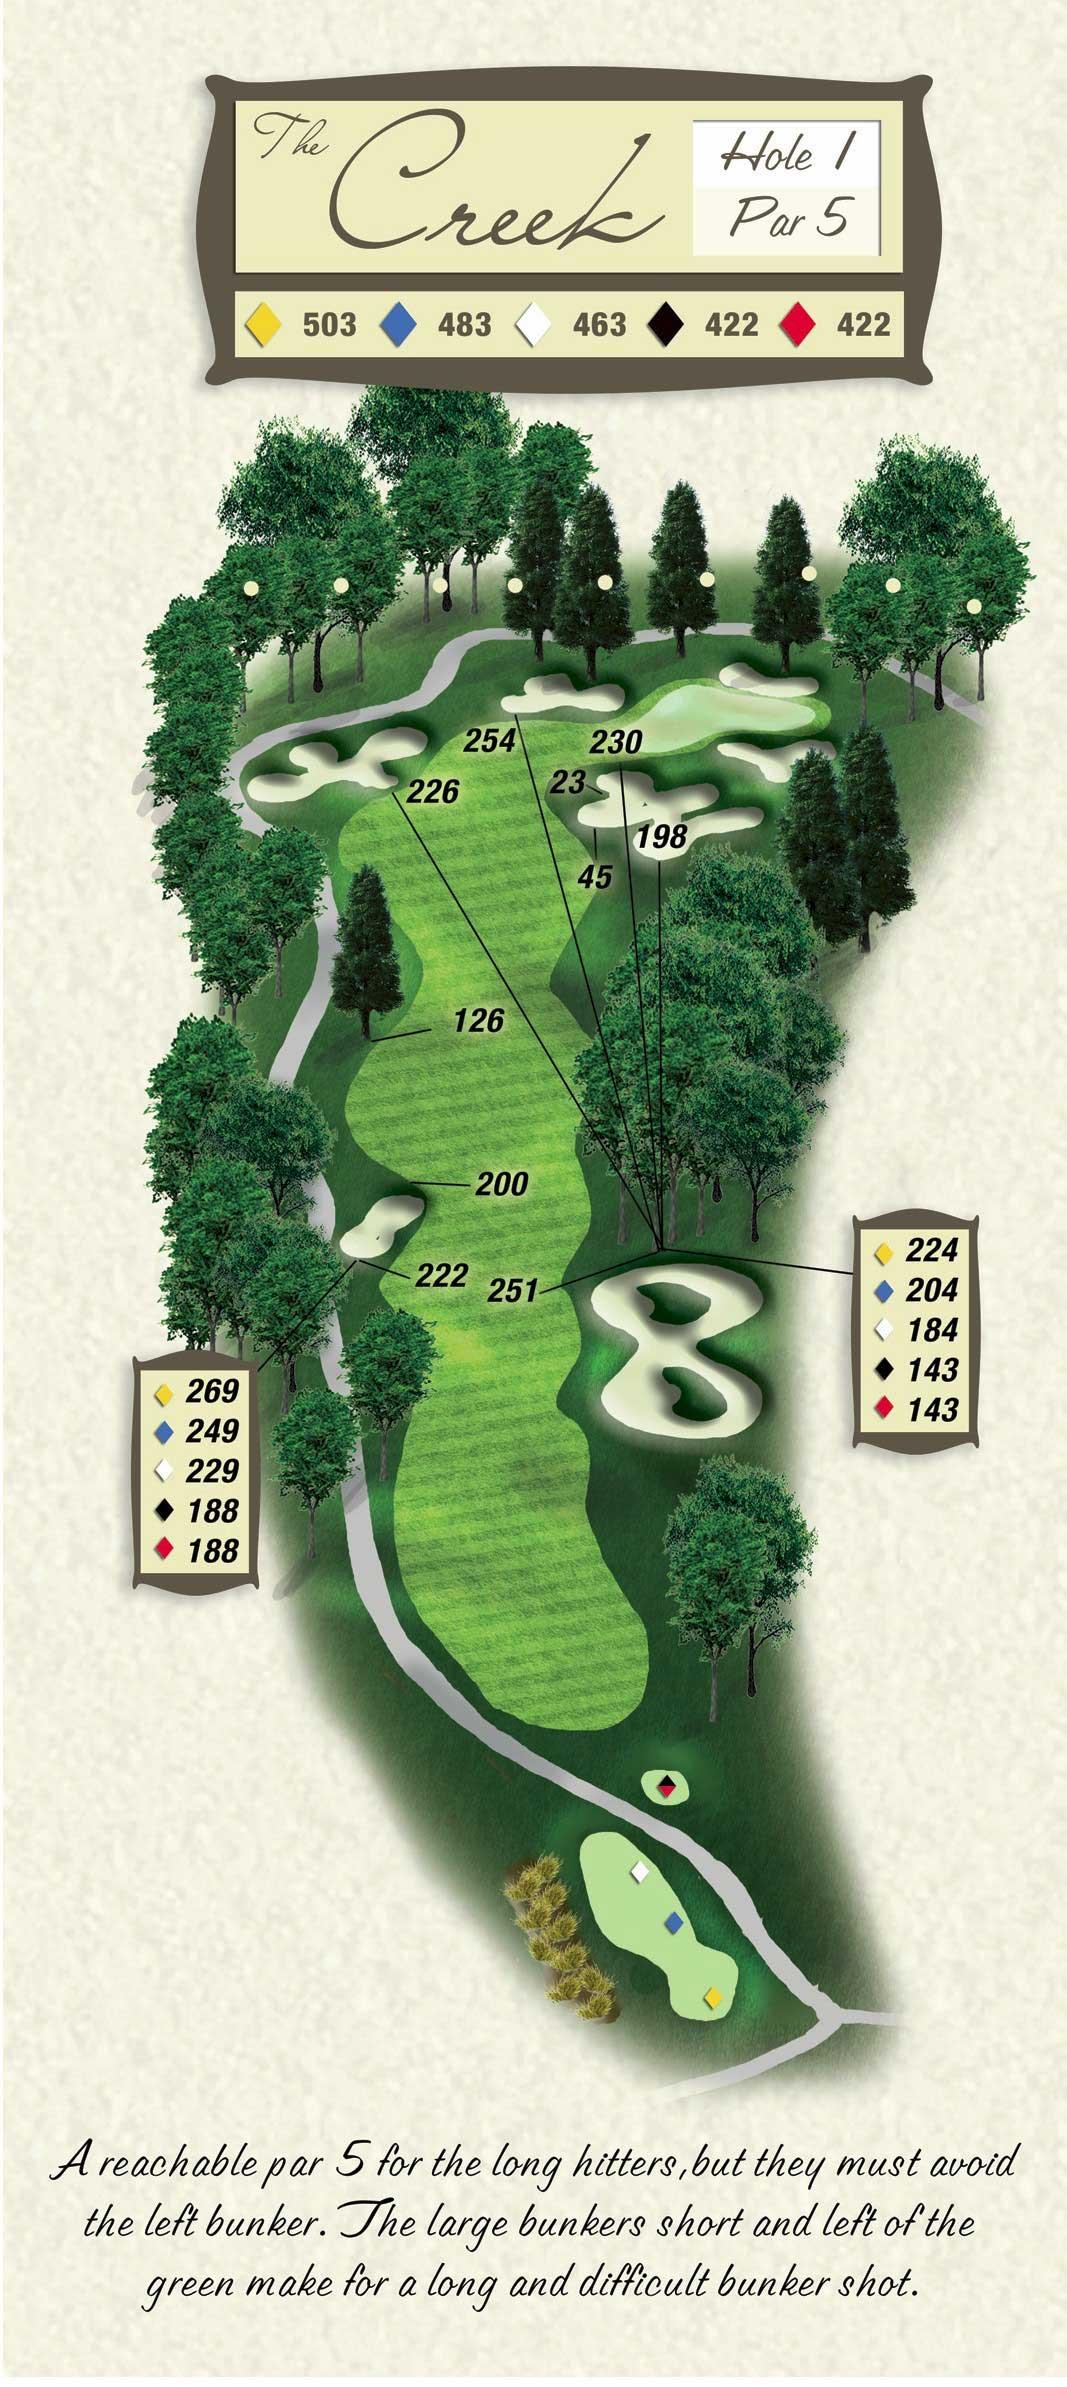
Hole # 1
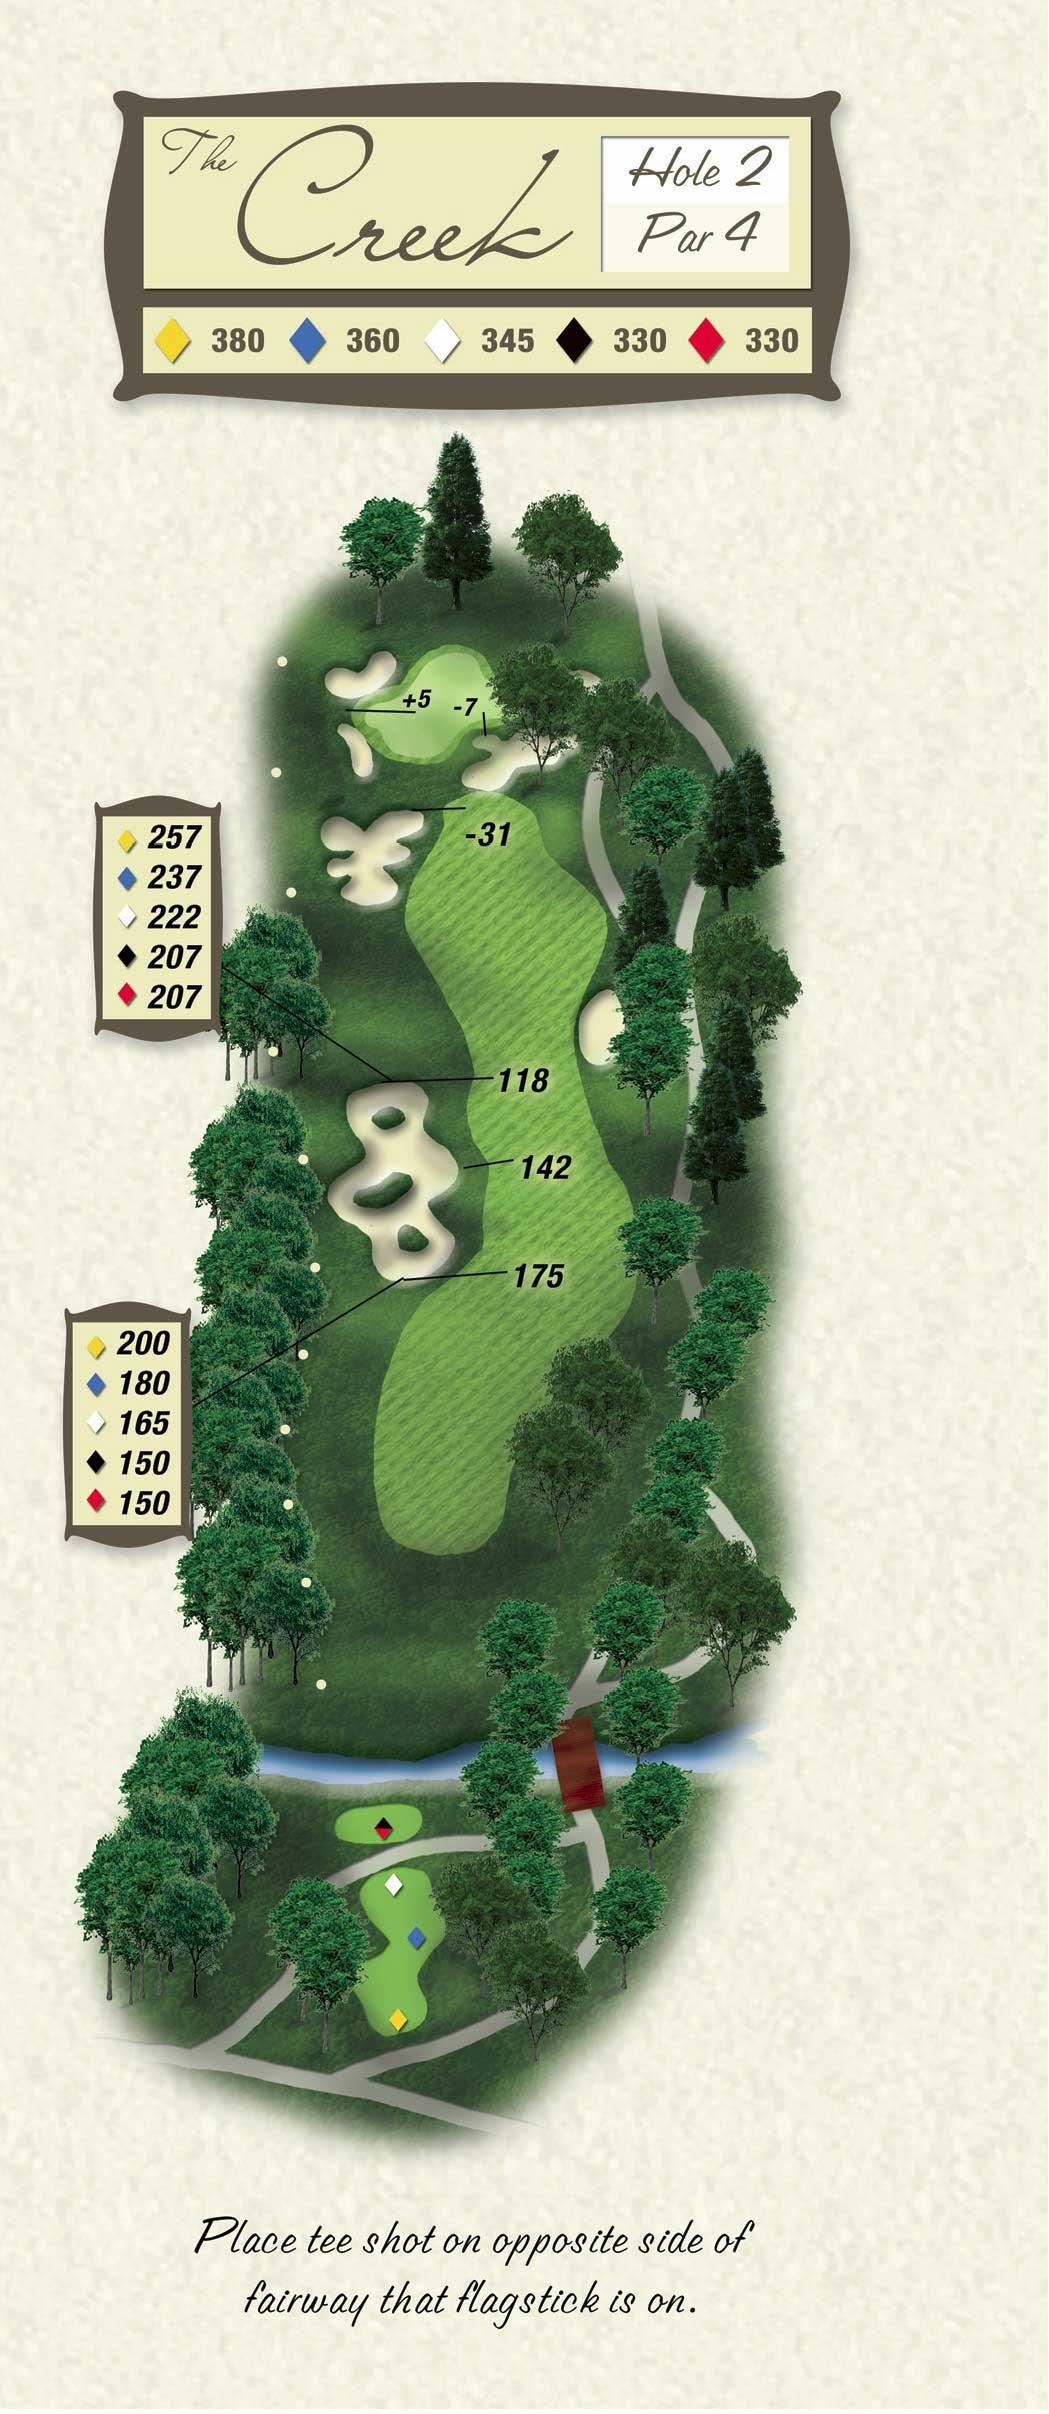
Hole # 2
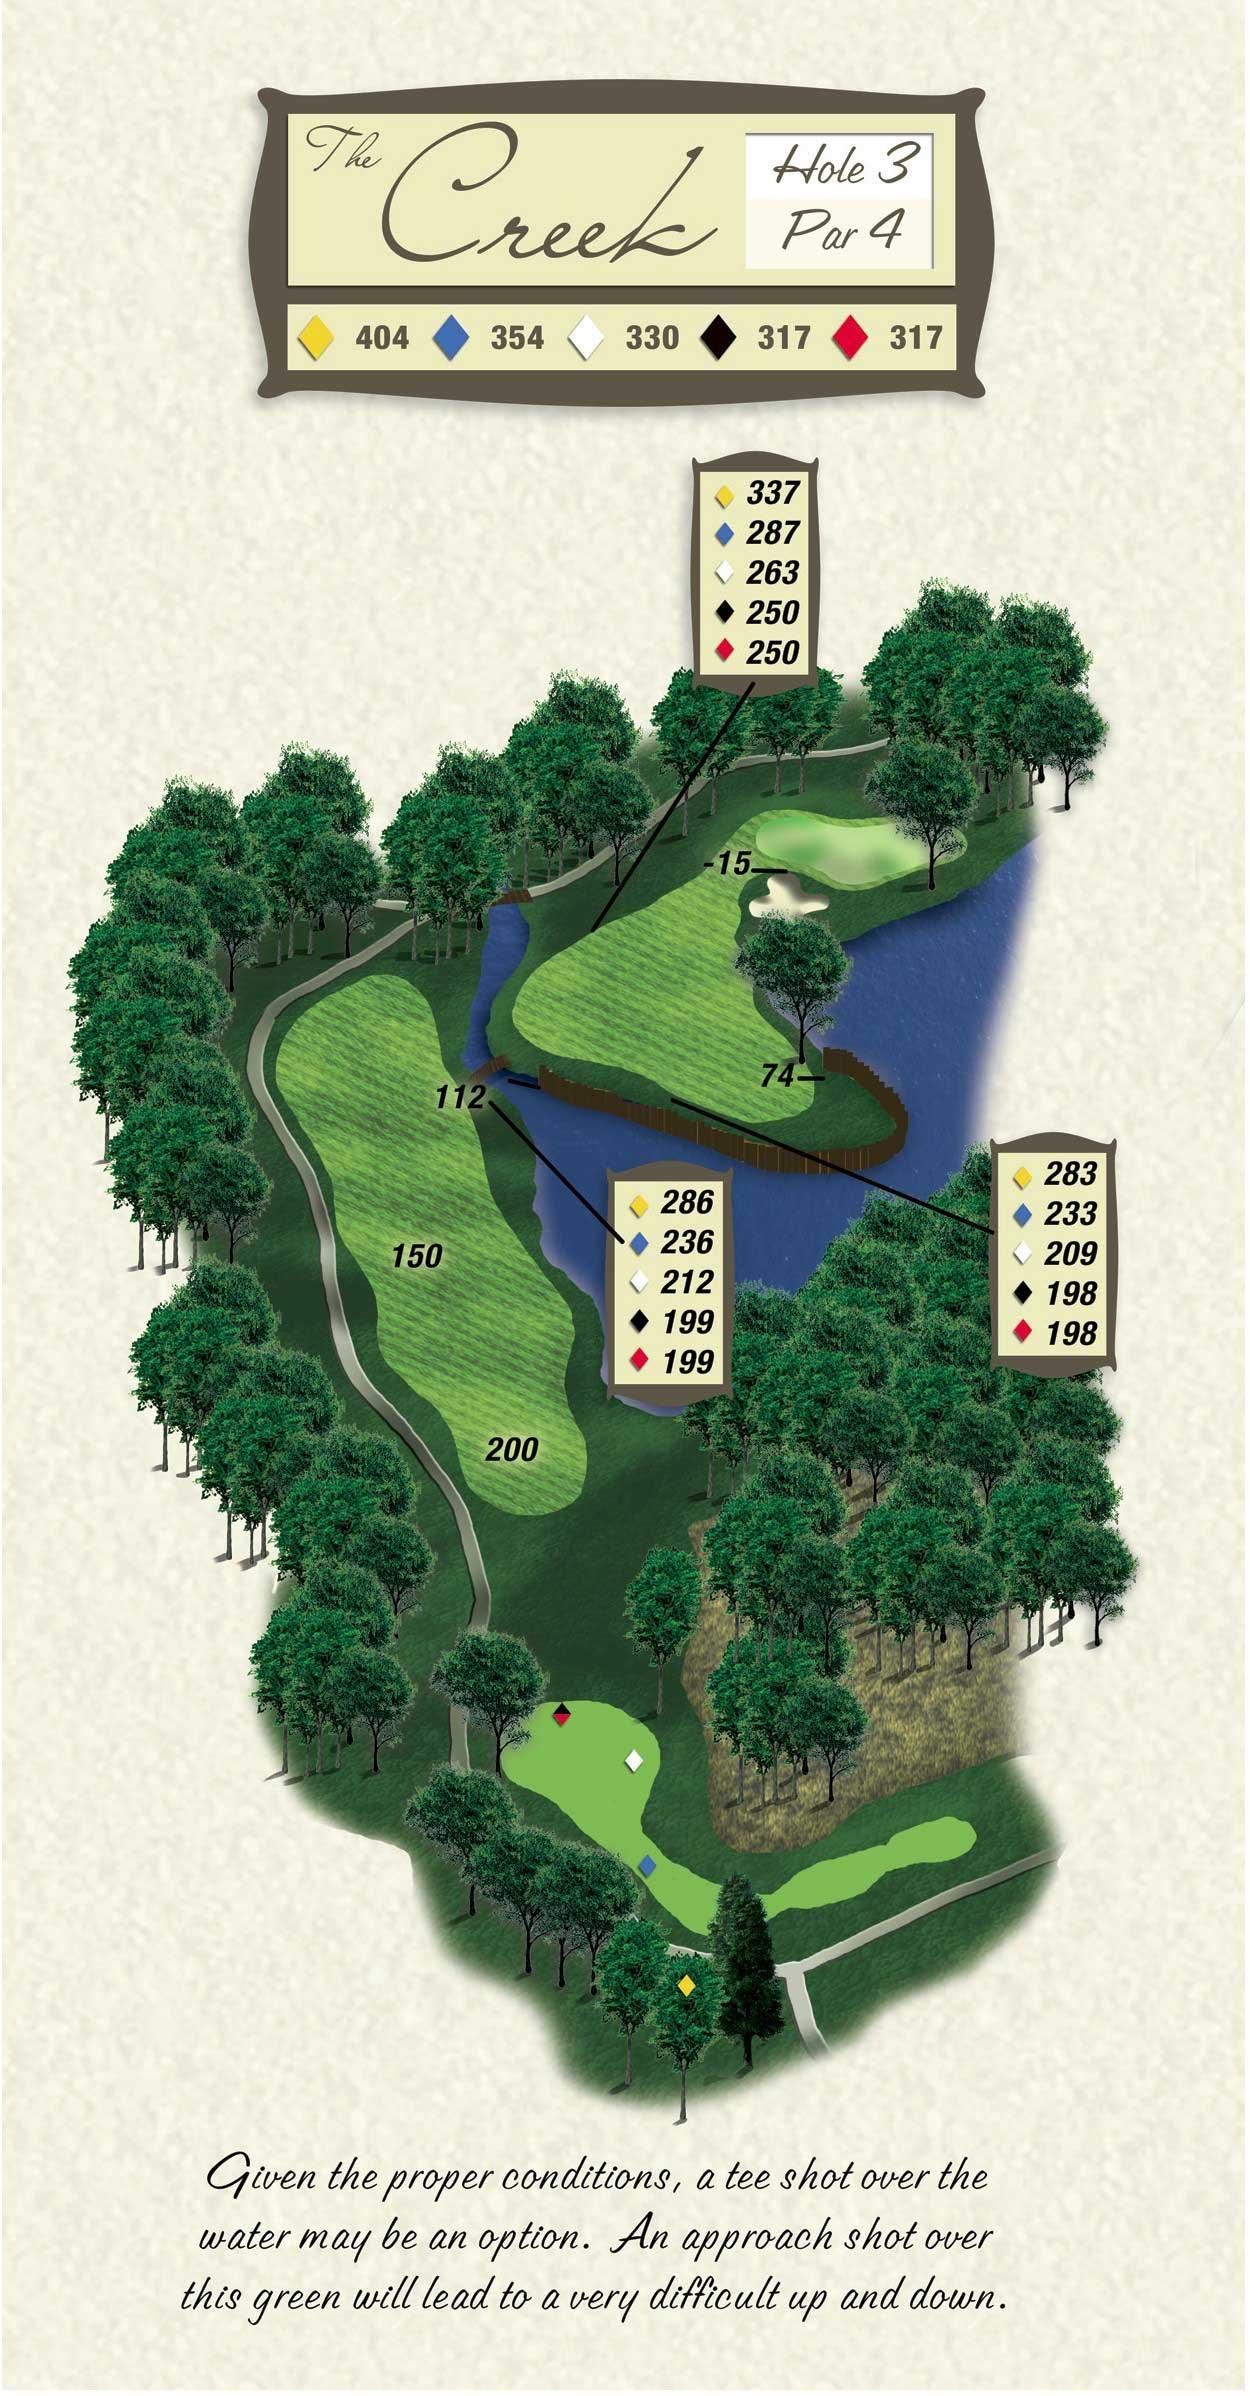
Hole # 3
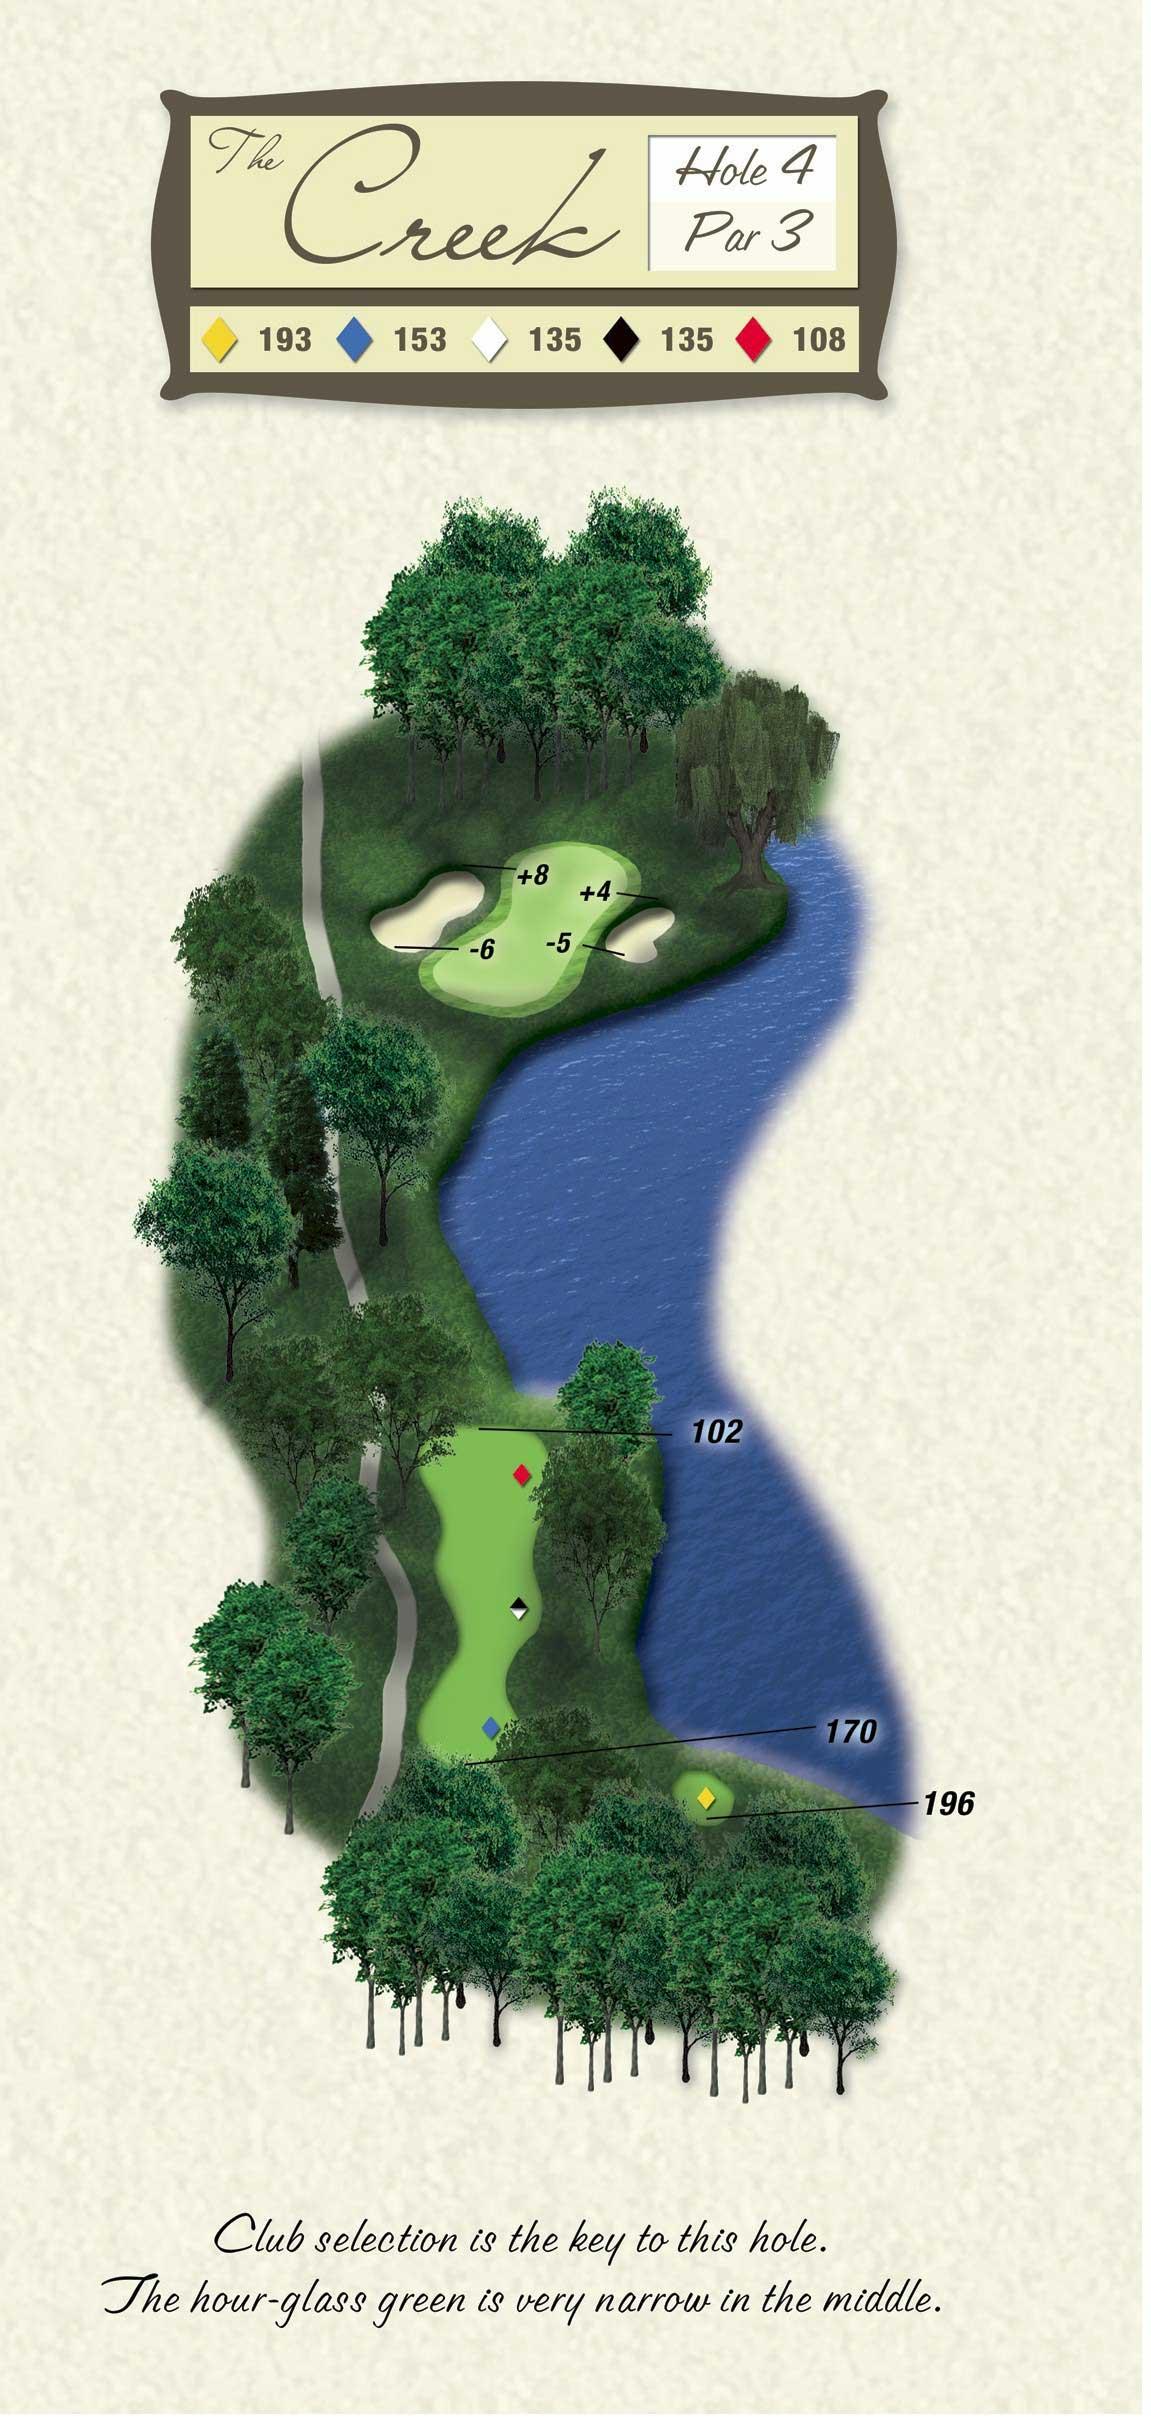
Hole # 4
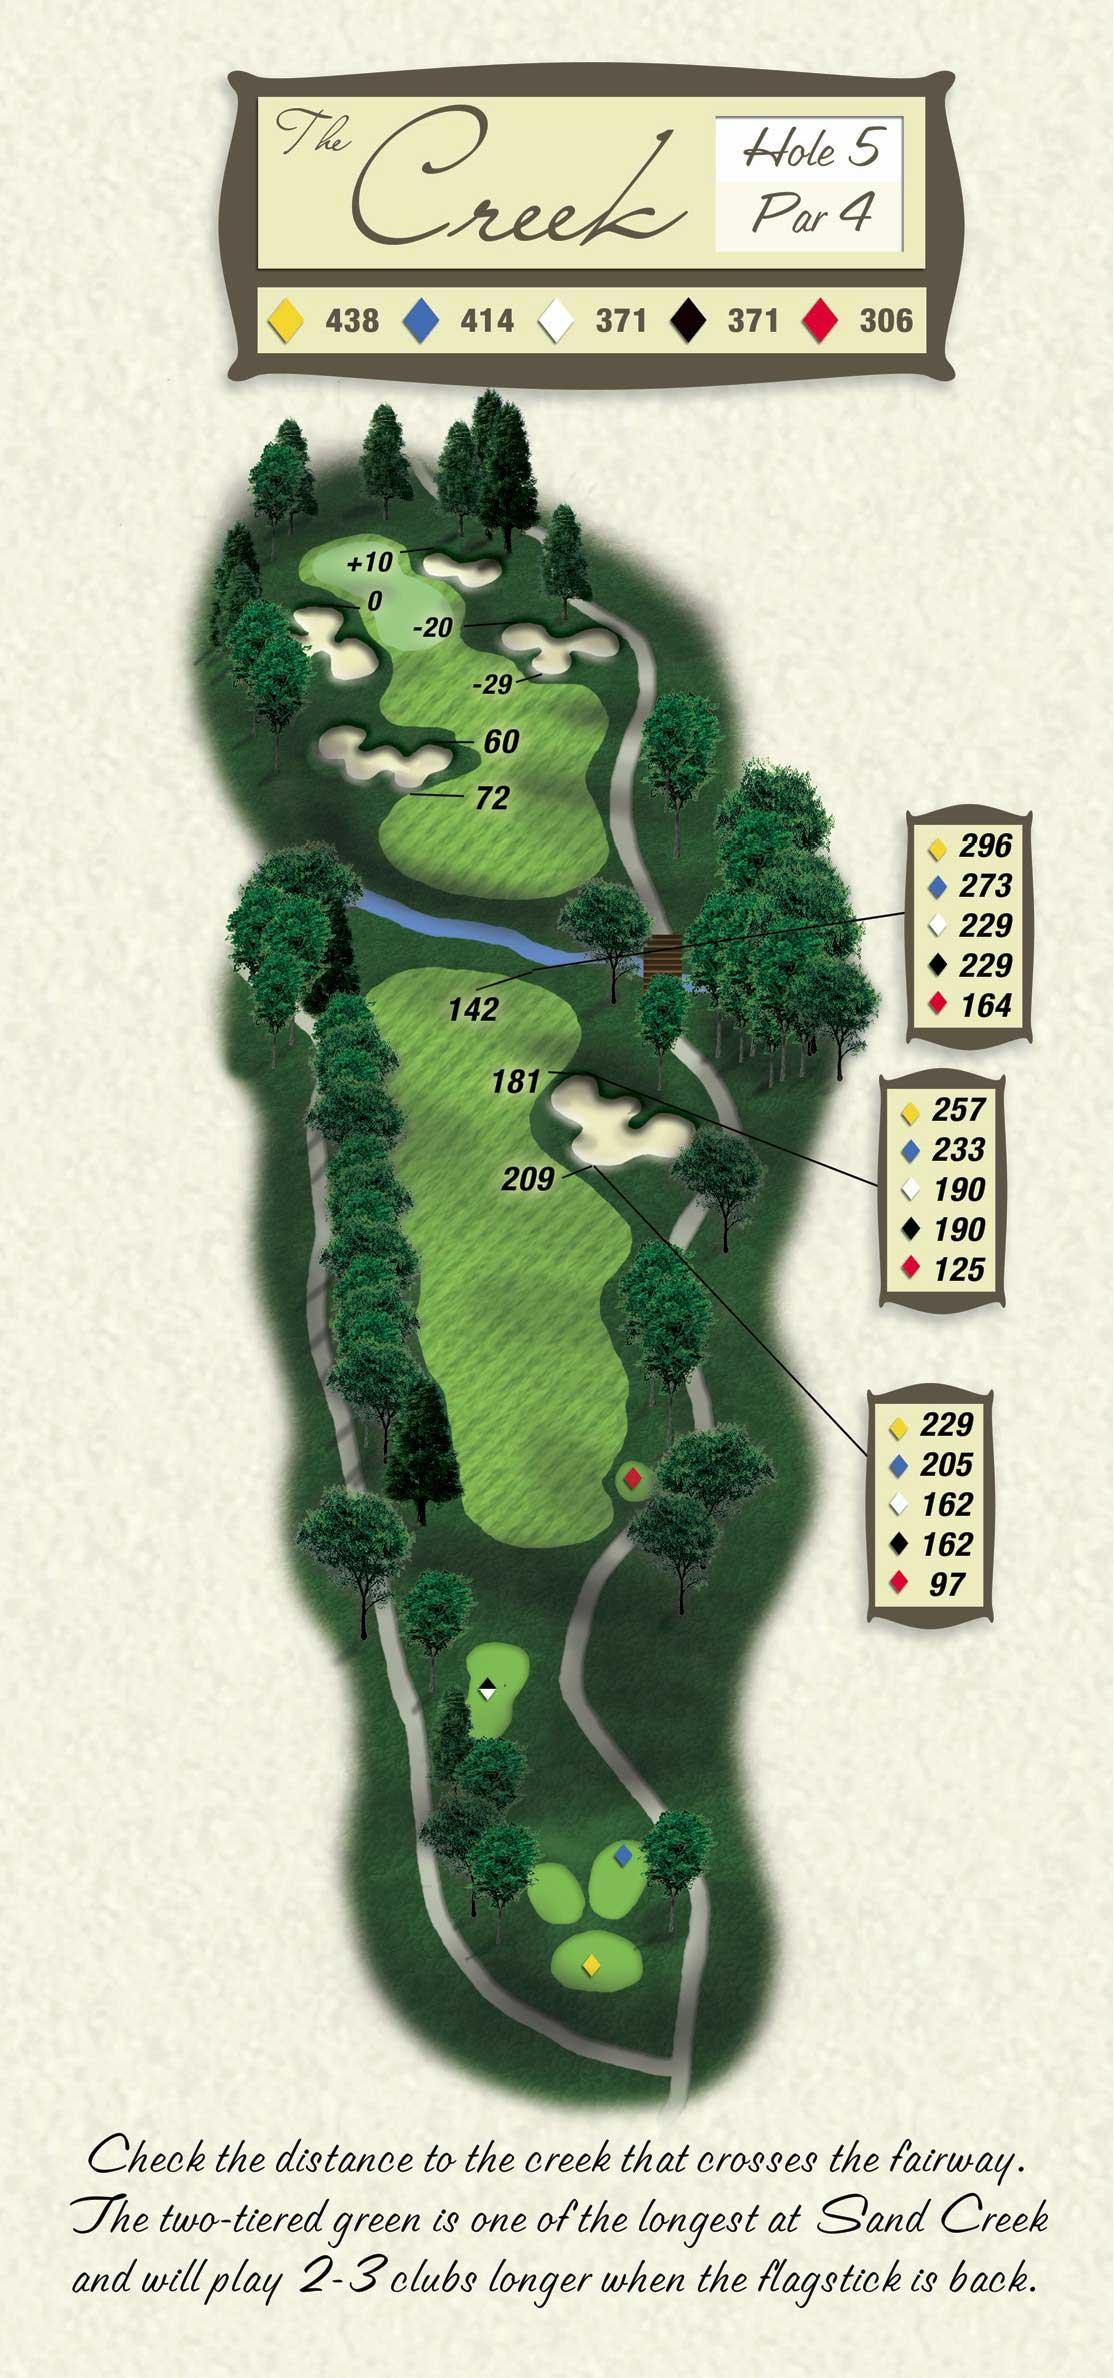
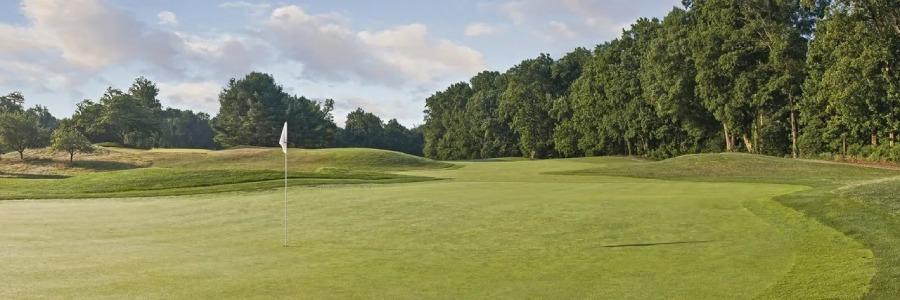
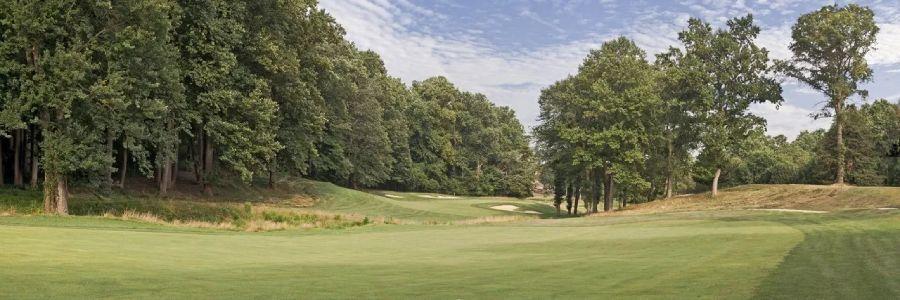
Hole # 5
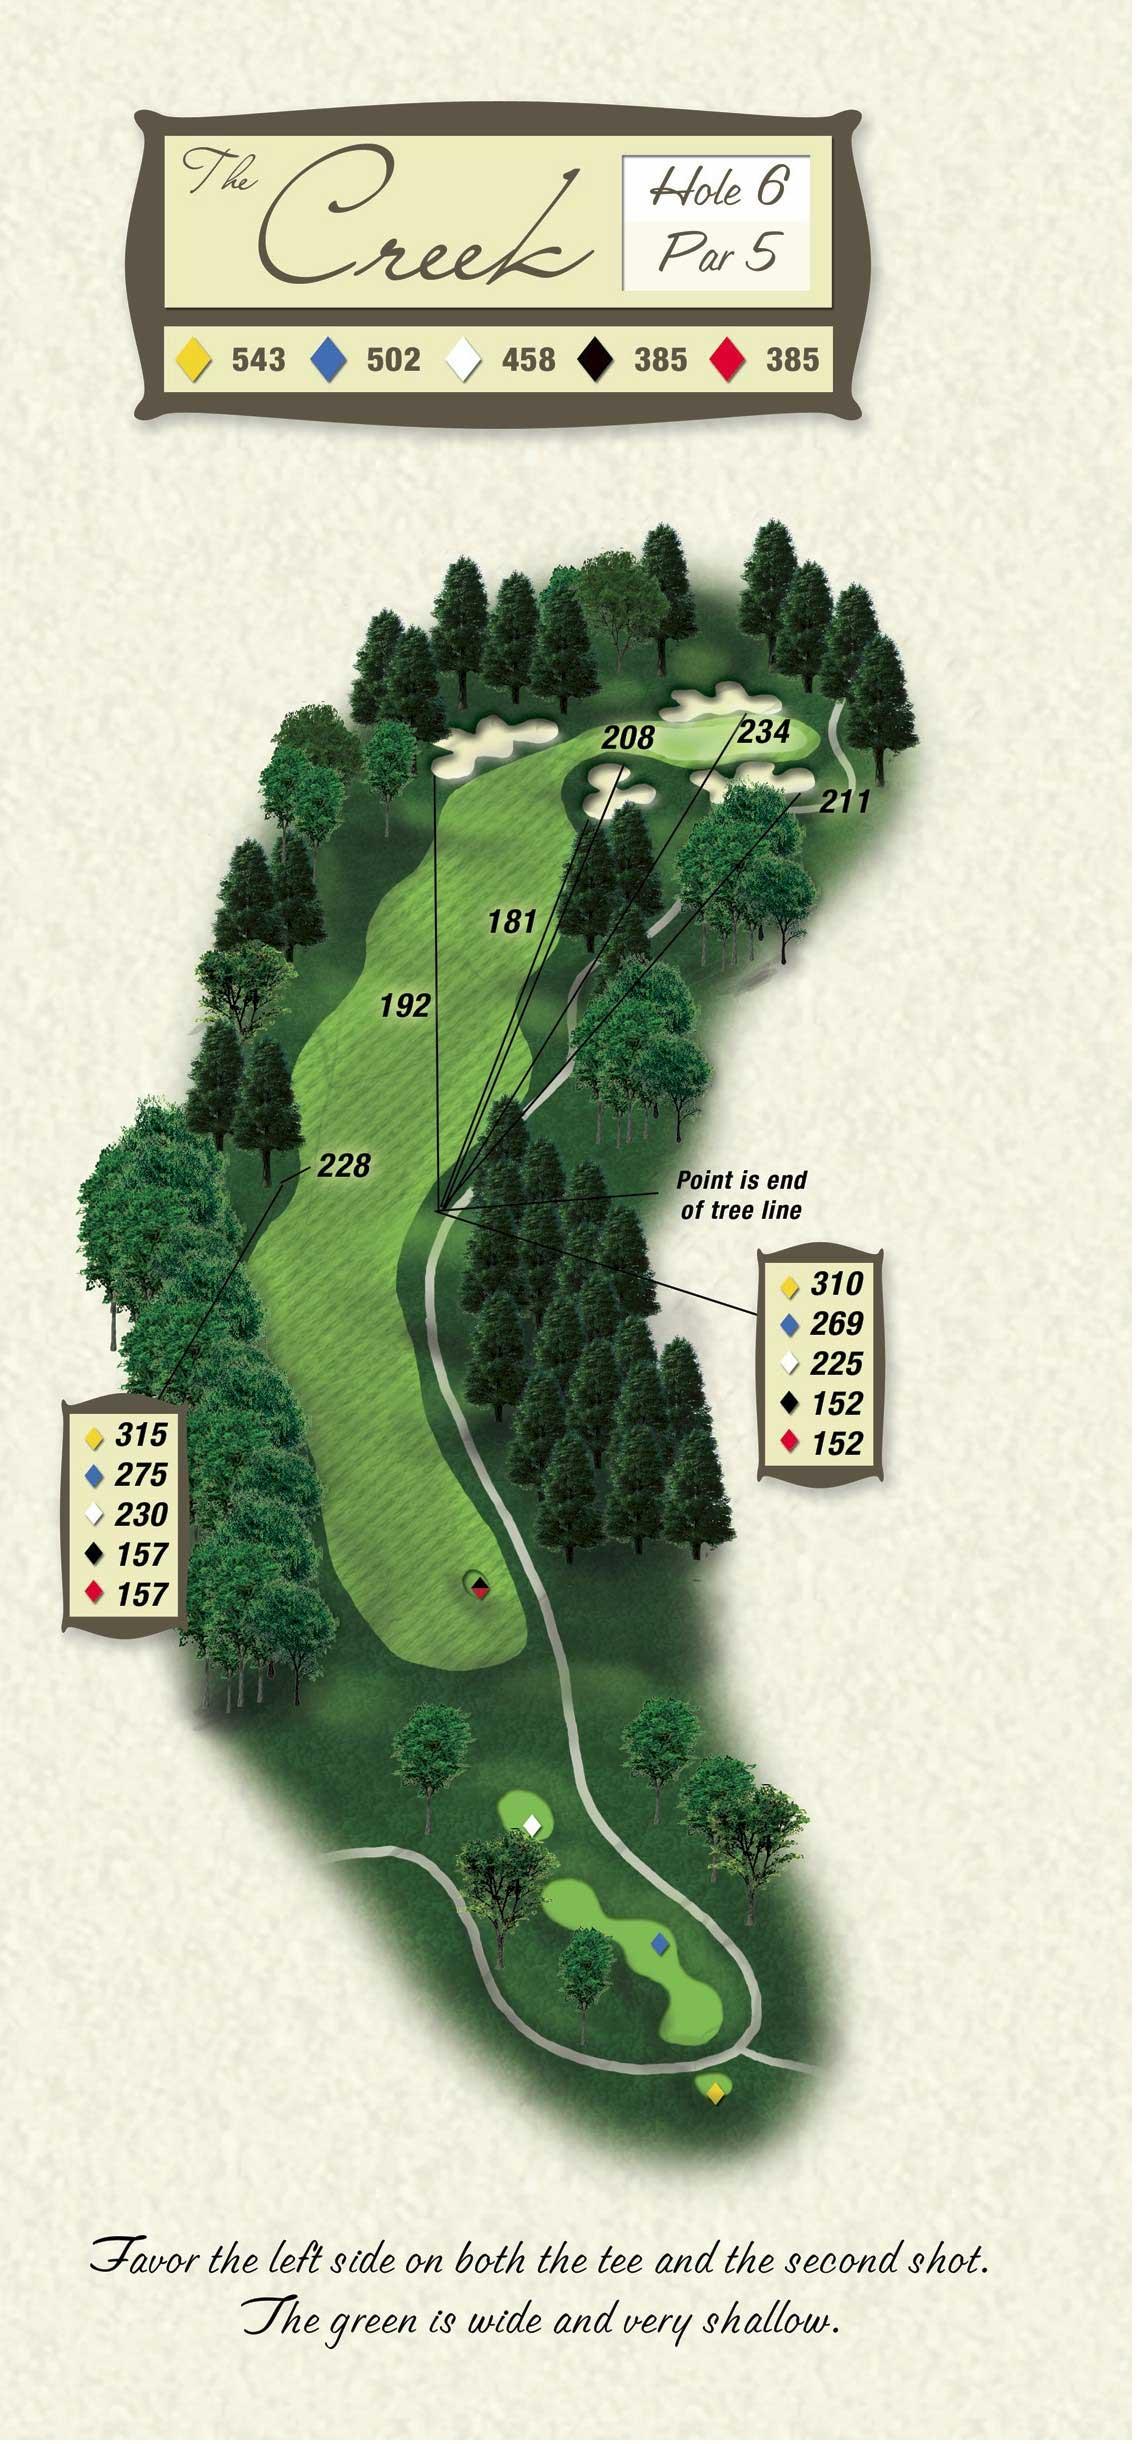
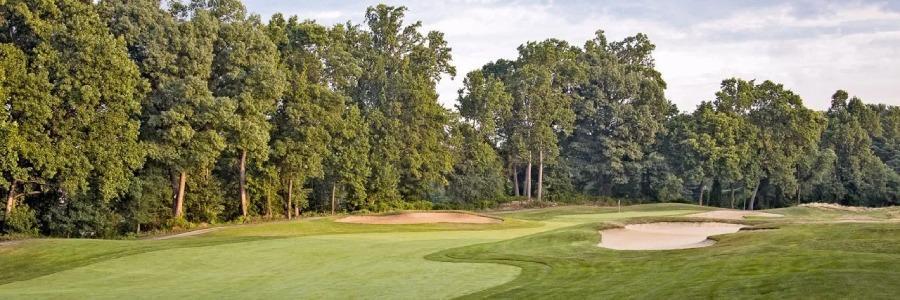
Hole # 6
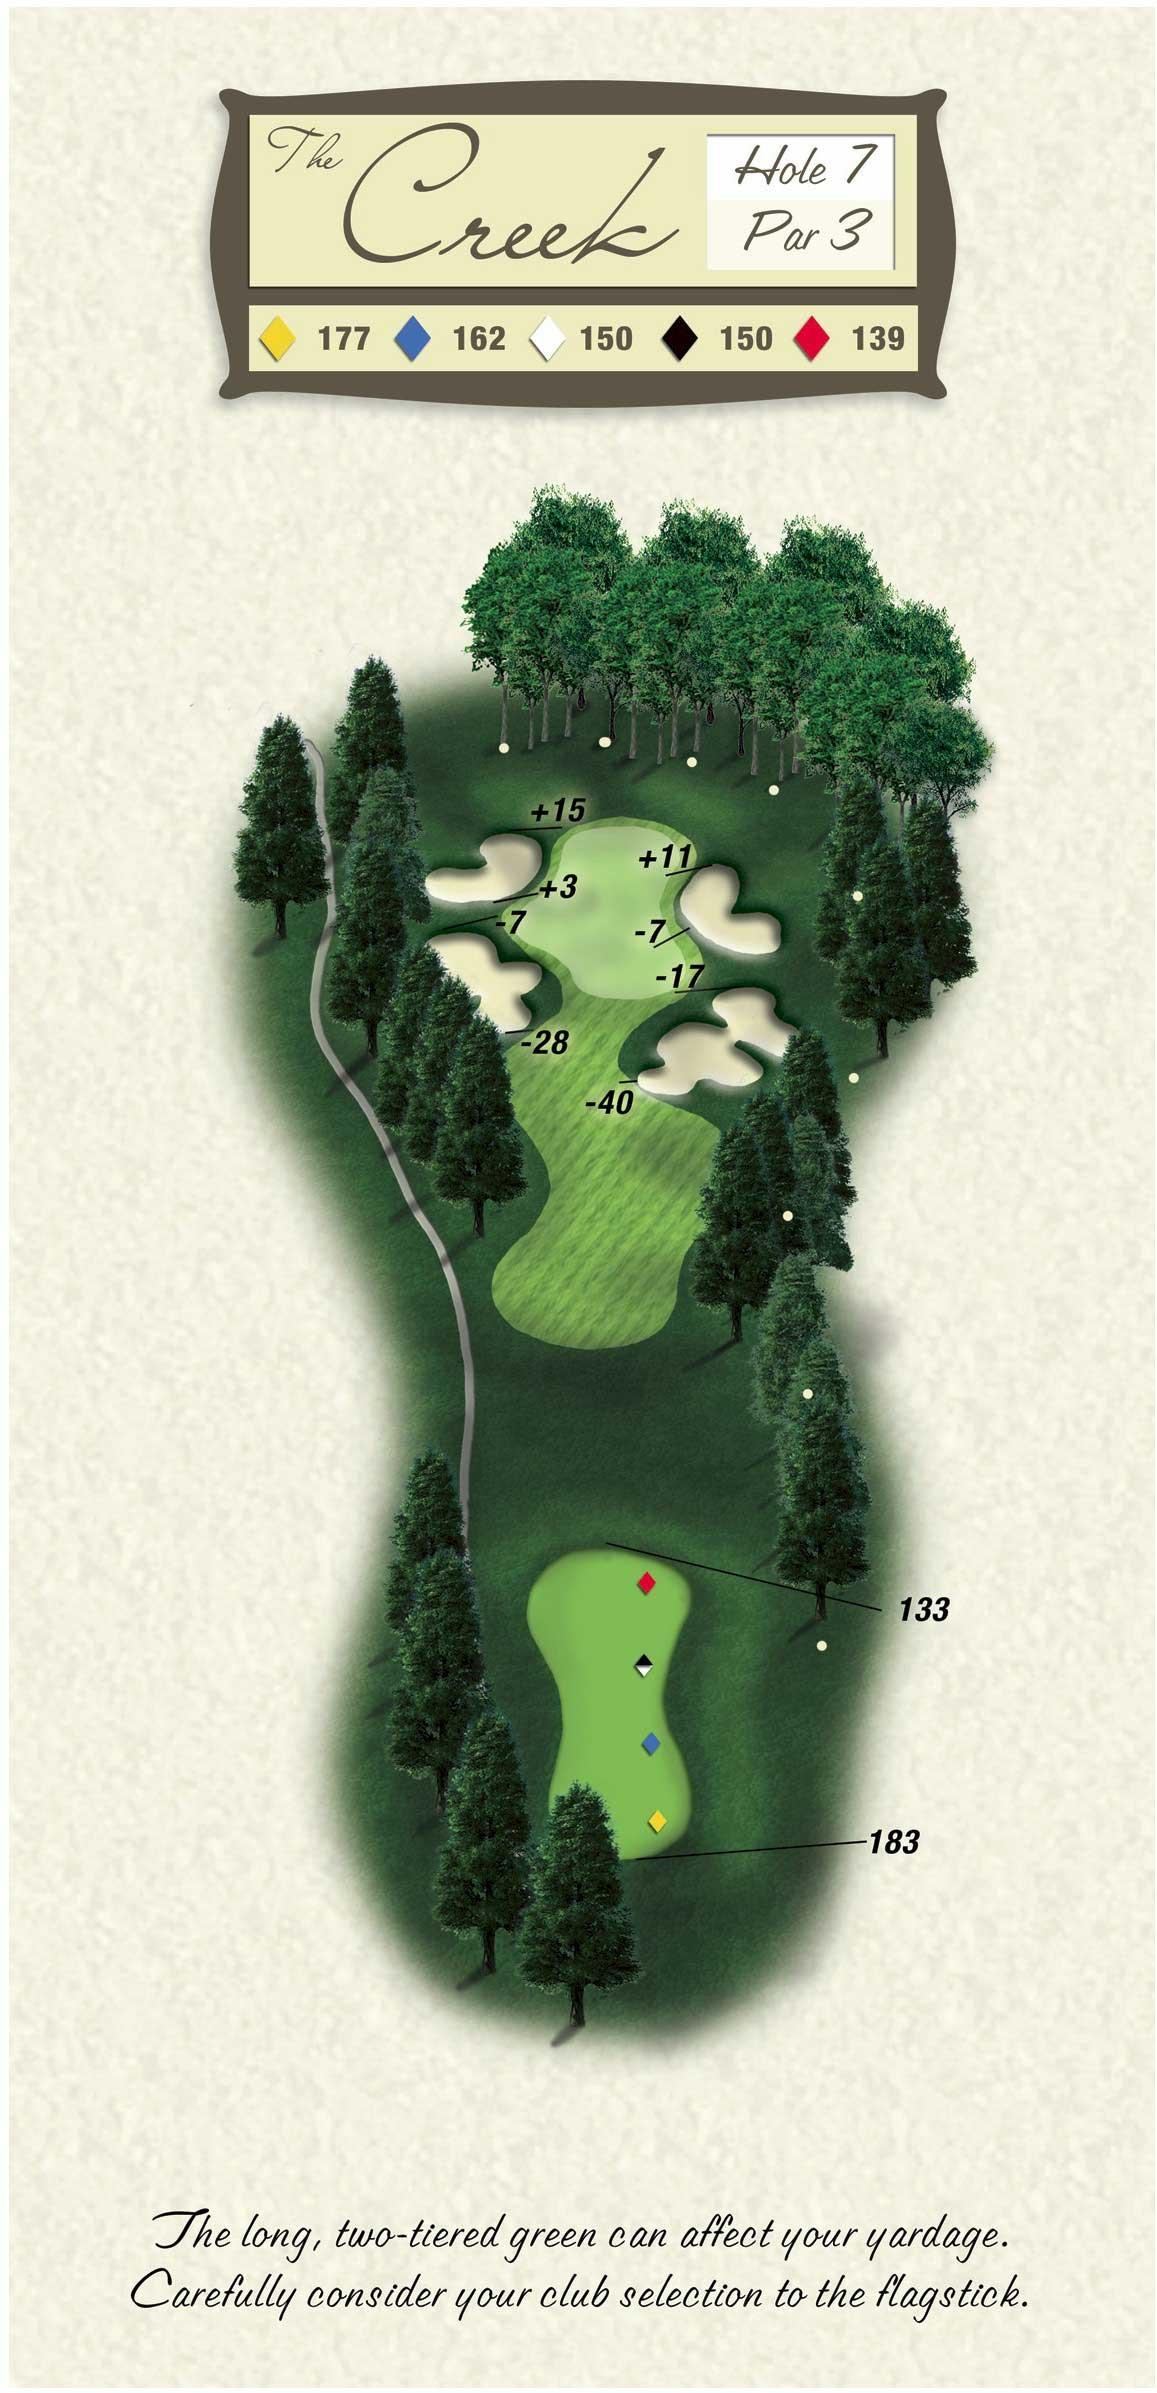
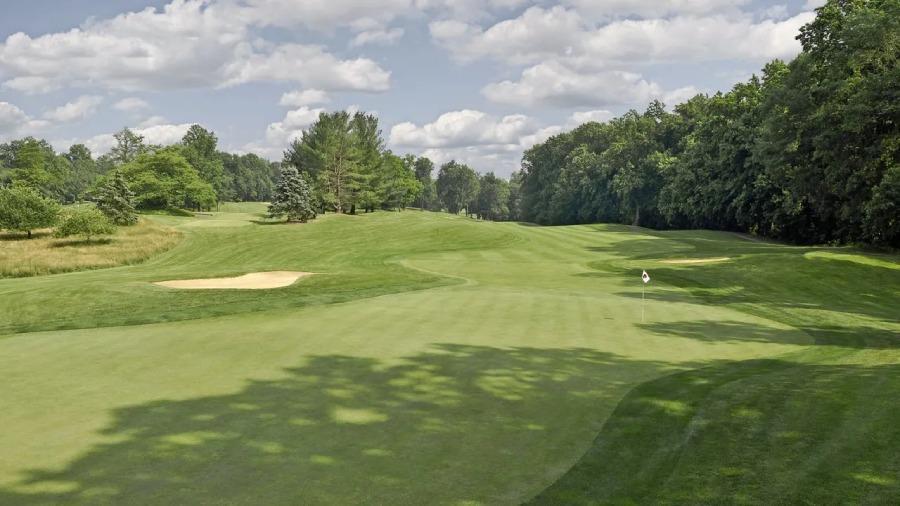
Hole # 7
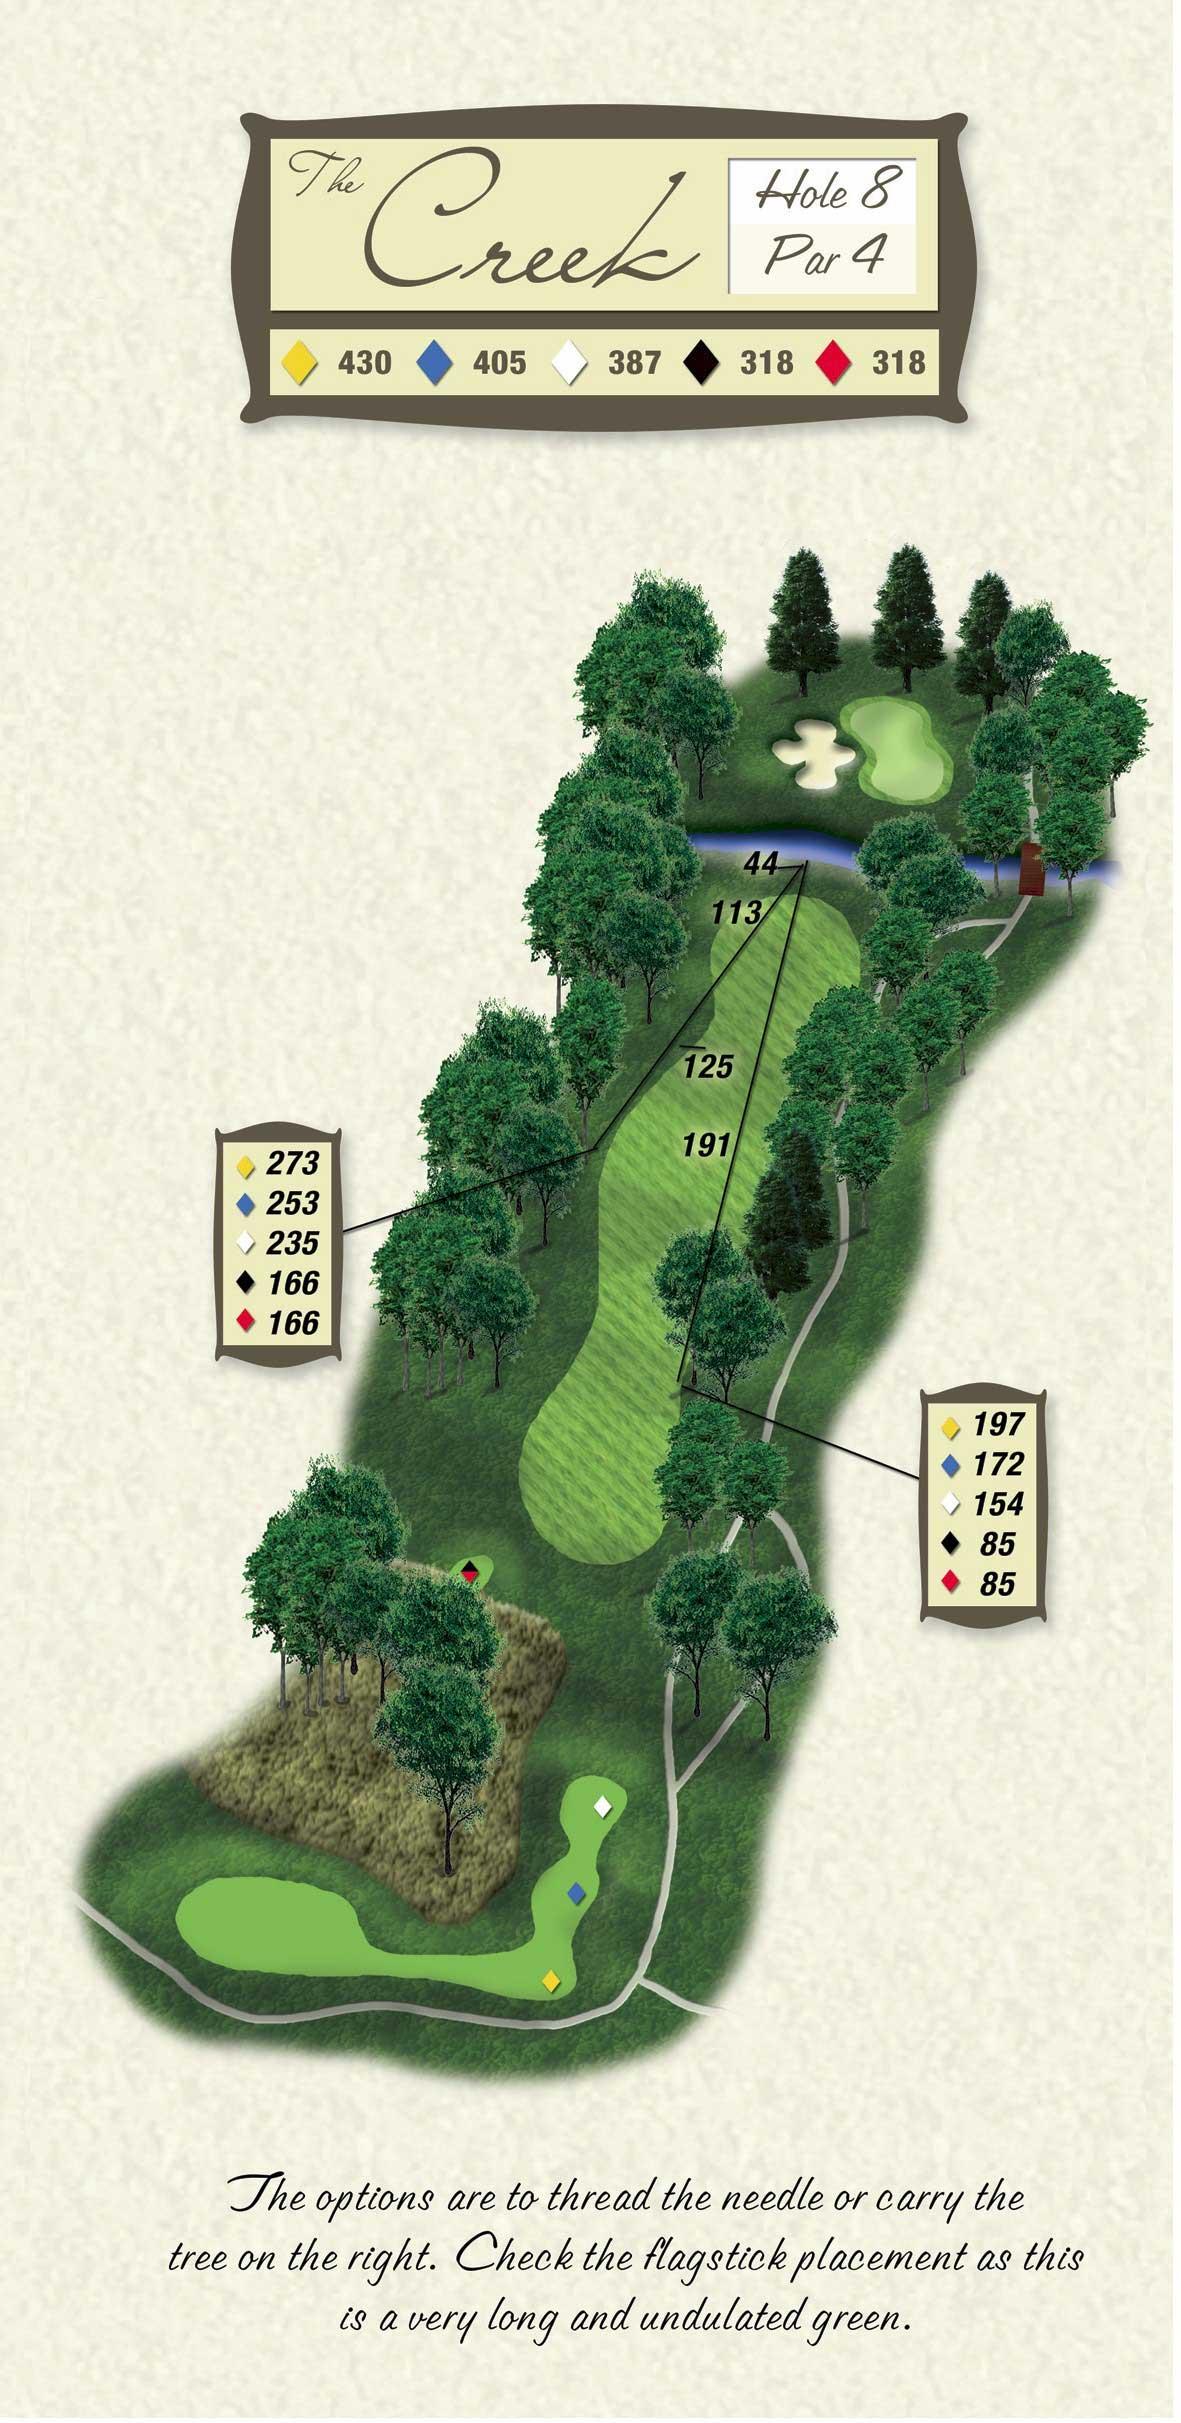
Hole # 8
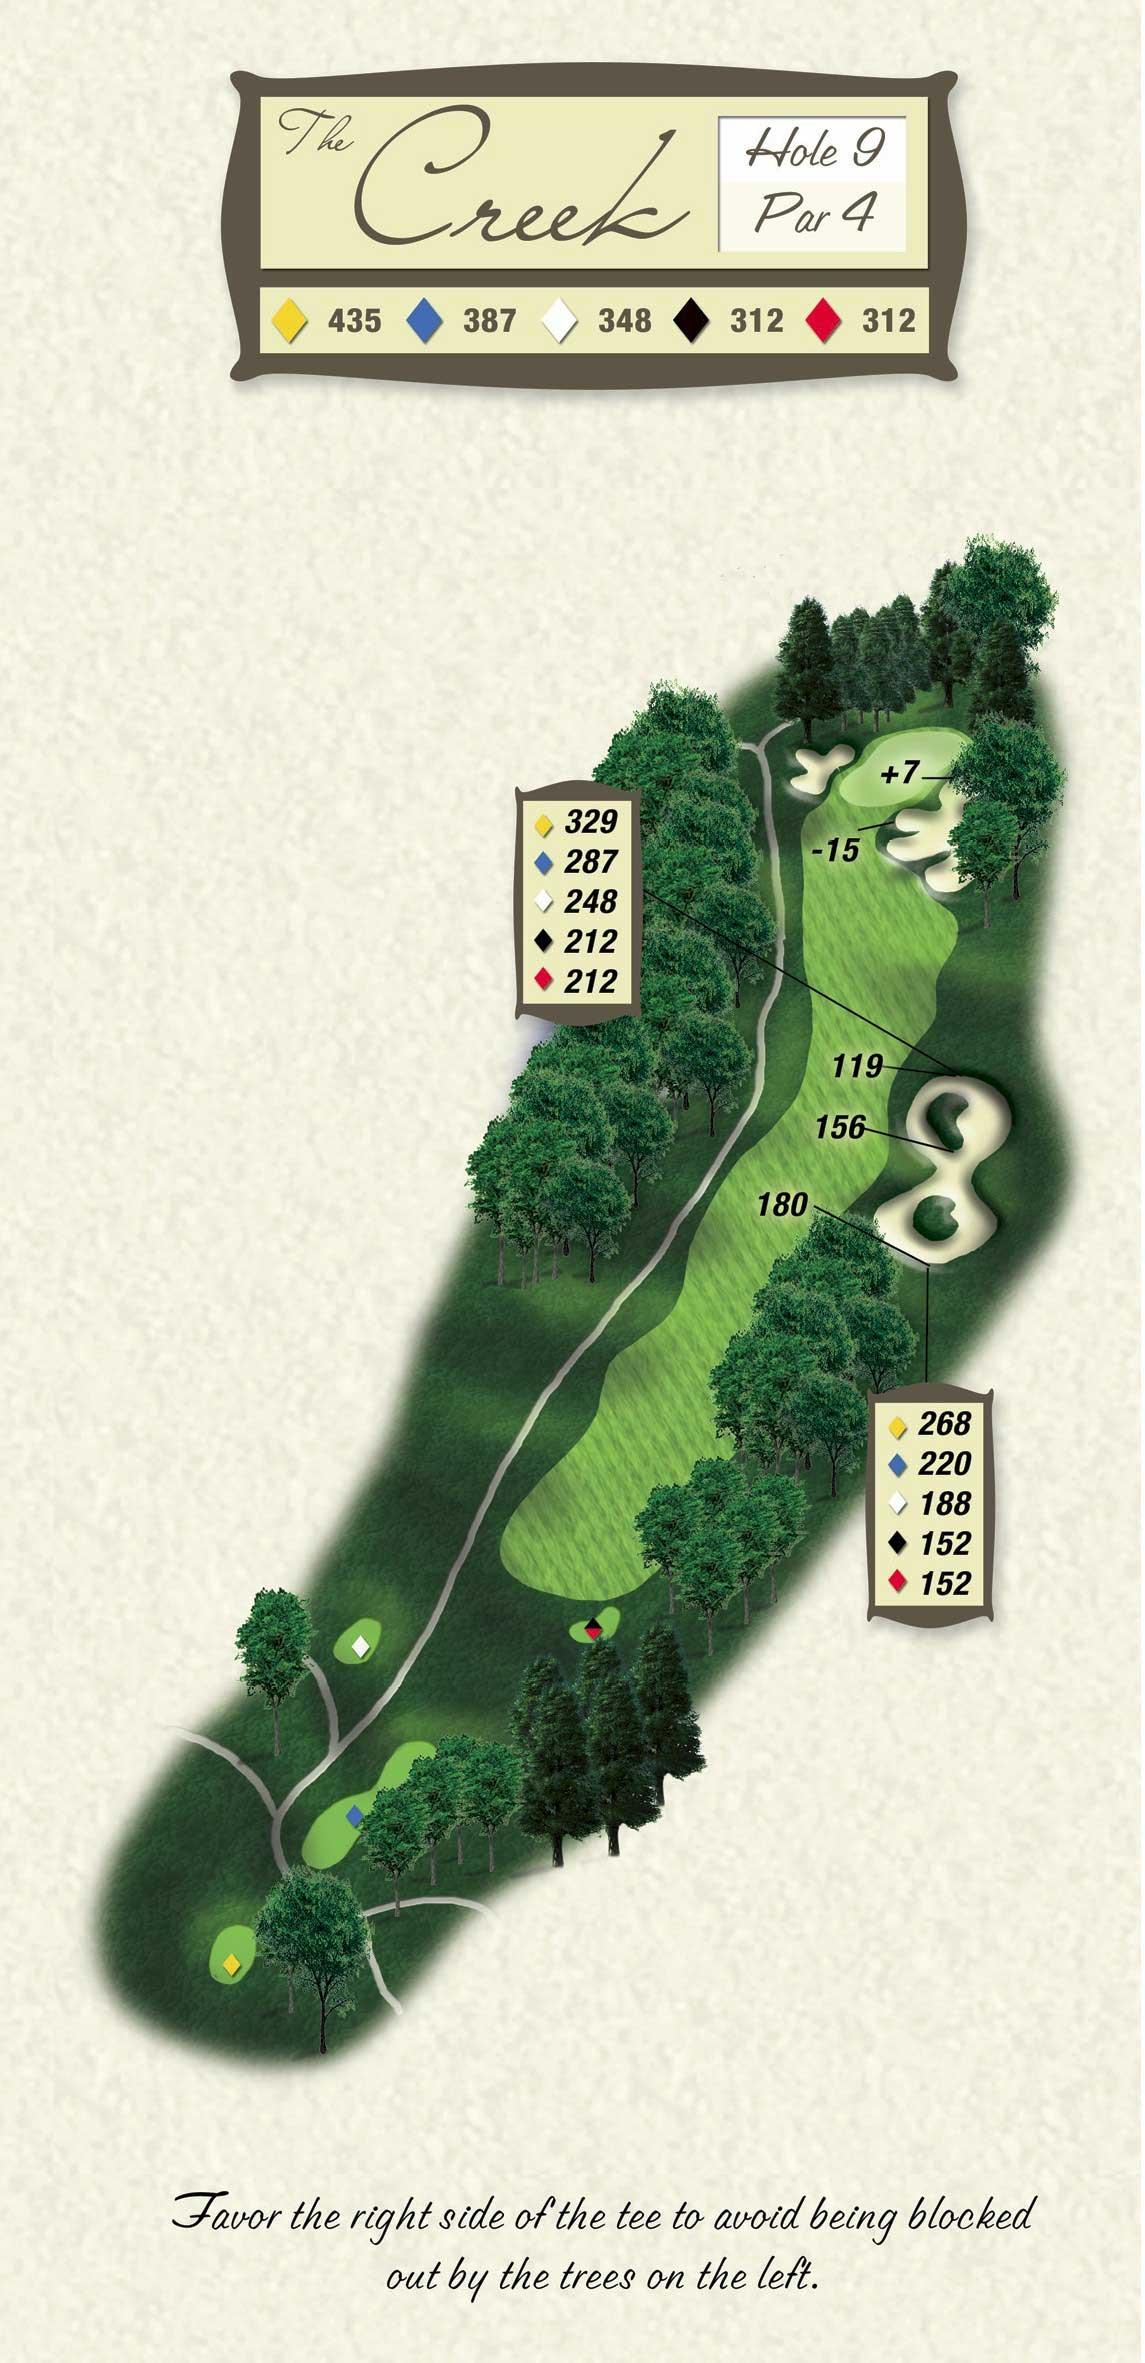
Hole # 9
Hole # 1
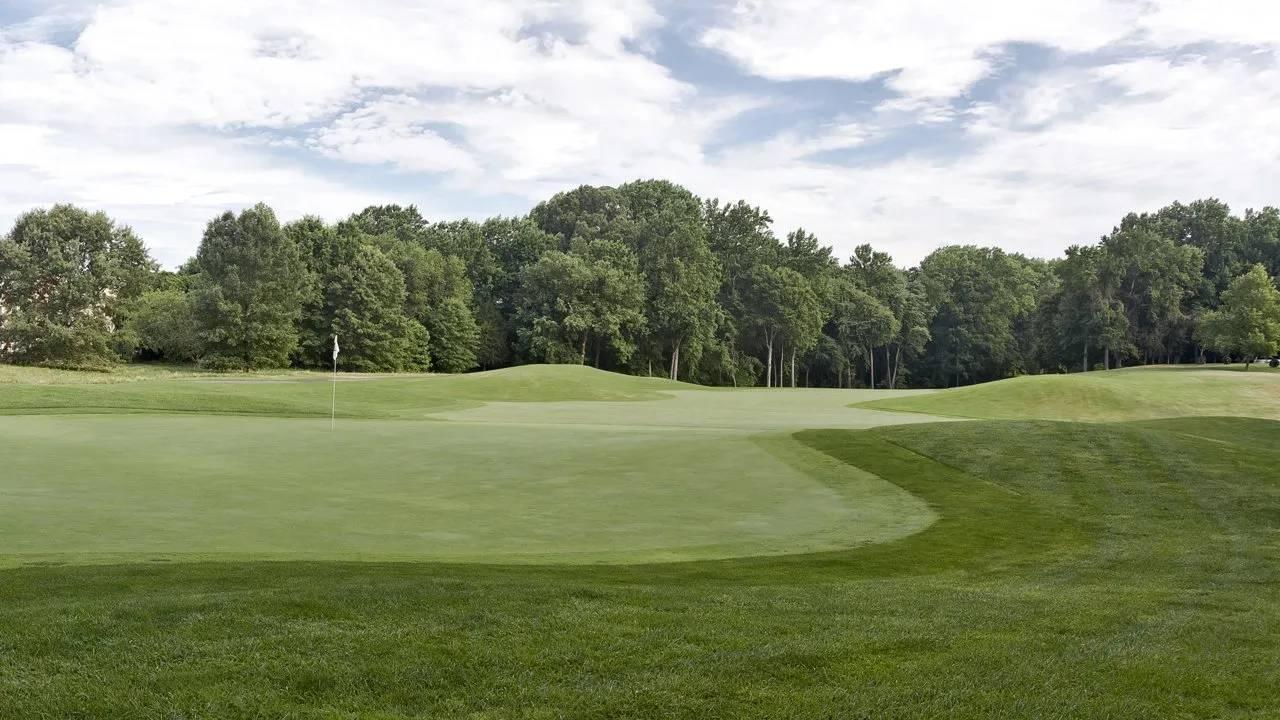
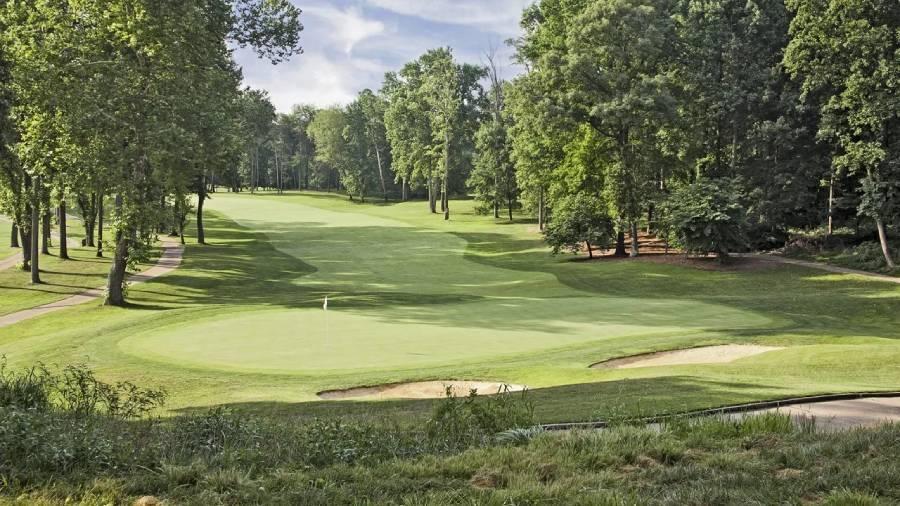
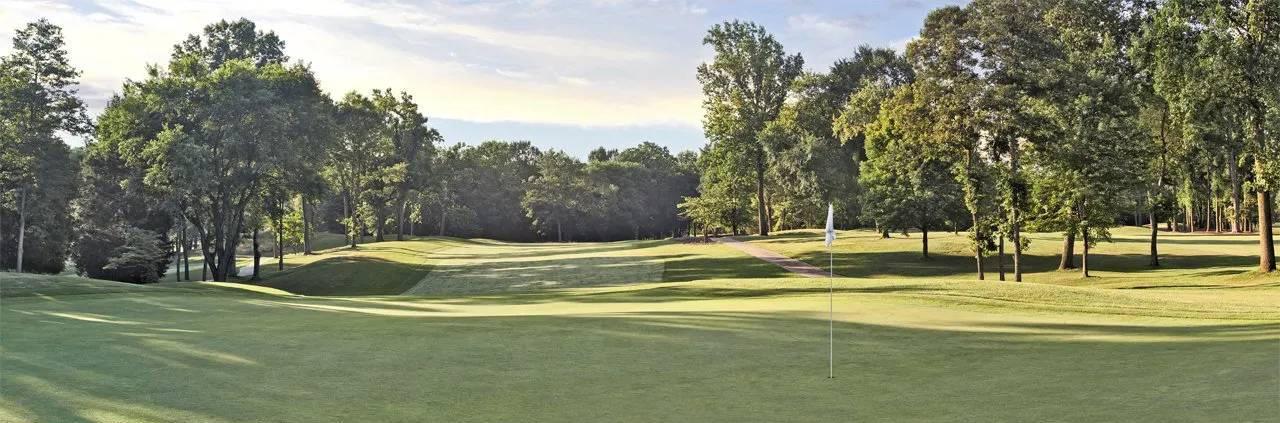
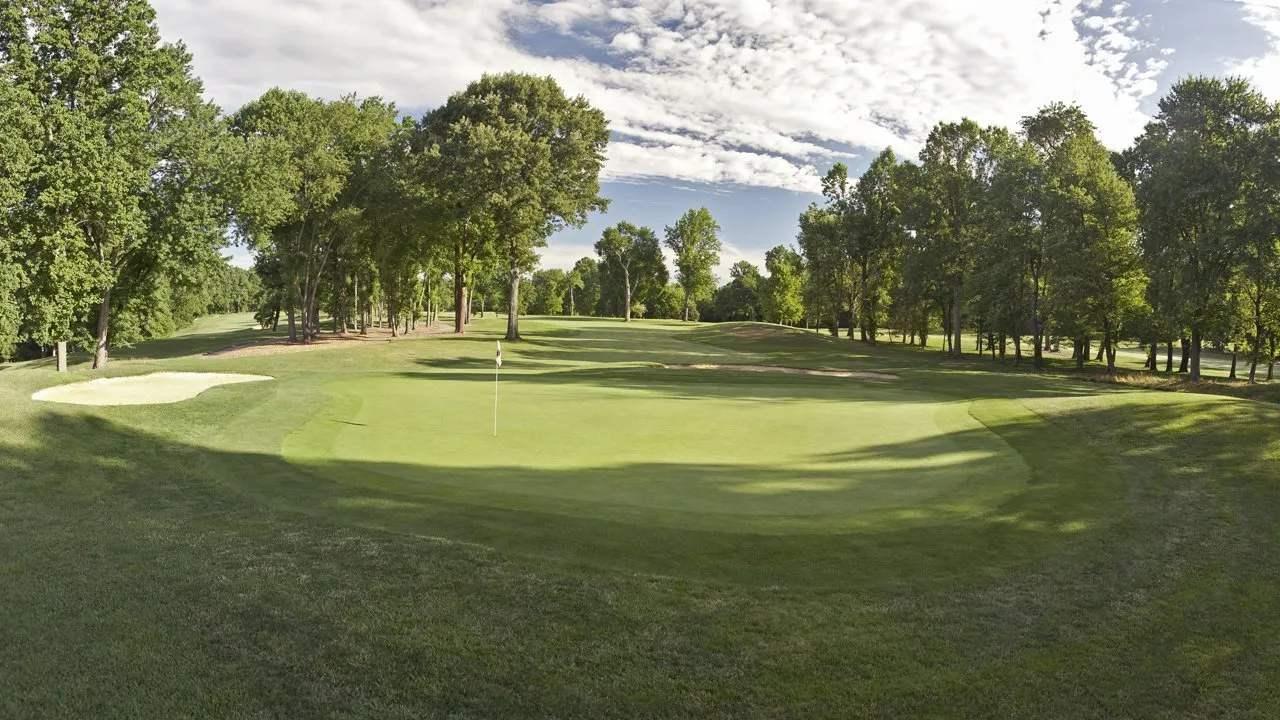
The 1st hole provides a gentle start to the front nine, requiring a fairly simple tee shot down the right-center of the fairway. Players should beware of the stand of trees on the left, which will block out a wayward tee shot from a clear shot to the green. The putting surface is protected by bunkers that require the second shot to be properly placed on this two-tiered green, which can provide a tough first putt to start the round.
| Yardage | ||||
|---|---|---|---|---|
|
Championship 414 |
Maroon 392 |
White 377 |
Black 297 |
Women's - Black 294 |
|
Handicap (M/L) 10/11 Par (M/L) 4/4 |
||||
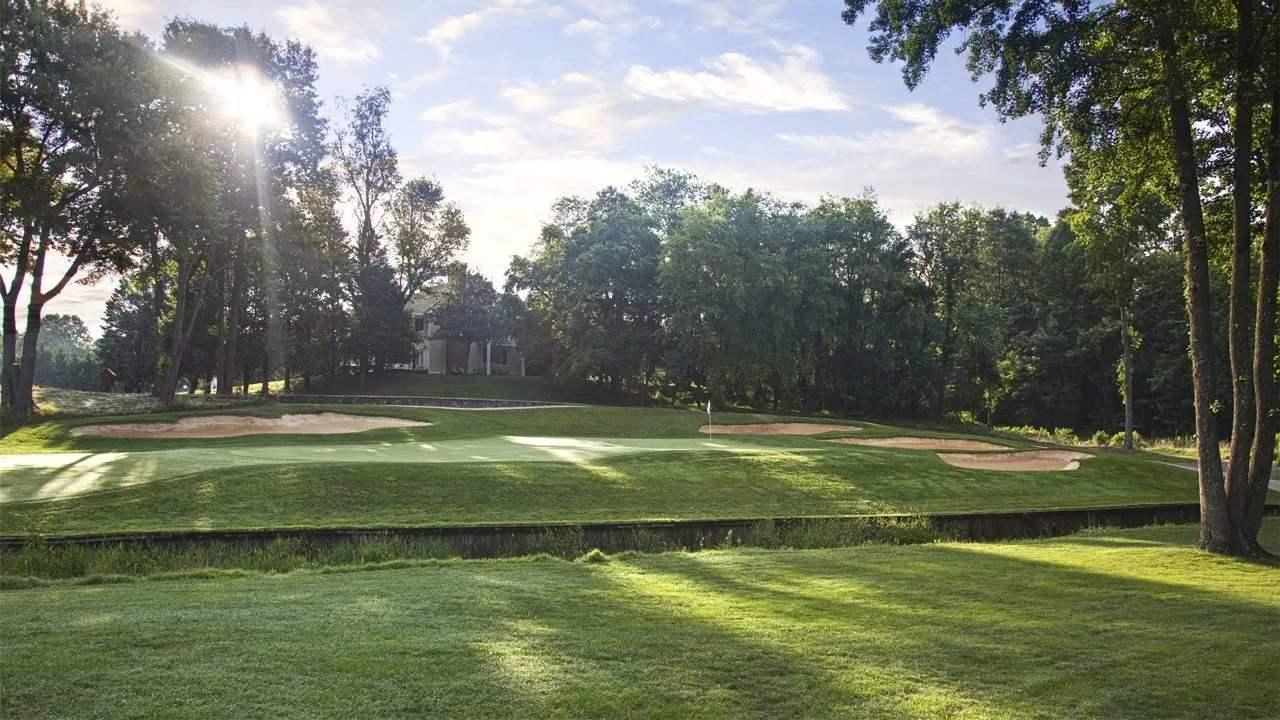
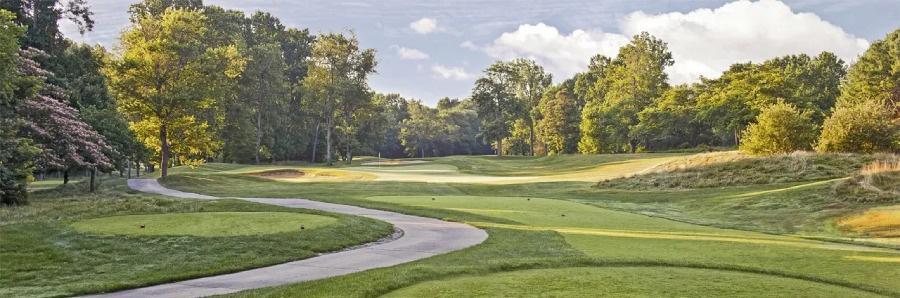
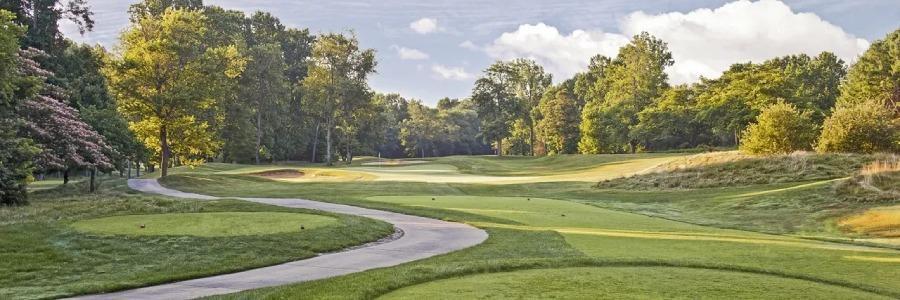
Hole # 2
The front nine has numerous holes that visually beg for a particular shot shape off the tee, and the 2nd hole is no exception. A distinct right-to-left ball flight is the shot of choice with the upper-right portion of the fairway providing the best possible landing area and angle for the second shot to the green. A shot that turns too much left will create a difficult angle to the green, and could be blocked out by the trees on the left side. The green has two levels that require an accurate shot to avoid the bunkers on the right and left, and to give the player the best chance for birdie on this undulating green.
| Yardage | ||||
|---|---|---|---|---|
|
Championship 405 |
Maroon 370 |
White 353 |
Black 337 |
Women's - Black 327 |
|
Handicap (M/L) 14/15 Par (M/L) 4/4 |
||||
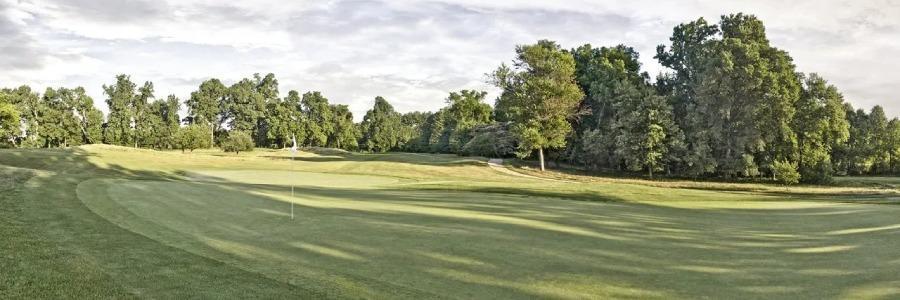
Hole # 3
The 3rd hole continues the requirement for an accurate, well-shaped tee shot, as it bends to the right around a large tree that looms over the fairway. The left side of the fairway sets up a clear angle to the green, but beware; a small pond in front of the green will gather any ball that is too short or too bold. Pick your target wisely, and use the right side of the green as the safe shot or suffer the consequences.
| Yardage | ||||
|---|---|---|---|---|
|
Championship 410 |
Maroon 388 |
White 348 |
Black 338 |
Women's - Black 311 |
|
Handicap (M/L) 2/9 Par (M/L) 4/4 |
||||
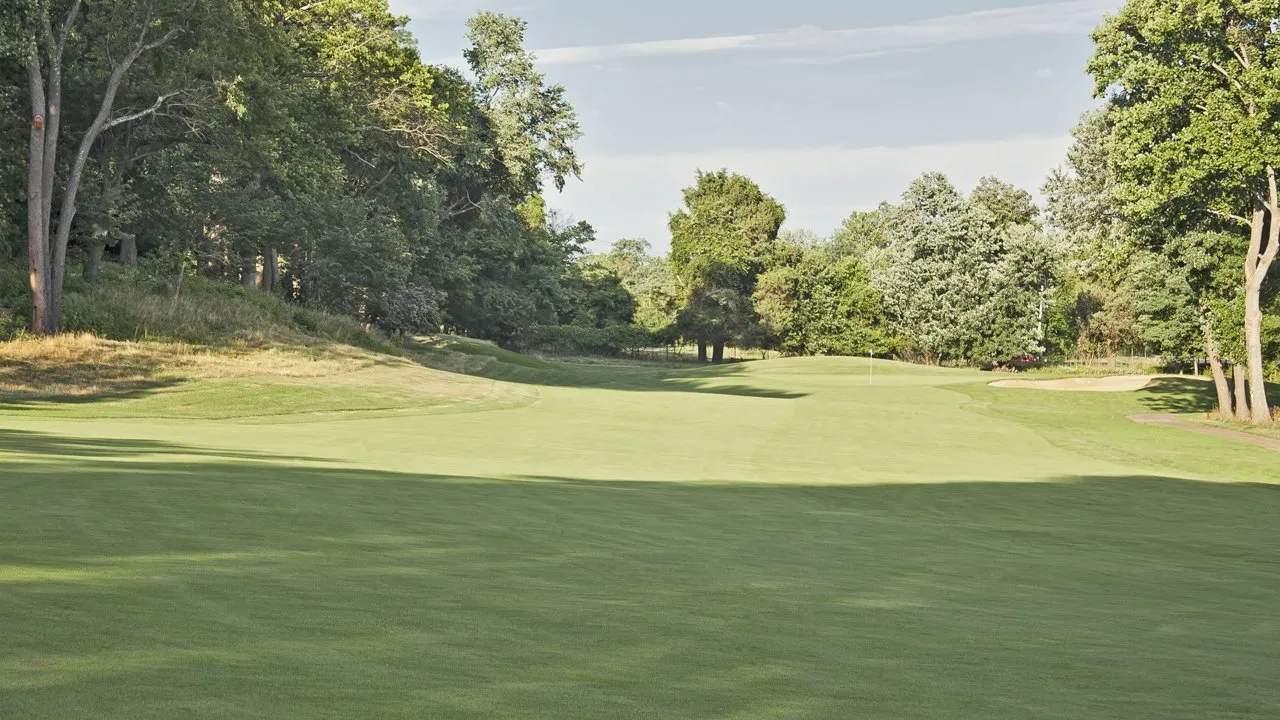
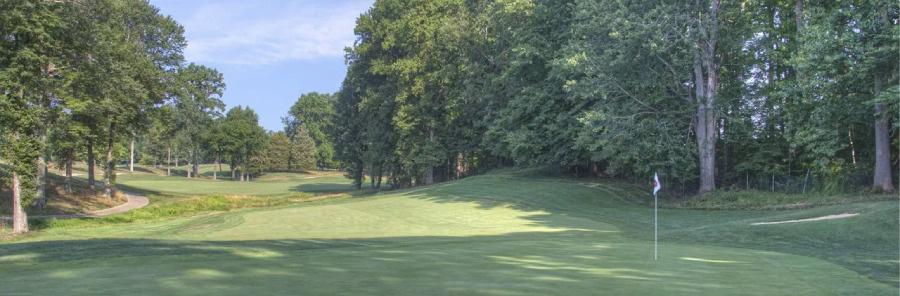
Hole # 4
After the three tough starting holes, the 4th hole provides a much needed reprieve and a birdie opportunity. A fairway wood or long iron will give the player a short or middle iron to the green. The pin position is critical in the club selection, as the hole can be cut in the front level, a low area in the middle of the green, or on the back shelf. If the pin is in the back, it can make the shot play as much as 3 clubs longer, and the slope behind the green challenges any bold shots with out-of-bounds at the road.

| Yardage | ||||
|---|---|---|---|---|
|
Championship 363 |
Maroon 342 |
White 330 |
Black 263 |
Women's - Black 258 |
|
Handicap (M/L) 18/15 Par (M/L) 4/4 |
||||
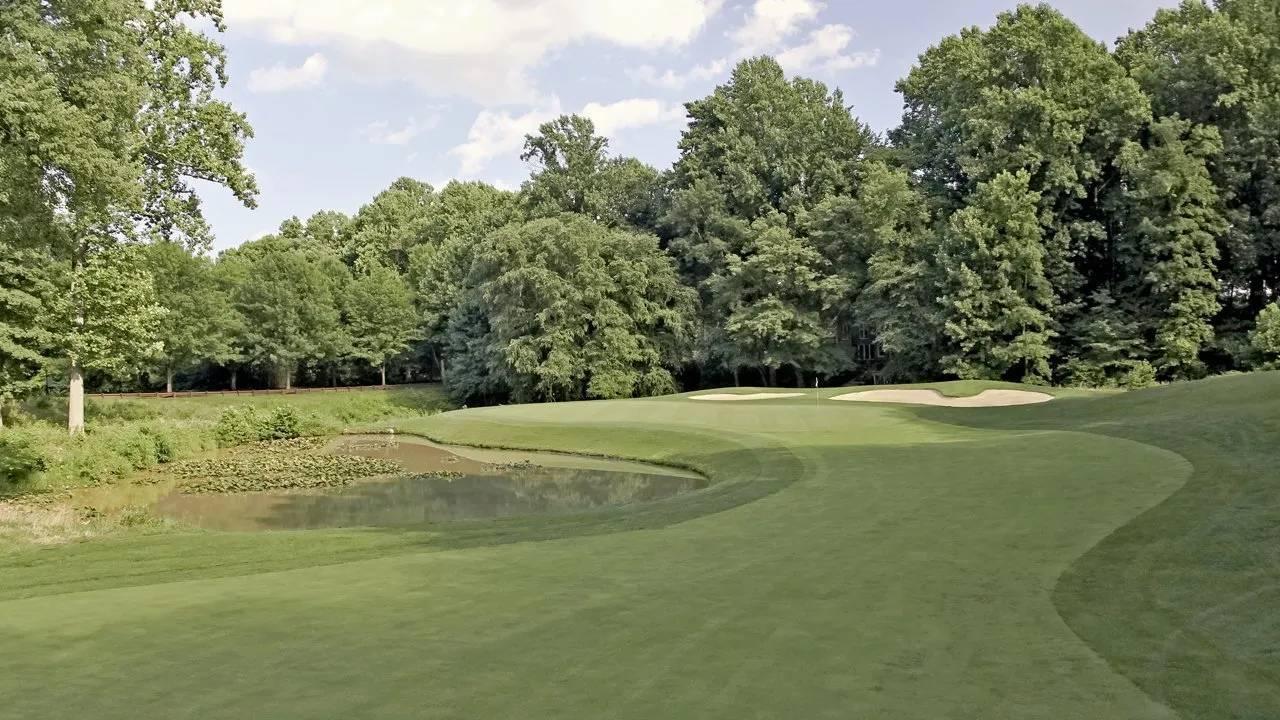
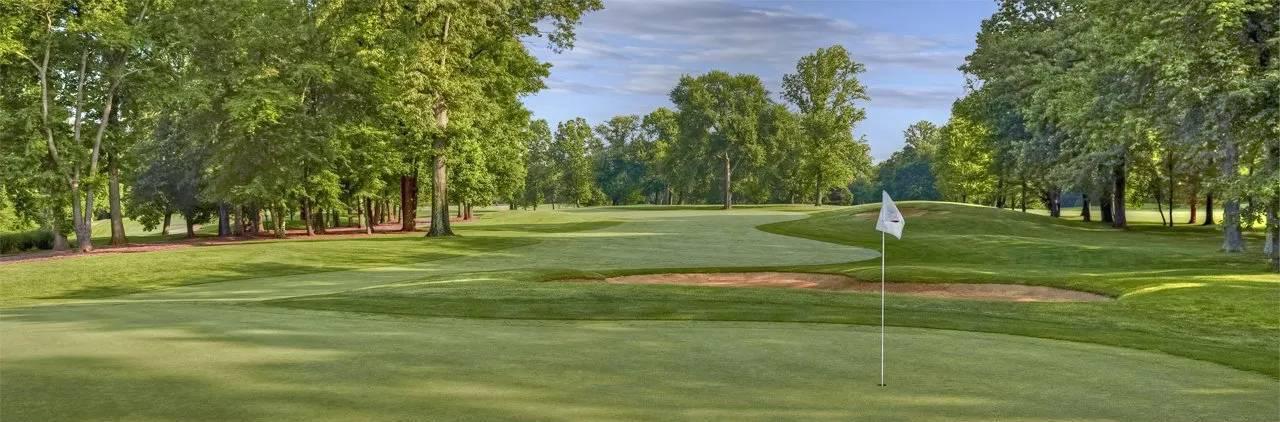
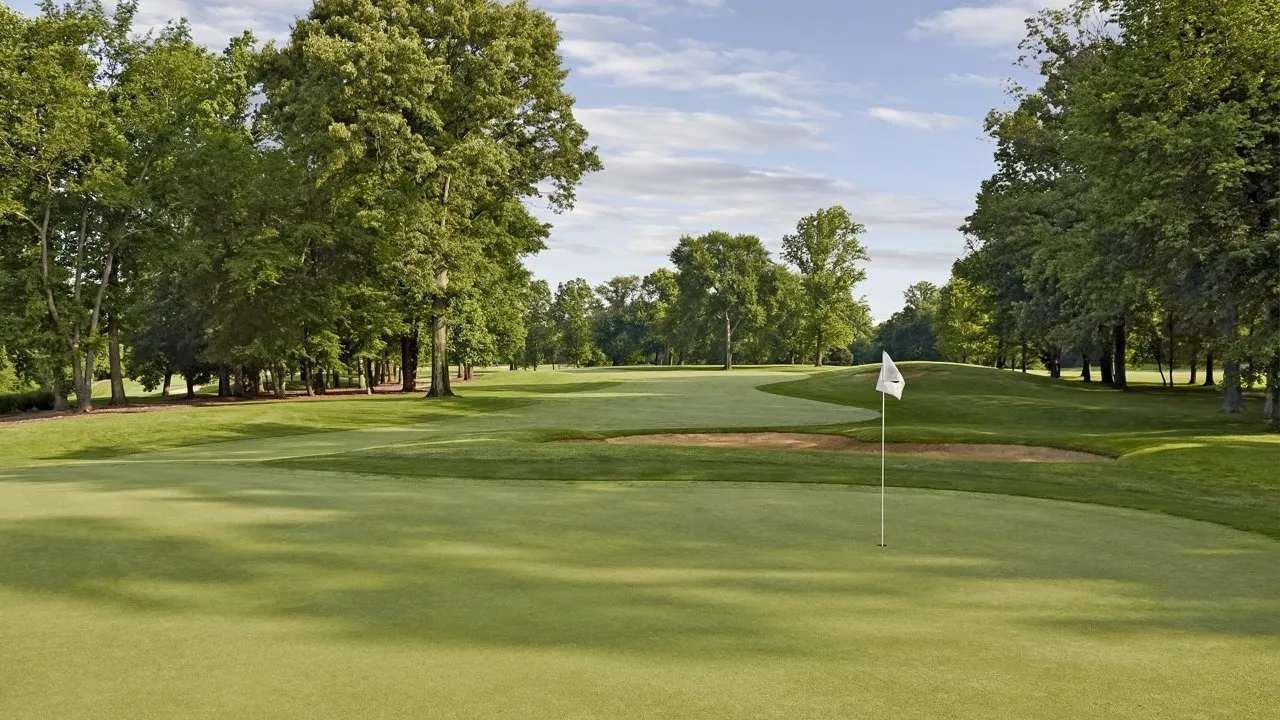
Hole # 5
Woodmore has one of the finest sets of Par 3's anywhere, and the 5th hole starts off this great collection with an intimidating and beautiful tee shot. The green has two distinct levels that move diagonally around a small pond, leaving little room for error should the player challenge the flagstick. Pick your club and take your chances!

| Yardage | ||||
|---|---|---|---|---|
|
Championship 189 |
Maroon 170 |
White 146 |
Black 133 |
Women's - Black 123 |
|
Handicap (M/L) 16/13 Par (M/L) 3/3 |
||||
Hole # 6
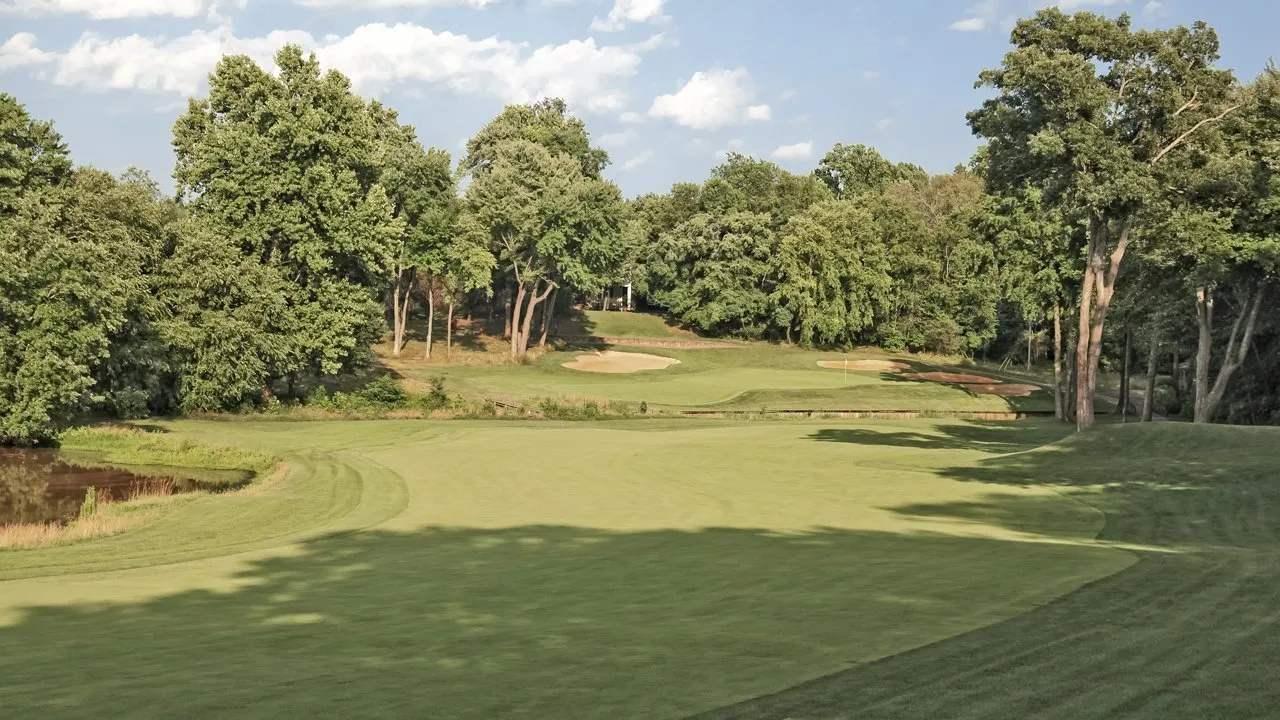
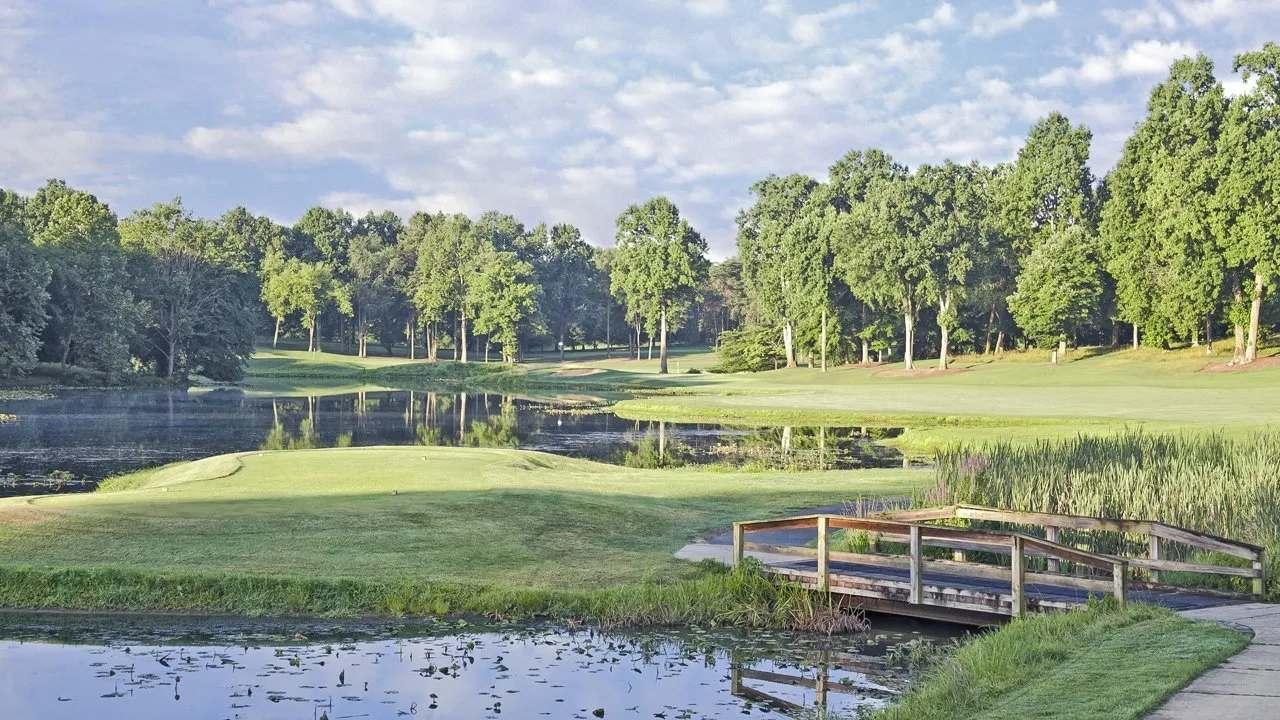
The first par 5 on the front nine is a dogleg to the right, with a generous fairway to the left, and fairway bunkers on the right side. Players can challenge the bunkers to leave themselves a shot at the green in two, but the tee shot must be struck solidly if there is any chance of going for the eagle. The safe play is a fairway wood to the safe side of the hole, setting up a strategically placed lay-up for the third shot - but beware of the pond! Keep the lay-up down the right side of the fairway to avoid the water running parallel to the hole. Once the player is in position for the third shot, club selection is again extremely critical, as this green has 3 levels that will make the player decide how bold they want to be to make birdie. A shot that is left on the wrong level or that spins too much will draw agonizingly back away from the hole, leaving a very long and difficult two putt for par.

| Yardage | ||||
|---|---|---|---|---|
|
Championship 551 |
Maroon 514 |
White 488 |
Black 473 |
Women's - Black 463 |
|
Handicap (M/L) 8/1 Par (M/L) 5/5 |
||||
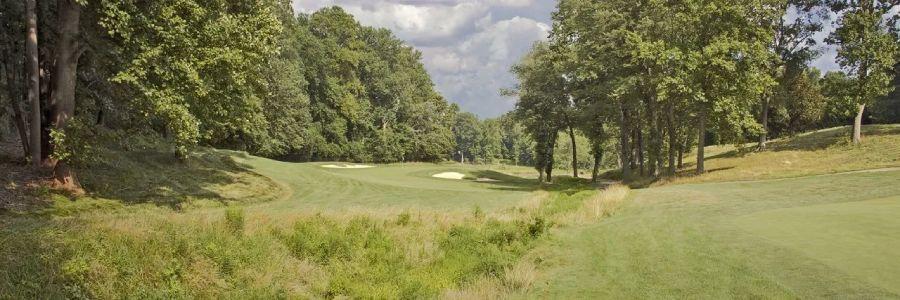
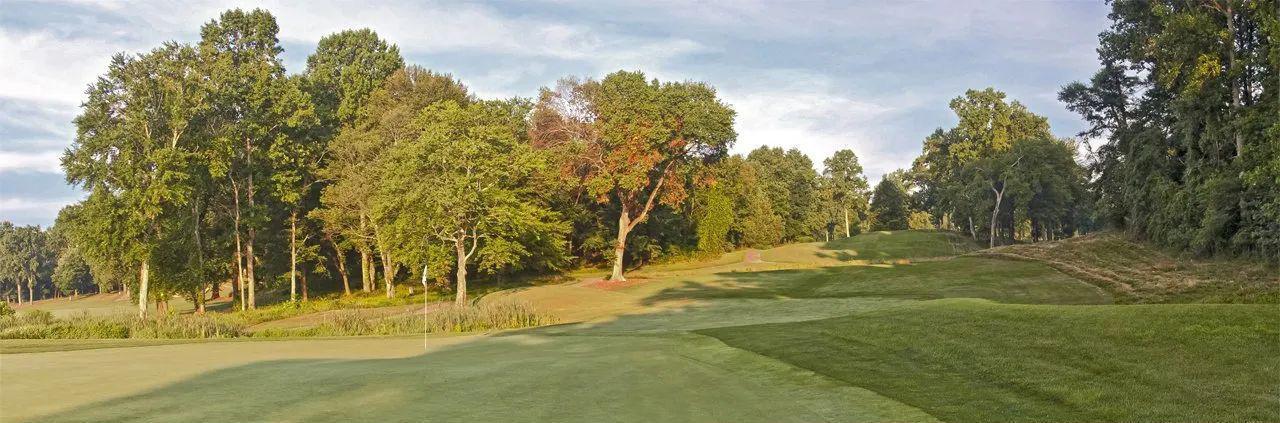
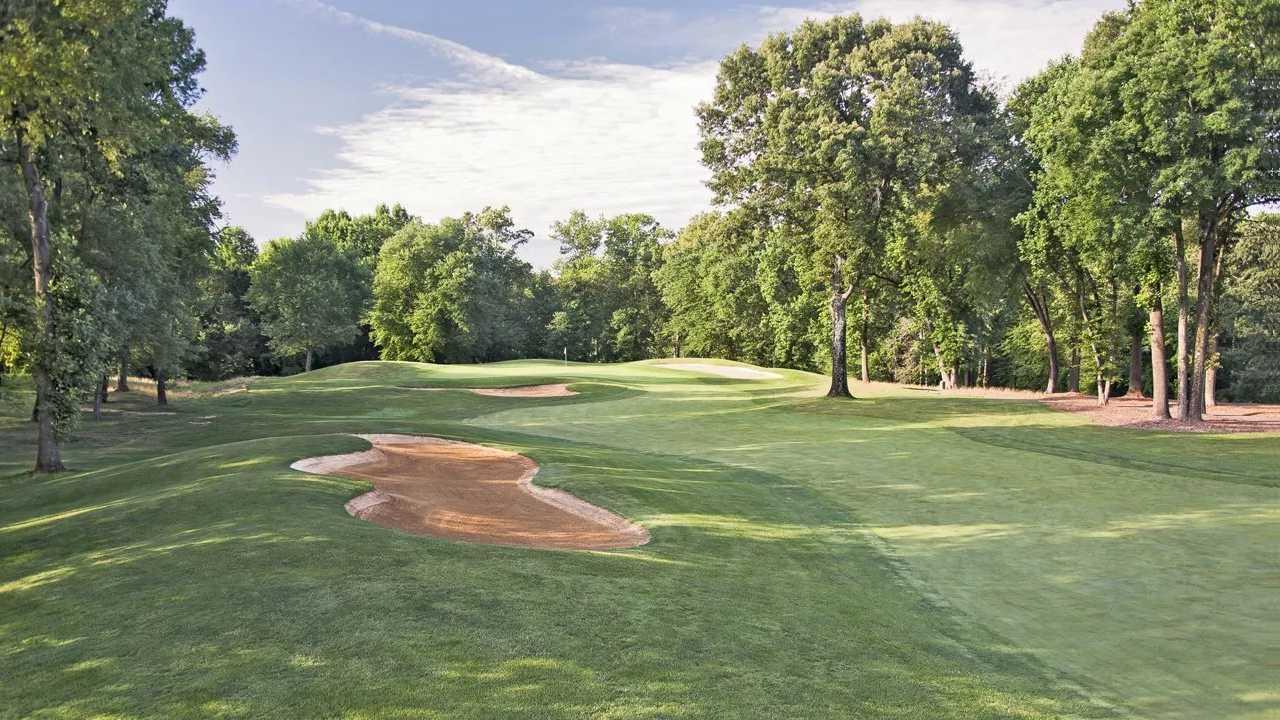
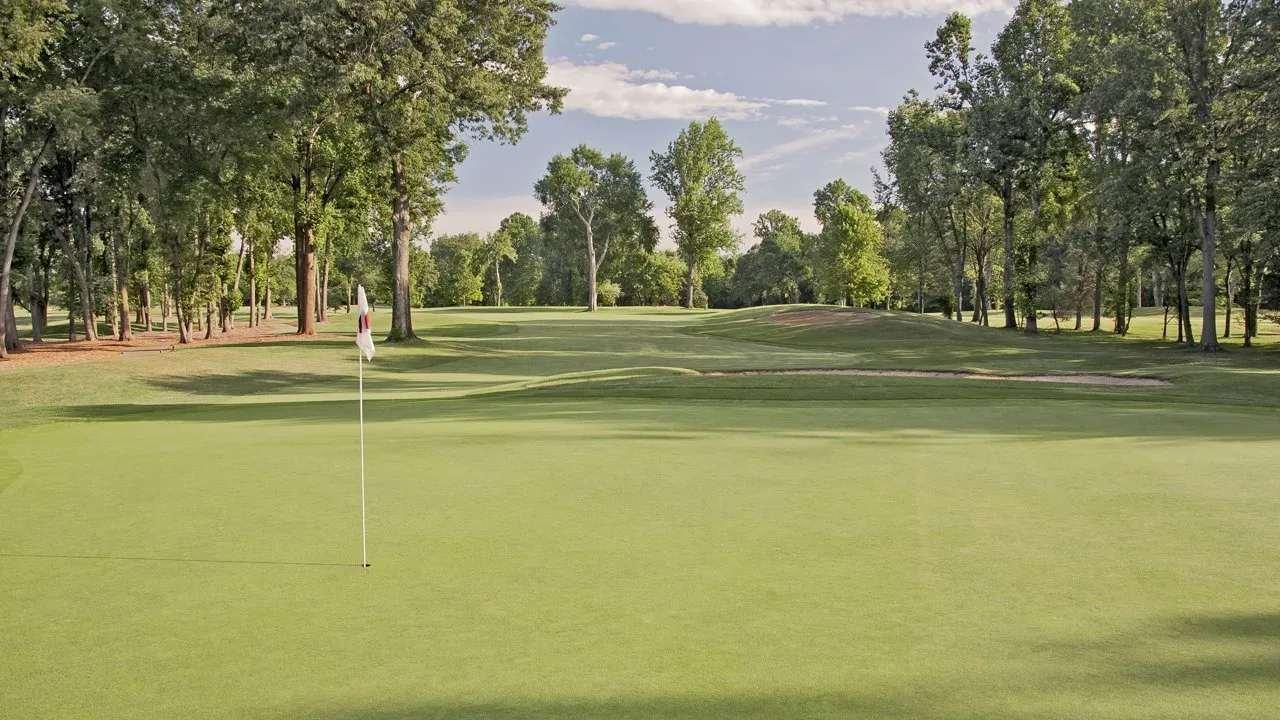
Hole # 7
The 7th hole is a beautifully shaped hole, and much like the 6th hole, makes the player decide on the tee how much of the dogleg they want to cut off. Should the tee shot carry far enough between the fairway bunkers, the player will be left with 150 yards or less into this fairly flat green. If the tee shot does not carry enough, the ball will land in one of the two bunkers and will be blocked out from most of the green by a tree overhanging the fairway. The safe play is to aim down the opening side of the fairway and accept a longer shot into the green to help avoid the dreaded big number on the scorecard.

| Yardage | ||||
|---|---|---|---|---|
|
Championship 423 |
Maroon 402 |
White 391 |
Black 364 |
Women's - Black 359 |
|
Handicap (M/L) 4/7 Par (M/L) 4/4 |
||||
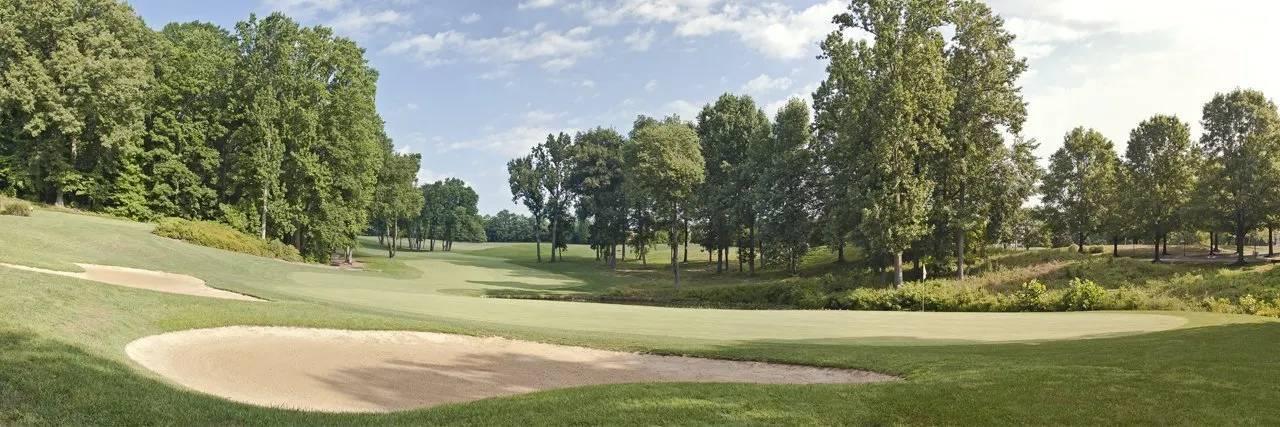
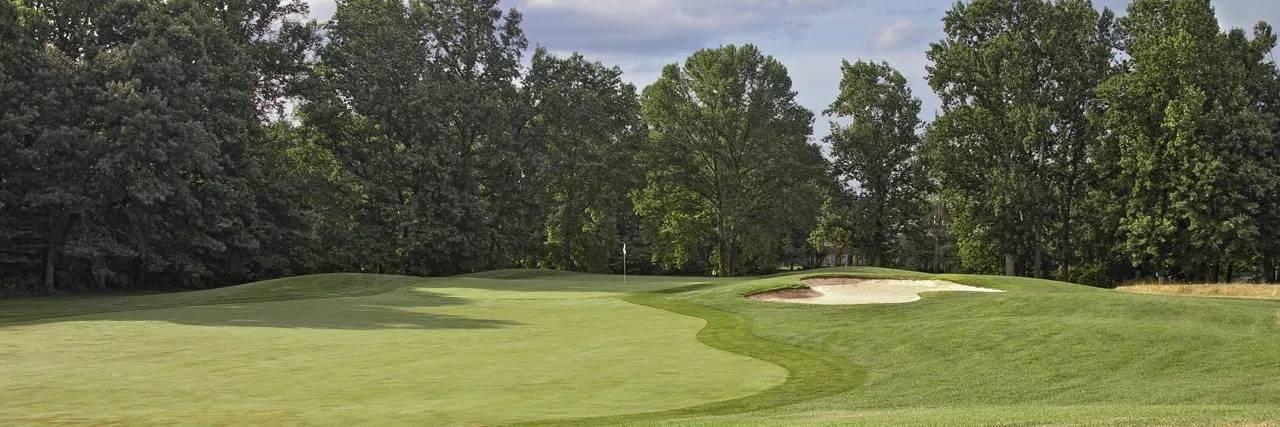
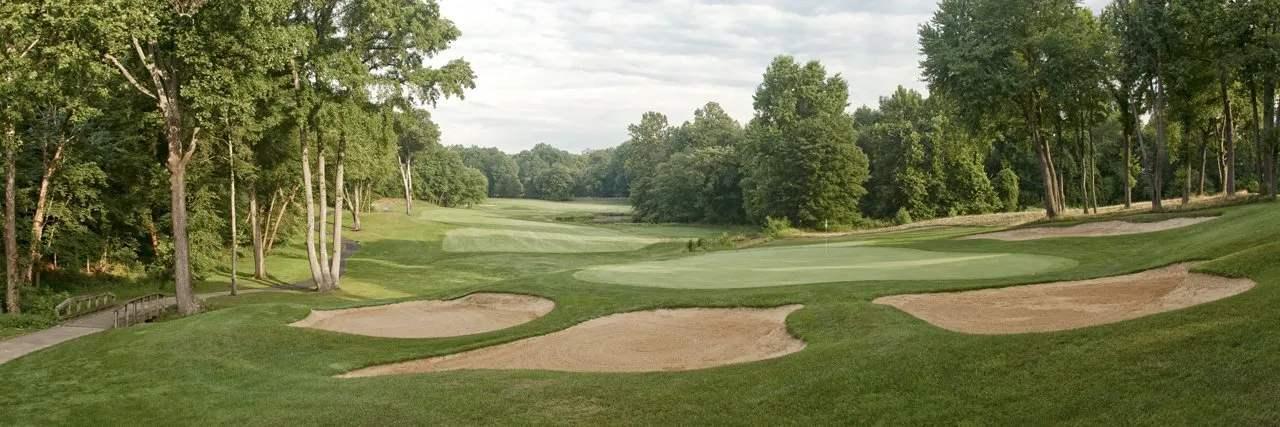
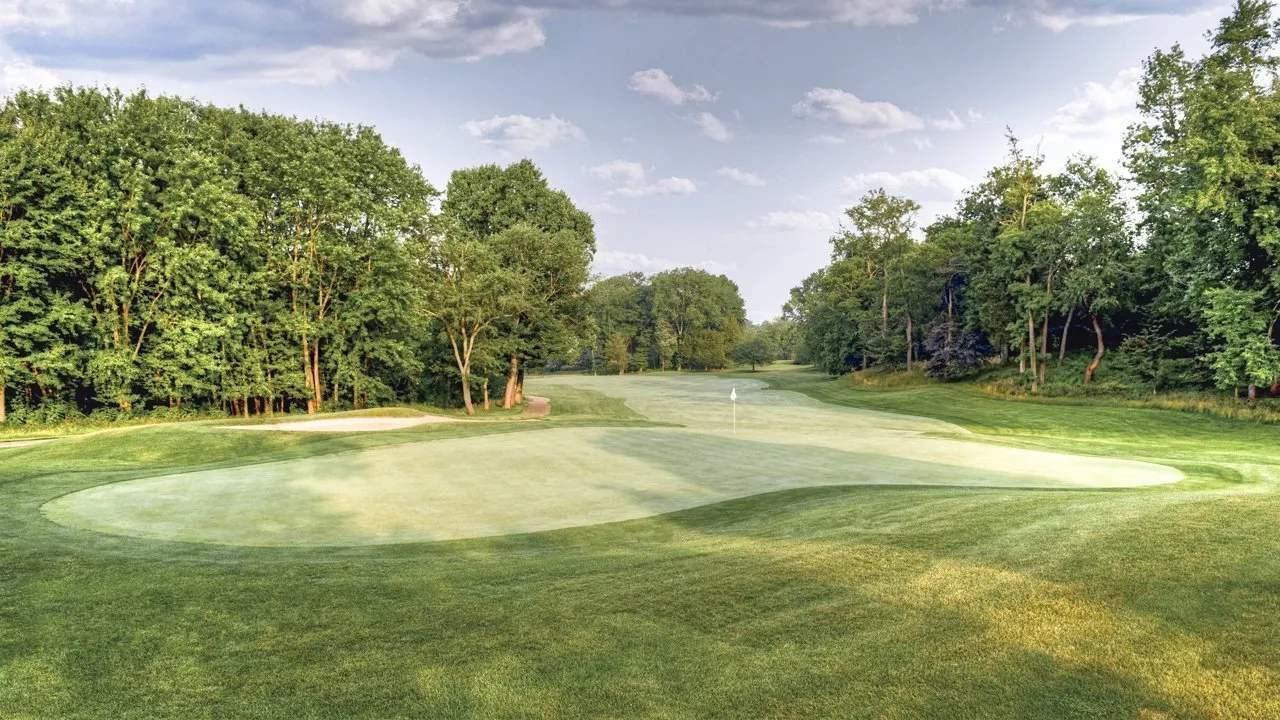
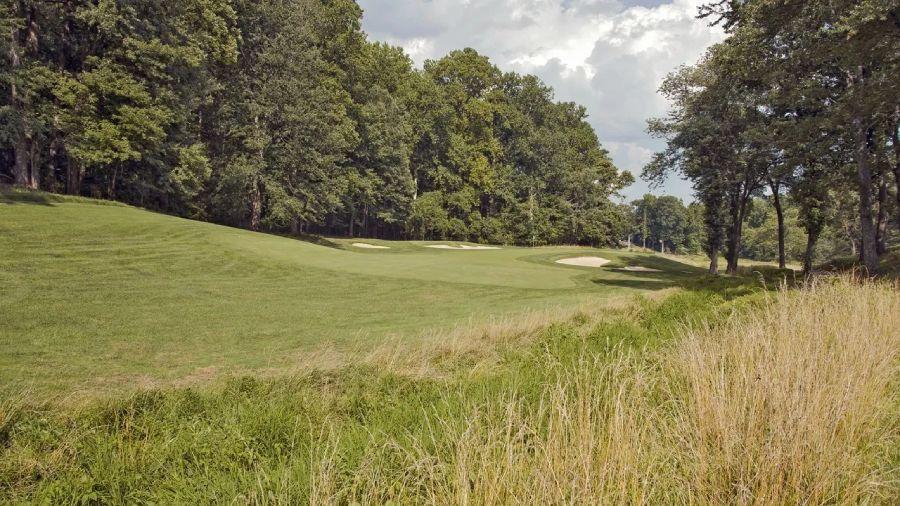
Hole # 8
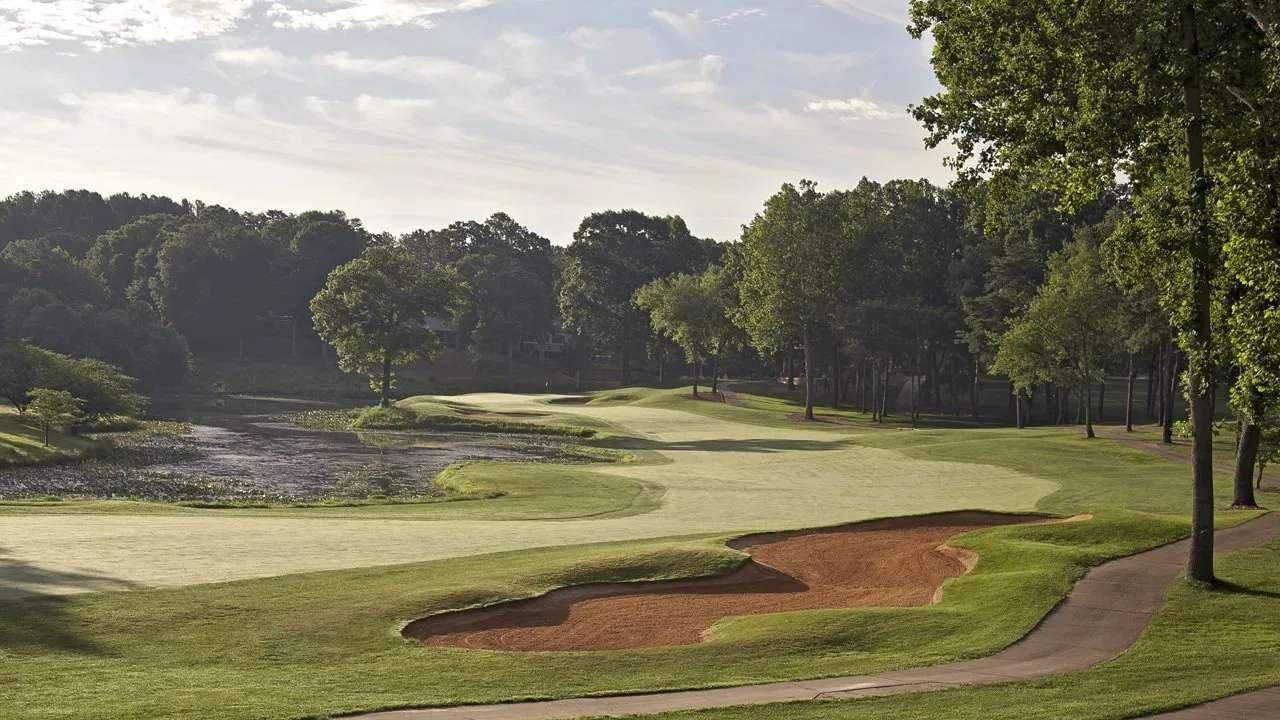
One of the toughest holes visually on the course, this par 5 is dominated by 2 yawning fairway bunkers in the distance. The longest hitters can power the ball over the first bunker, leaving them a fairway wood opportunity at the green and a chance at eagle. Most players will do well to aim left of the bunkers and use the generous part of the fairway to put themselves in position for a lay-up shot - but be precise! The hole pinches in at 175 yards out, making even the most basic lay-up shot a challenge. Once these tasks are accomplished, the player must think about where the pin is located on the green, as any shot that hits this green will move left with the severe slope of the green. Think carefully and use this slope to get it close!
| Yardage | ||||
|---|---|---|---|---|
|
Championship 565 |
Maroon 543 |
White 531 |
Black 478 |
Women's - Black 468 |
|
Handicap (M/L) 6/3 Par (M/L) 5/5 |
||||
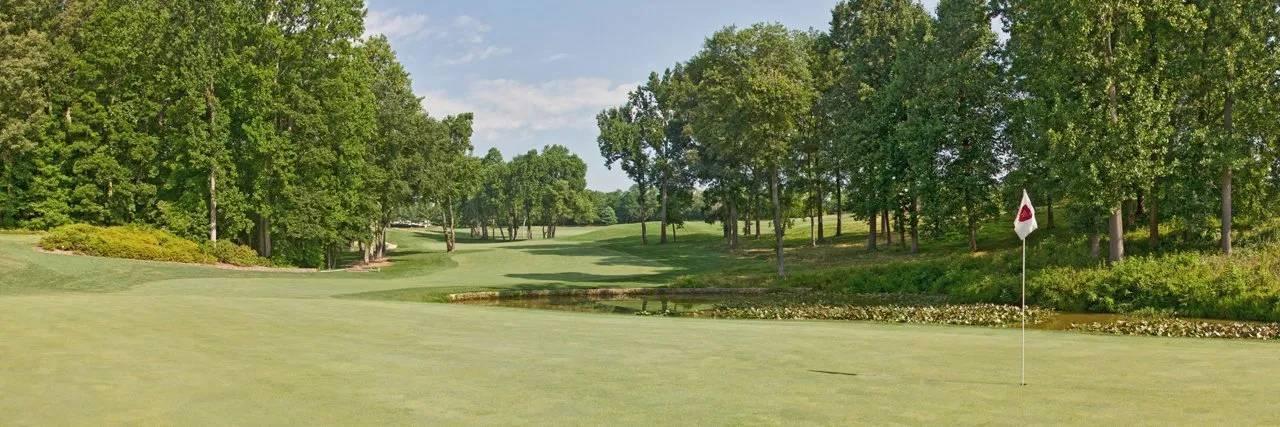
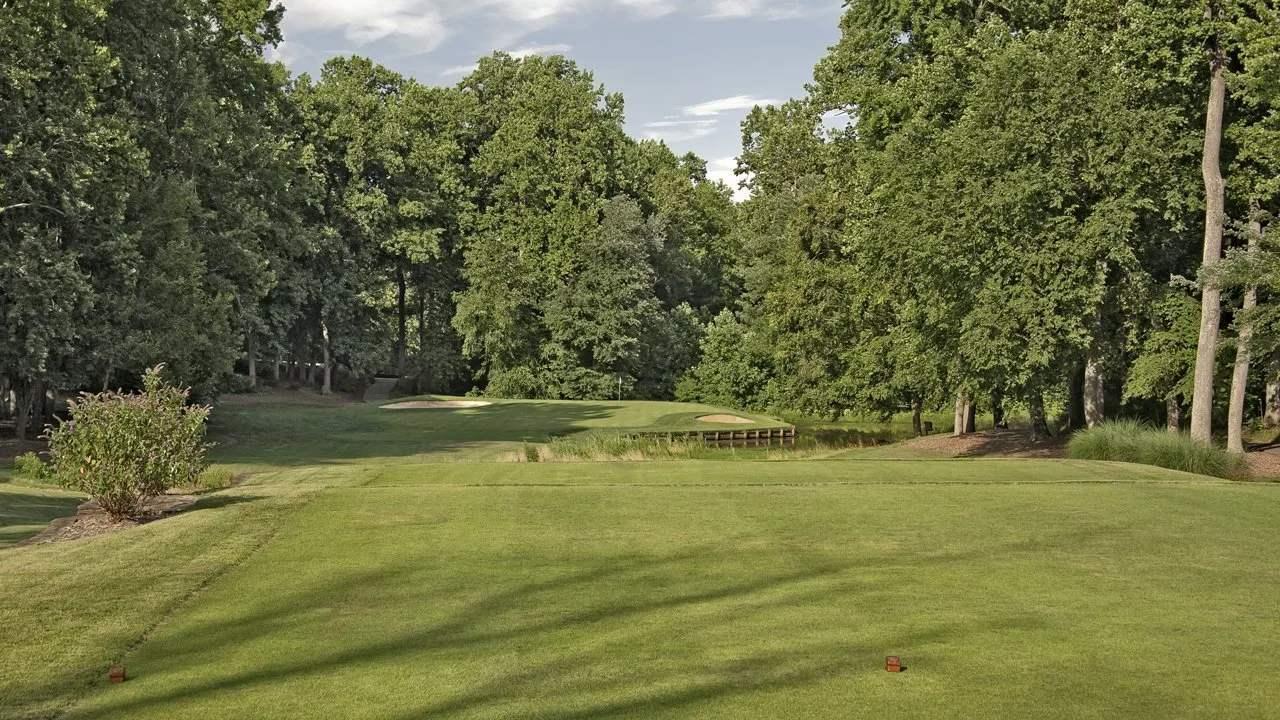
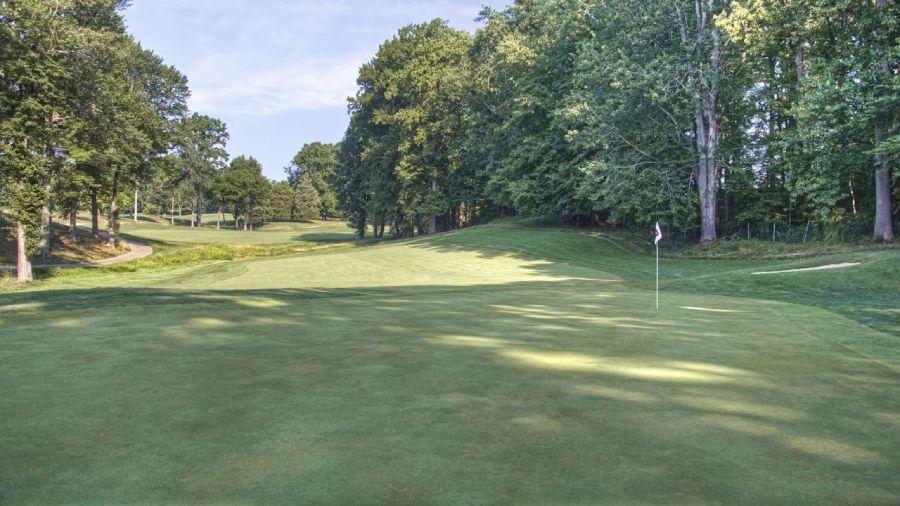
Hole # 9
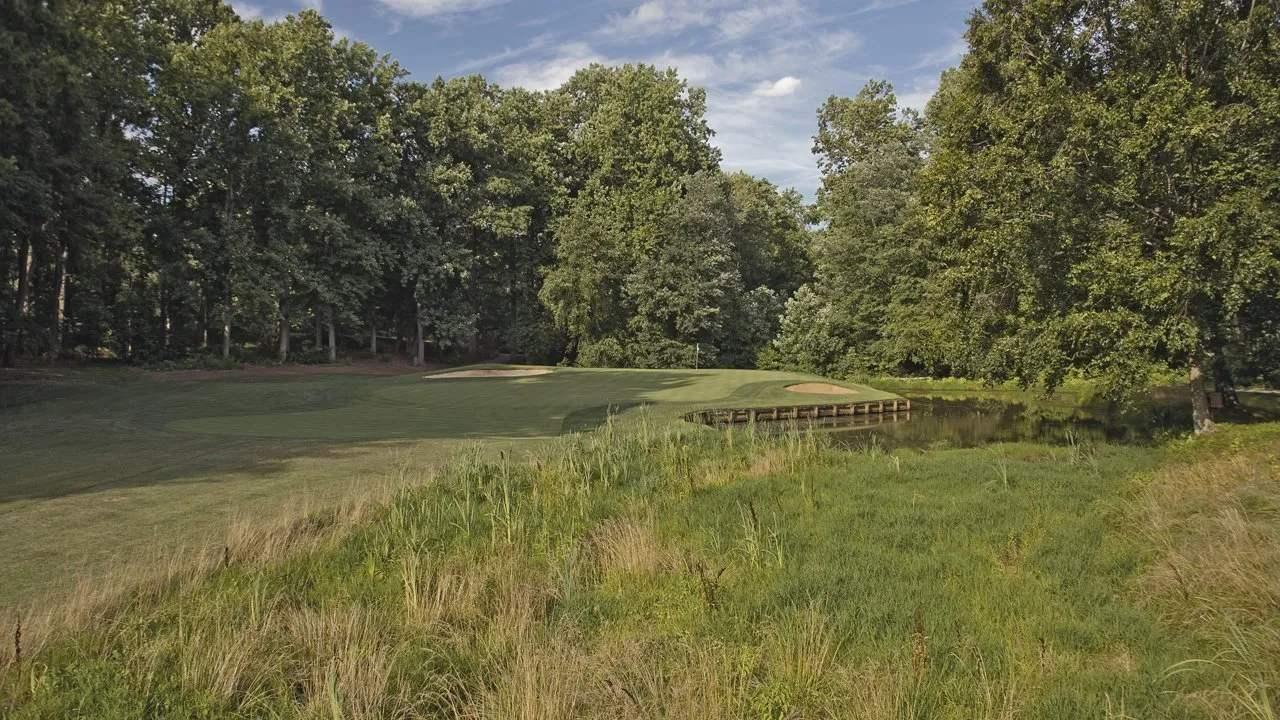
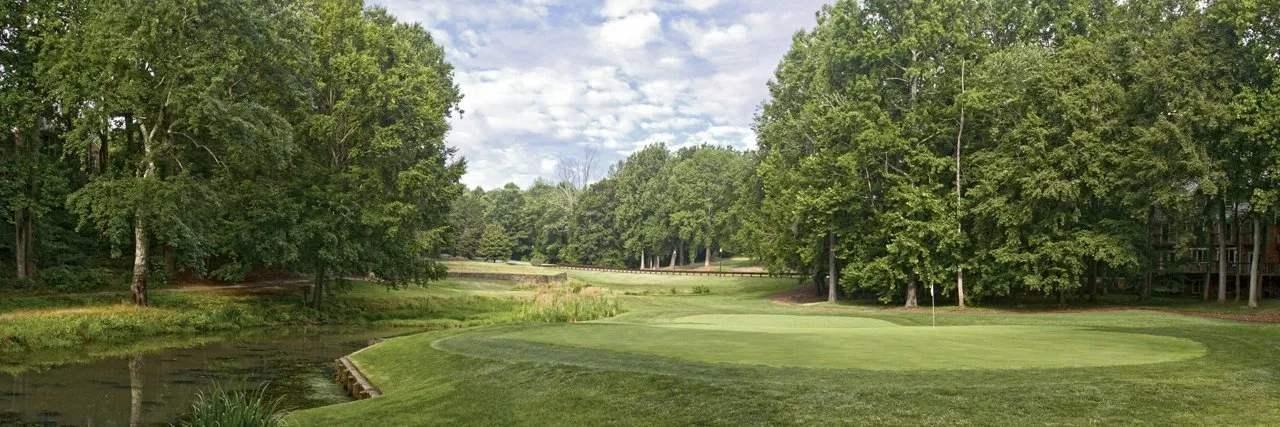
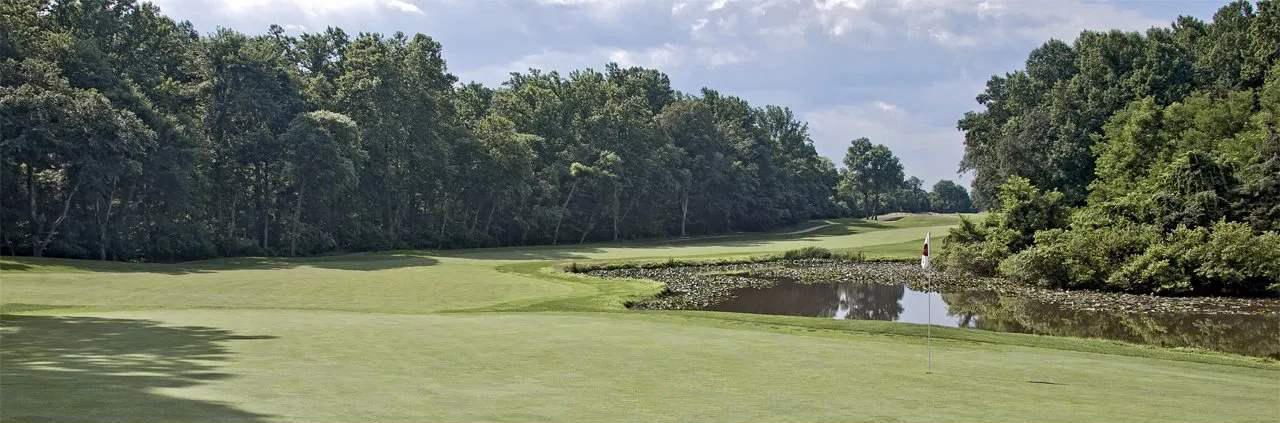
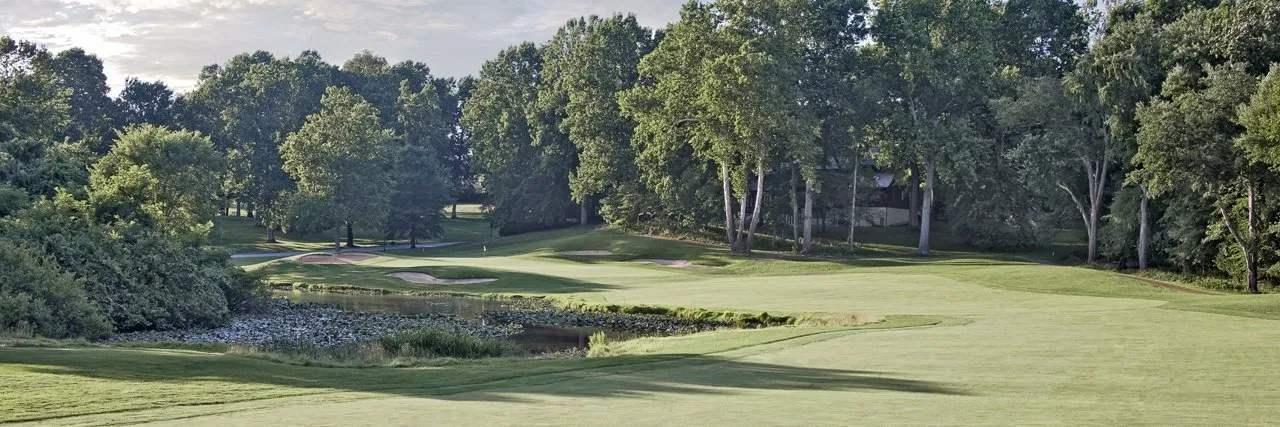
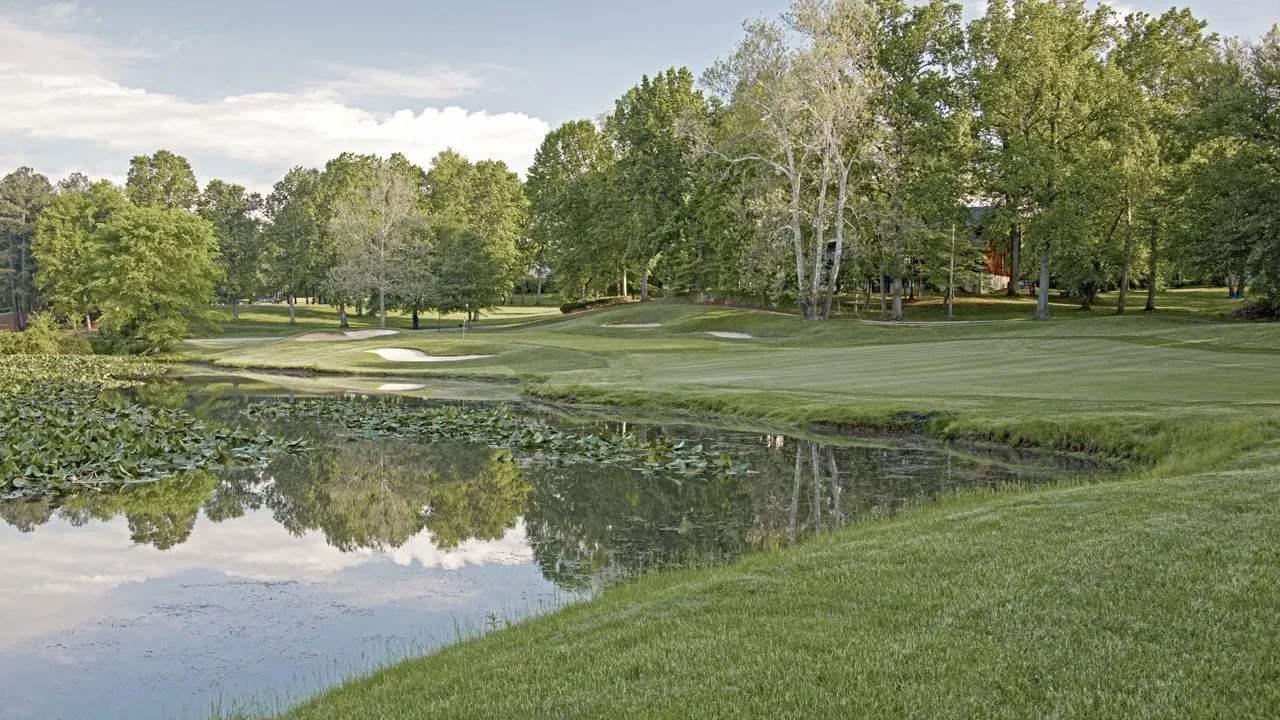
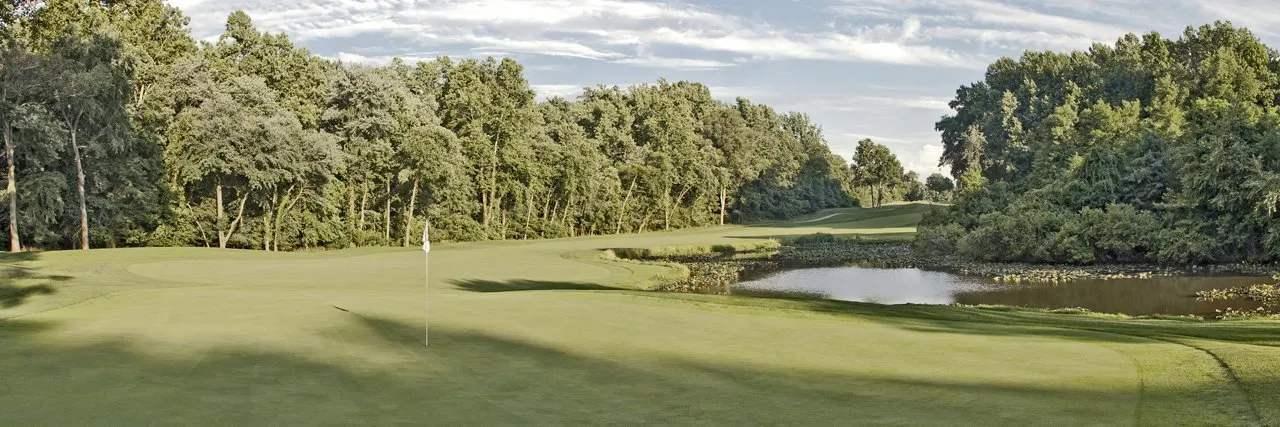
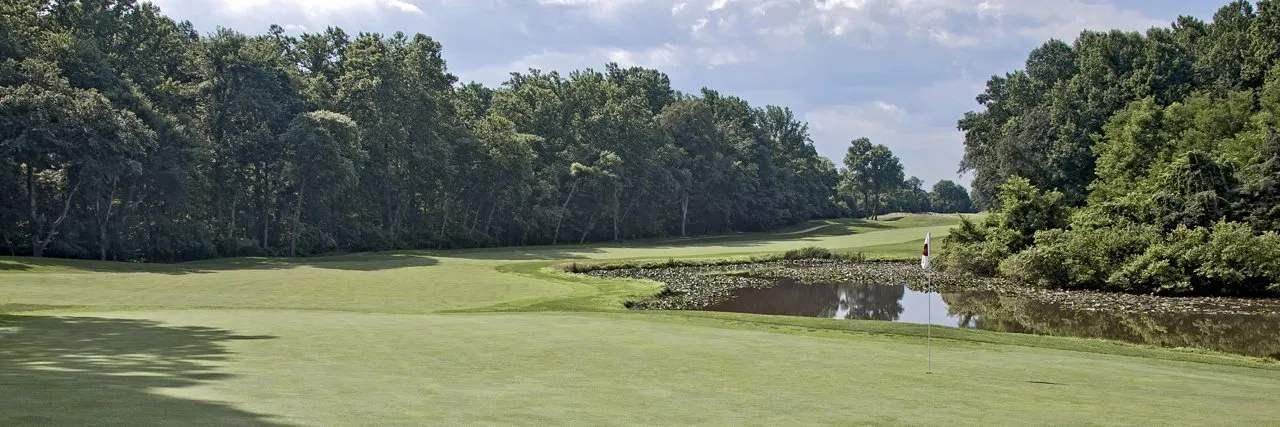
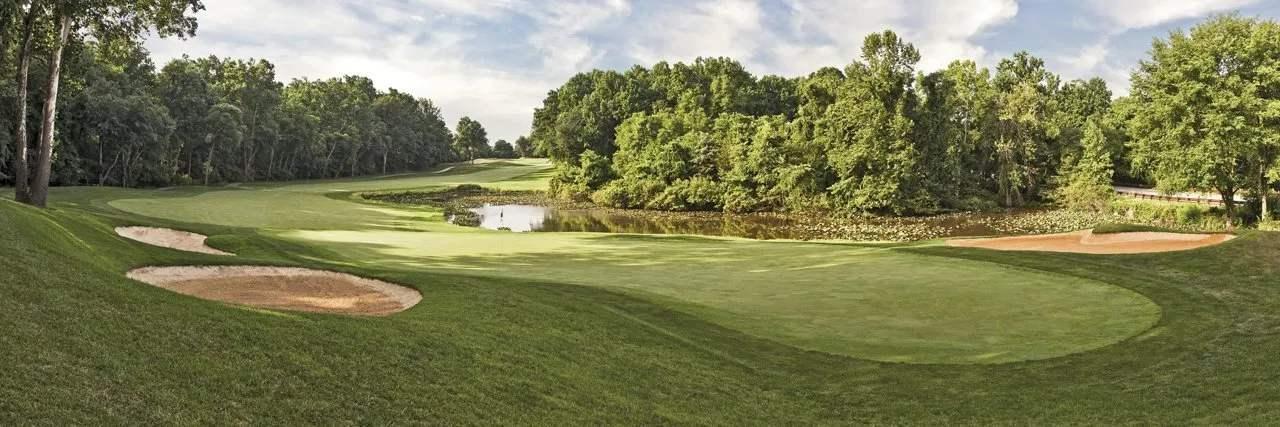
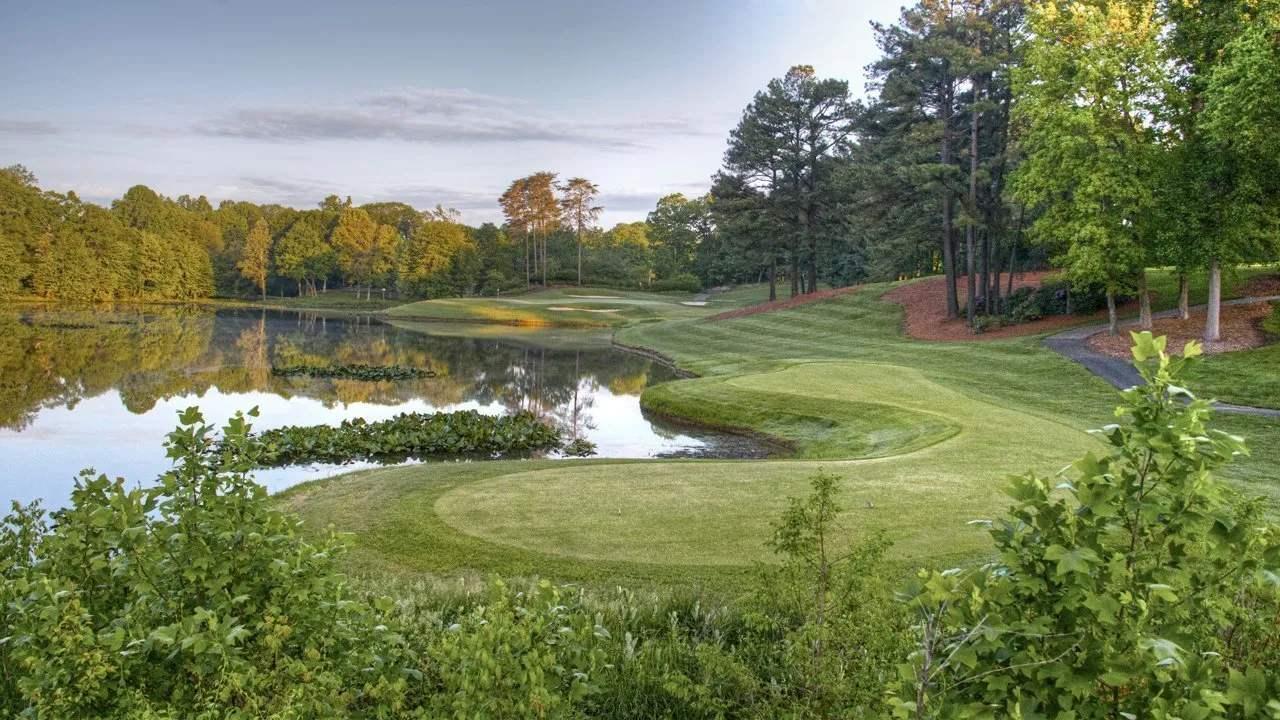
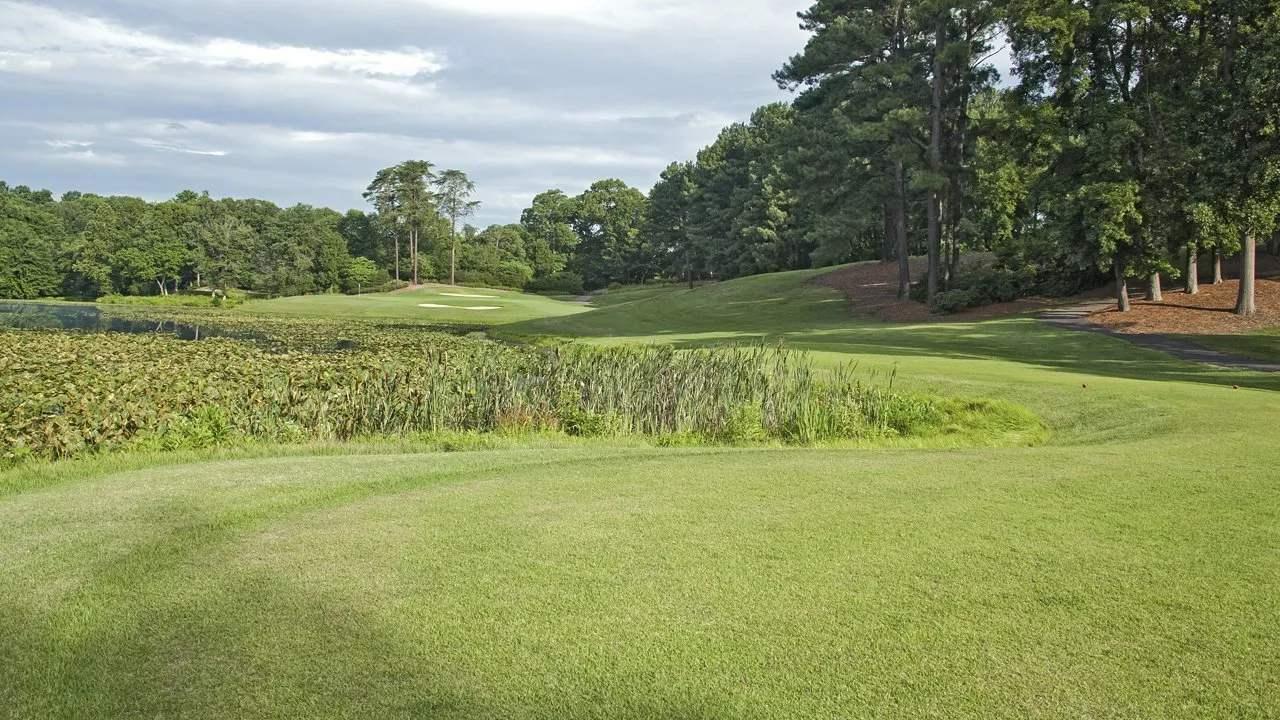
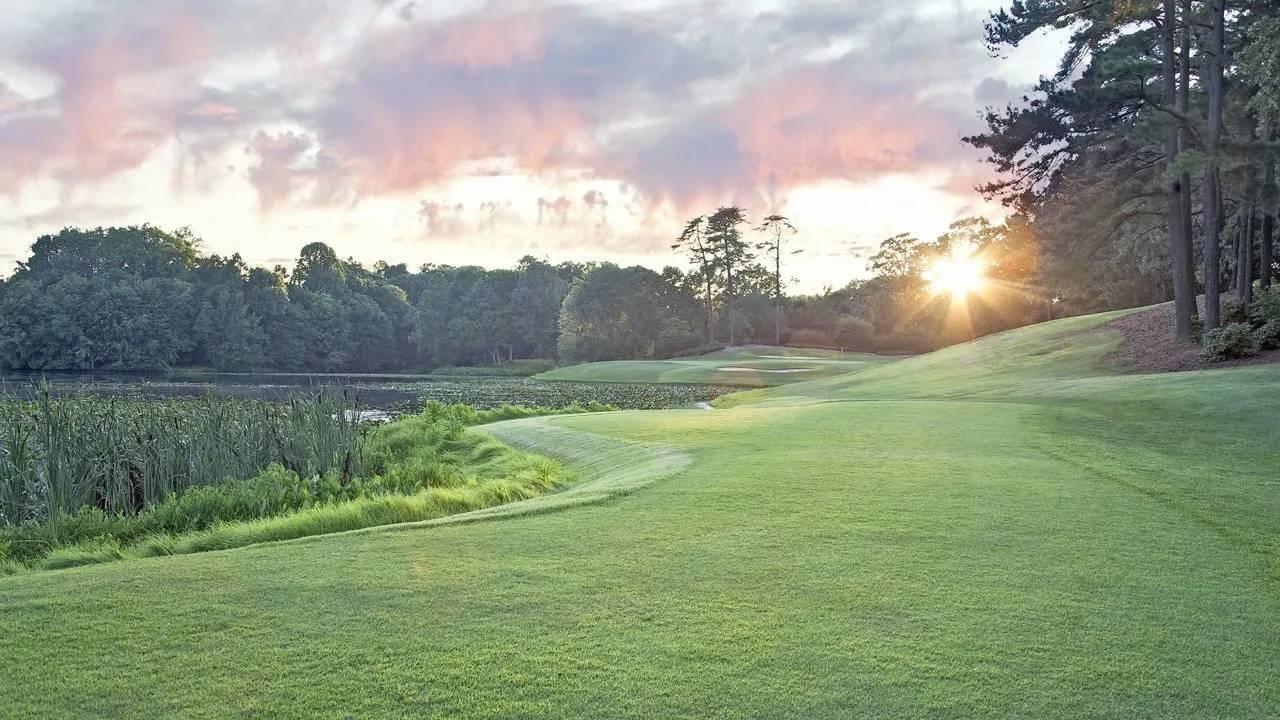
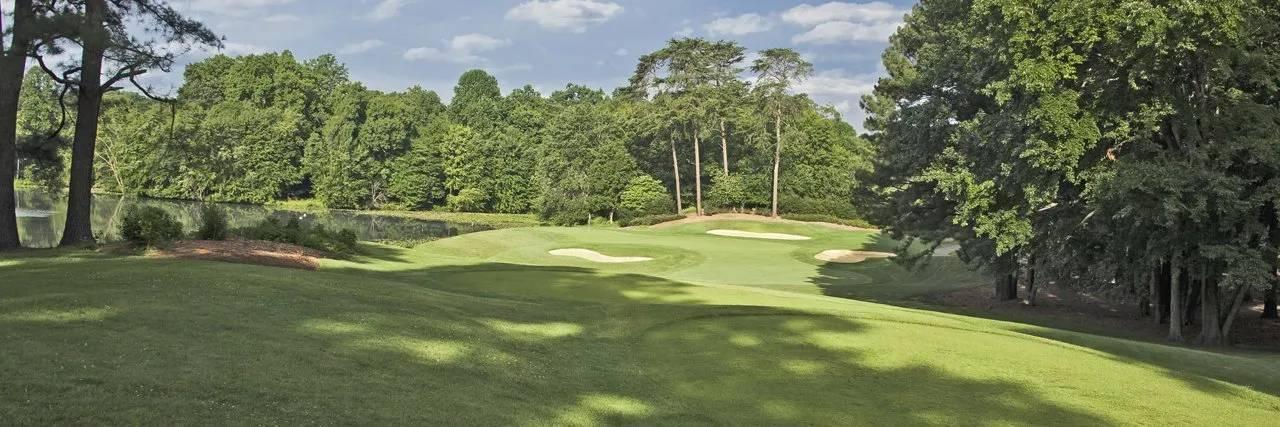
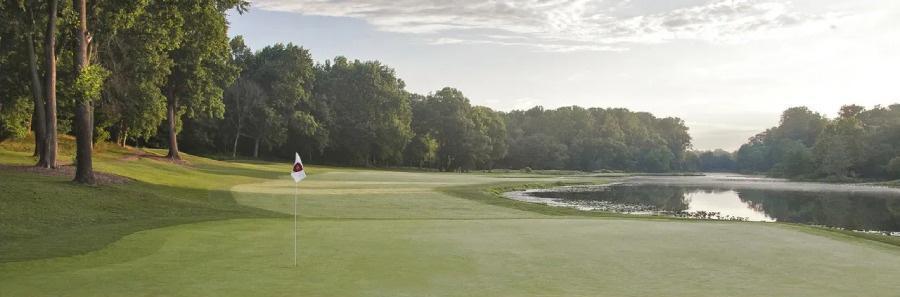
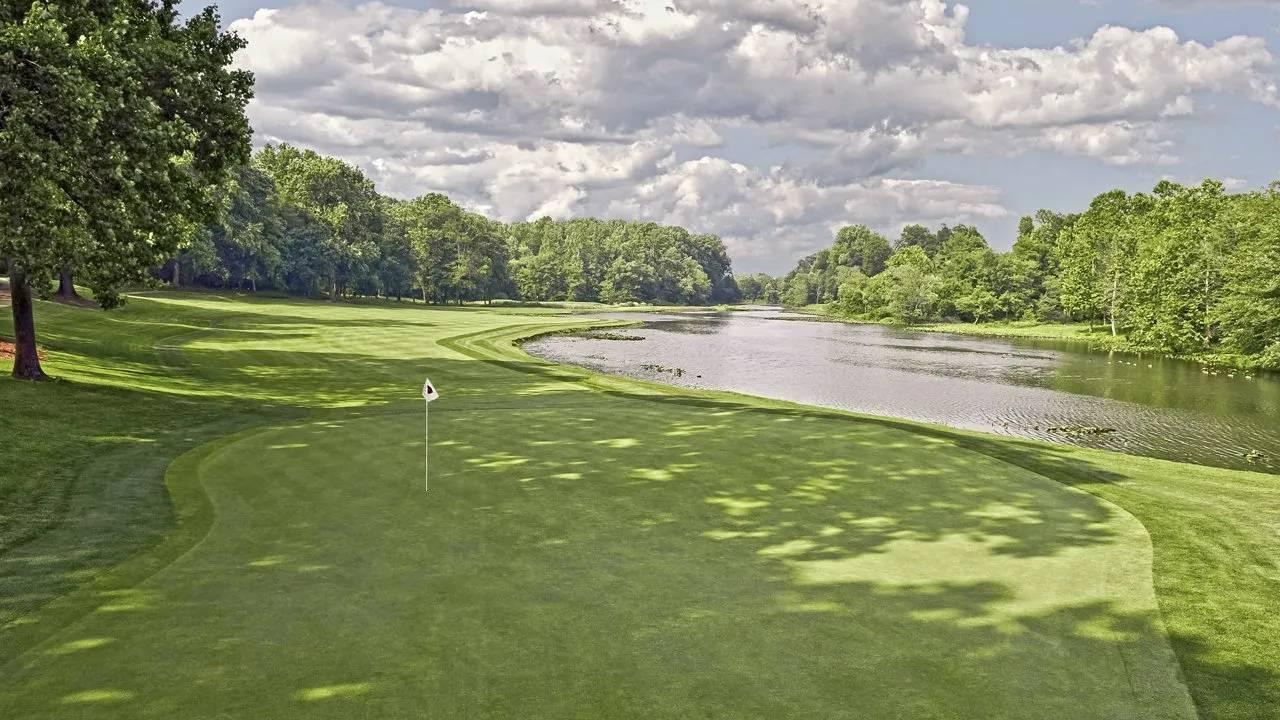
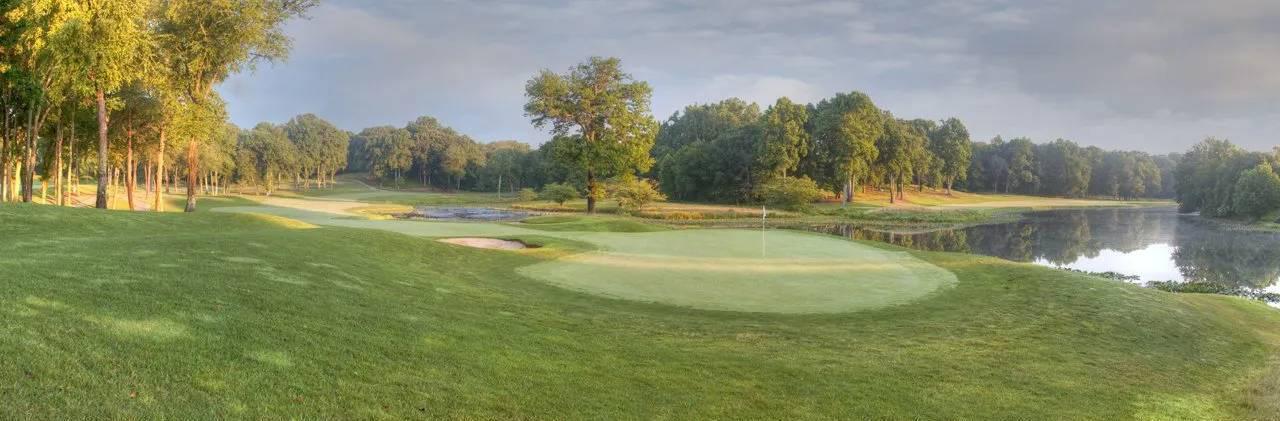
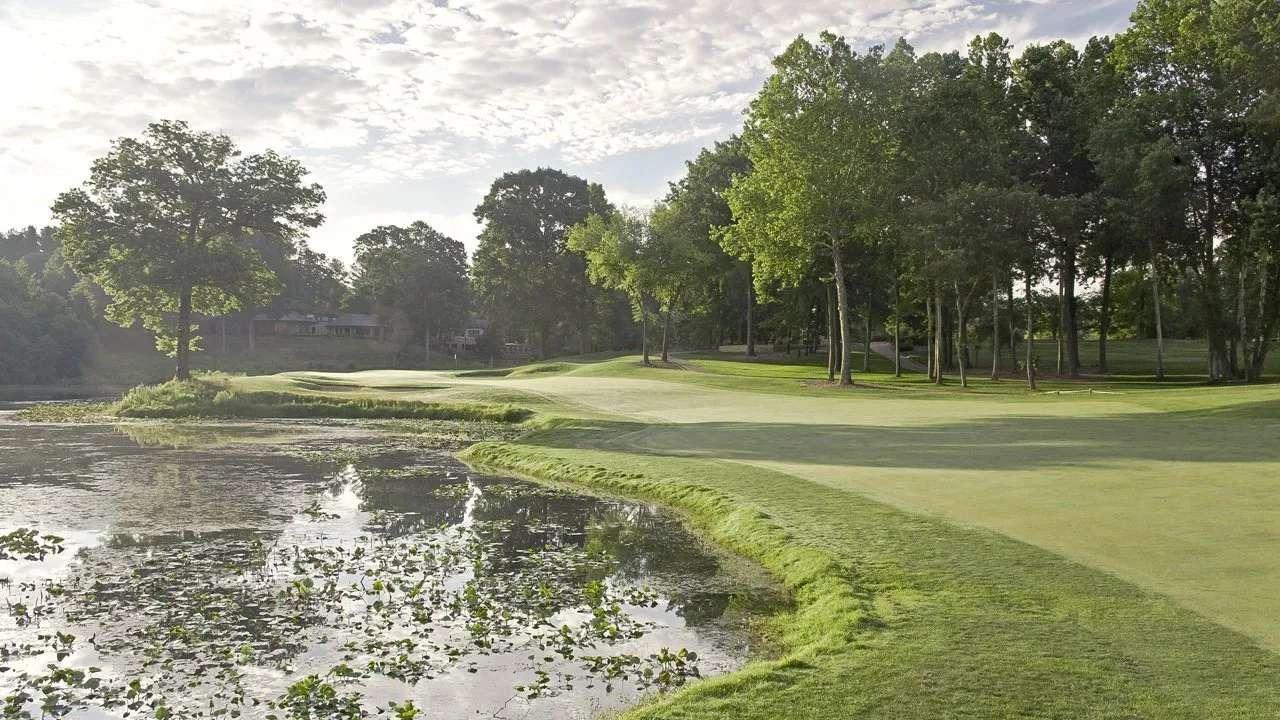
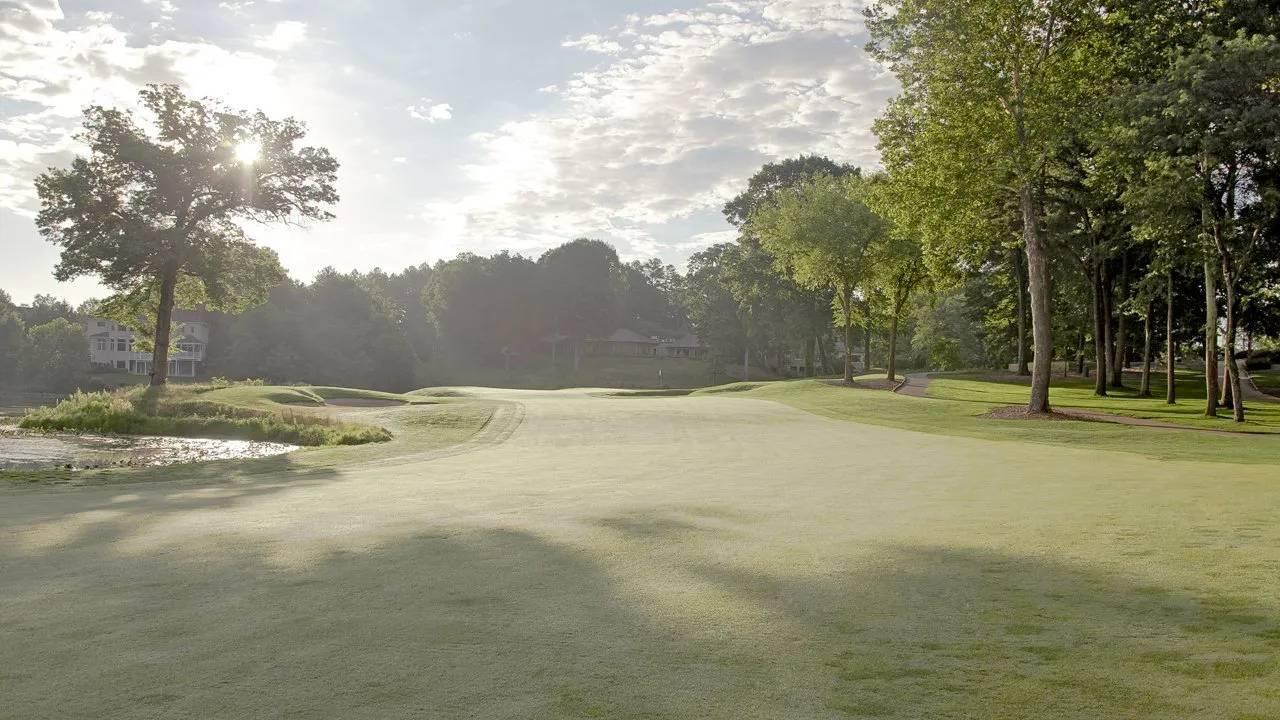
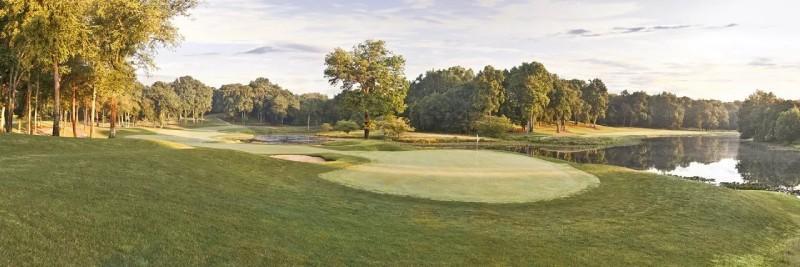
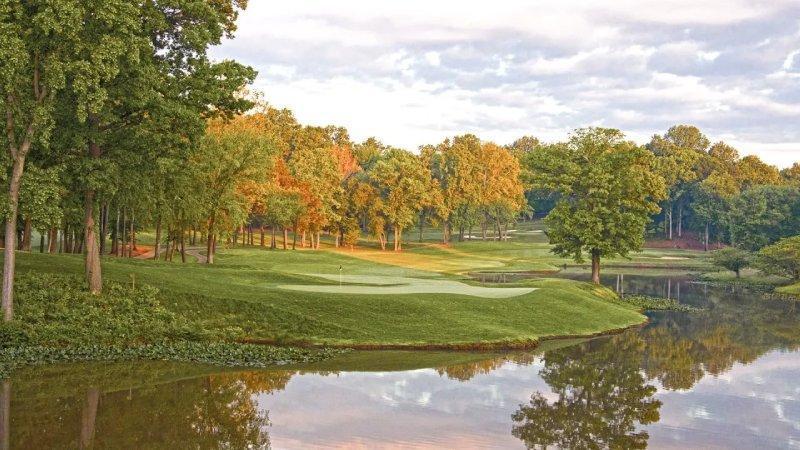
Beauty and the beast is the best way to describe the 9th hole. One of the most beautiful holes on the course is also one of the most demanding par 3 shots the player will face on any course. Lake Woodmore sits tranquilly to the left of this undulating and shallow green, and a high, accurate shot is the order of the day to have any chance to make birdie on this hole. Players that hit the green will be faced with one of the most difficult greens on the course, and will need all of their putting skills to make a birdie or par. Those who fall short of the green will find themselves like so many others on this beautiful beast - in a watery grave!
| Yardage | ||||
|---|---|---|---|---|
|
Championship 194 |
Maroon 165 |
White 145 |
Black 124 |
Women's - Black 119 |
|
Handicap (M/L) 12/17 Par (M/L) 3/3 |
||||
Hole # 10
The 10th hole leads off the back nine with a very demanding tee shot, requiring a left to right ball flight down the right-center of the fairway. Players should beware of the stand of trees on the left and right, which will block out a wayward tee shot from a clear shot to the green. The putting surface is protected by bunkers that require the second shot to be properly placed on this treacherous green, which can provide a challenge as you start your journey on the back nine.
| Yardage | ||||
|---|---|---|---|---|
|
Championship 387 |
Maroon 372 |
White 359 |
Black 342 |
Women's - Black 333 |
|
Handicap (M/L) 15/14 Par (M/L) 4/4 |
||||
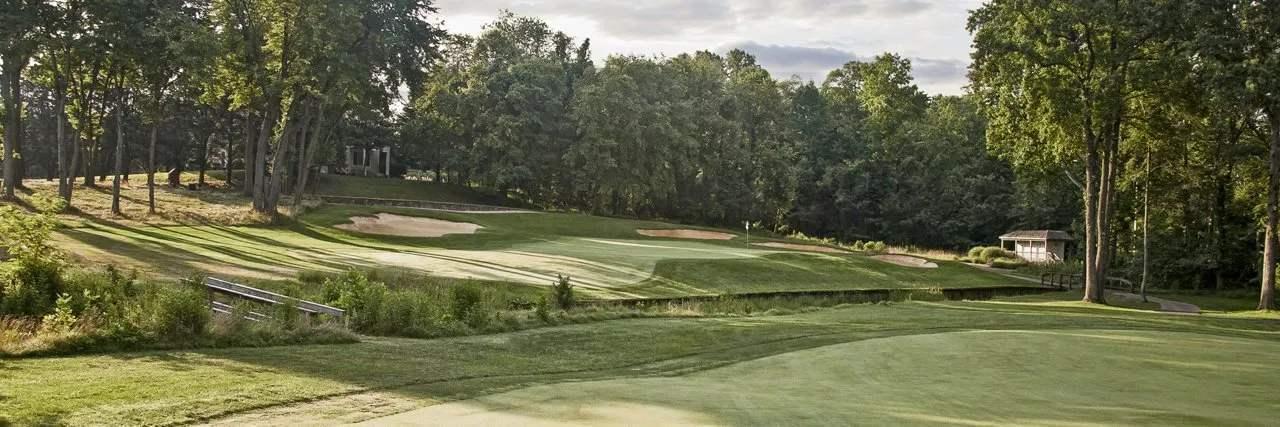
Hole # 11
A gorgeous view on the elevated tee at the 11th sets the stage for a winding ride to the green. The tee shot needs to split the fairway for position on this hole, as any tee shot that goes left will find the fairway bunker or a severe drop-off into the woods that leaves virtually no chance for a clean second shot. If the tee shot goes to the right, it will either strike the trees along the rough or leave a difficult angle for the lay-up. Once the lay-up has been placed down the fairway, the player must then take into account the numerous hole locations on this green. Anything in the front is an attackable position, but if the pin is over the large slope in the green the player must beware, as any shot that hits the down slope will kick hard to the back of the green or into the rough. Par is an excellent score on the 11th hole.
| Yardage | ||||
|---|---|---|---|---|
|
Championship 541 |
Maroon 529 |
White 512 |
Black 444 |
Women's - Black 438 |
|
Handicap (M/L) 11/2 Par (M/L) 5/5 |
||||
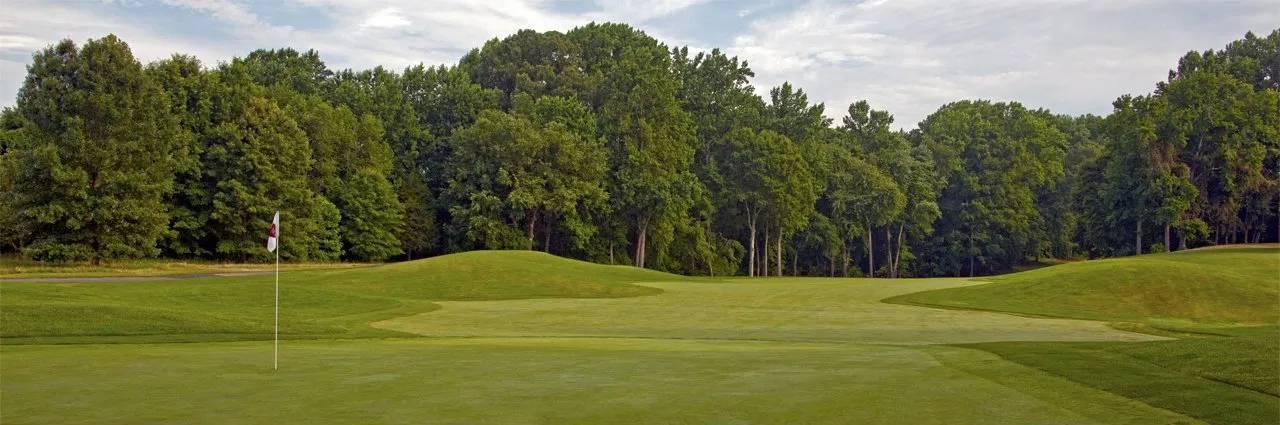
Hole # 12
The 12th hole is a difficult par 3 that is made tough by the severly undulating green. Put the ball on the correct side of the slope and watch it funnel right next to the hole. But miss your spot and pay the consequences, as the ball will slide away and leave a nearly impossible putt for birdie, making par a difficult proposition.


| Yardage | ||||
|---|---|---|---|---|
|
Championship 169 |
Maroon 150 |
White 141 |
Black 123 |
Women's - Black 113 |
|
Handicap (M/L) 17/18 Par (M/L) 3/3 |
||||
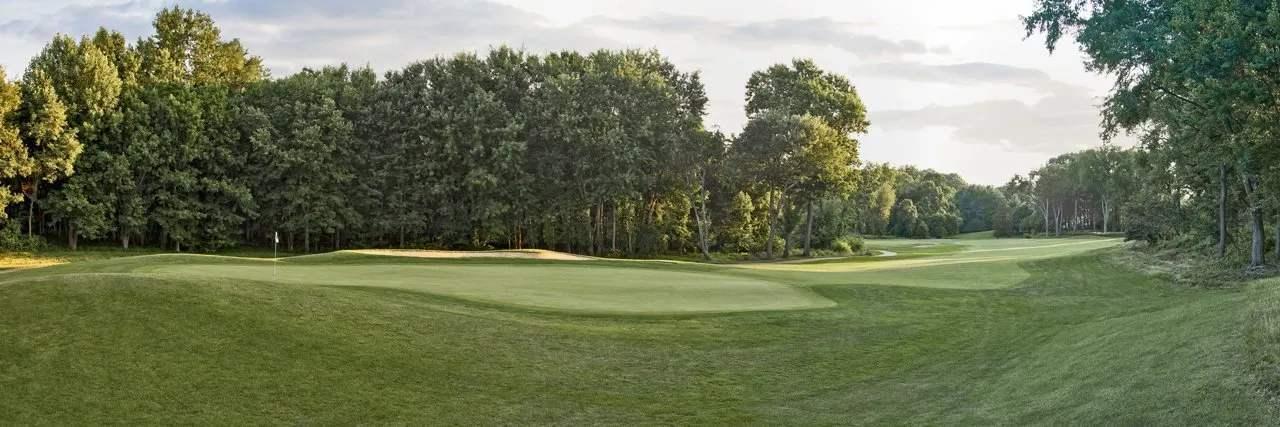
Hole # 13
A tee shot to the right side of the fairway is the shot of choice on the 13th hole, giving the player the best angle to the green. Wayward tee shots to the left will find the creek, and any shot too far right will find the trees, so accuracy is key on this hole. Bunkers guard the right and left sides of this hole; the correct distance is a must if the player is going to have a chance at birdie.

| Yardage | ||||
|---|---|---|---|---|
|
Championship 412 |
Maroon 380 |
White 365 |
Black 325 |
Women's - Black 312 |
|
Handicap (M/L) 3/6 Par (M/L) 4/4 |
||||
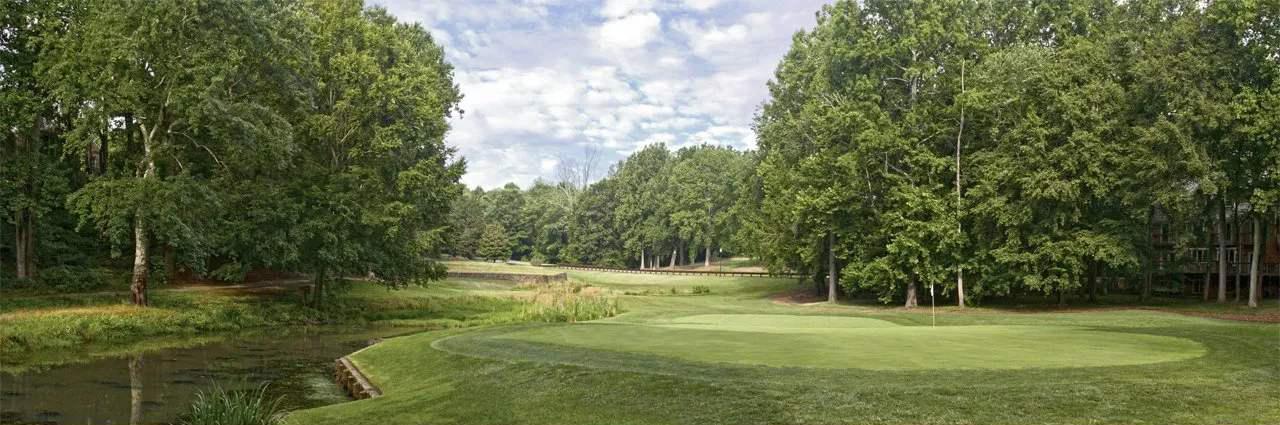
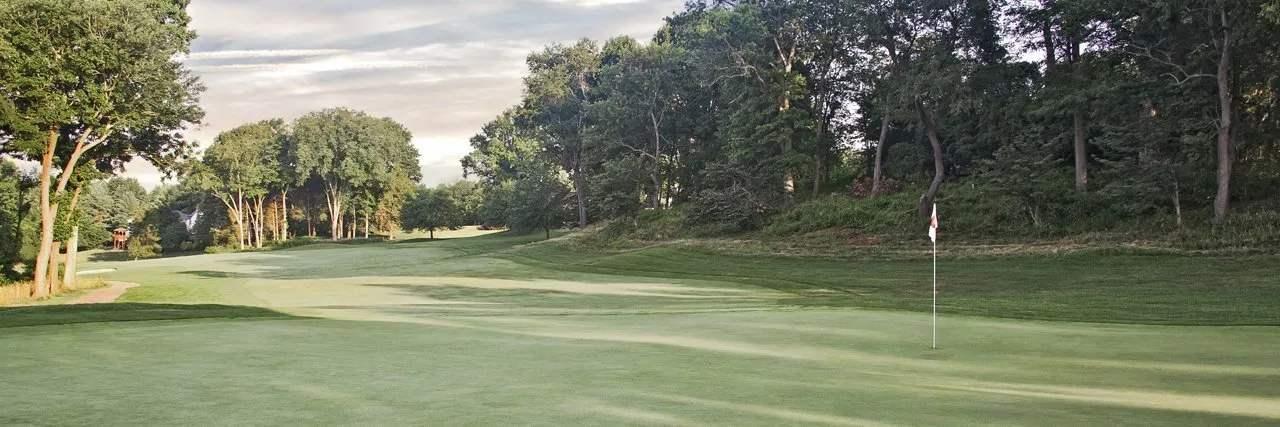
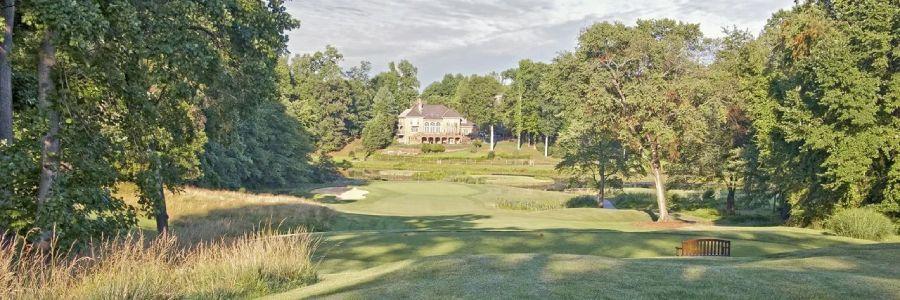
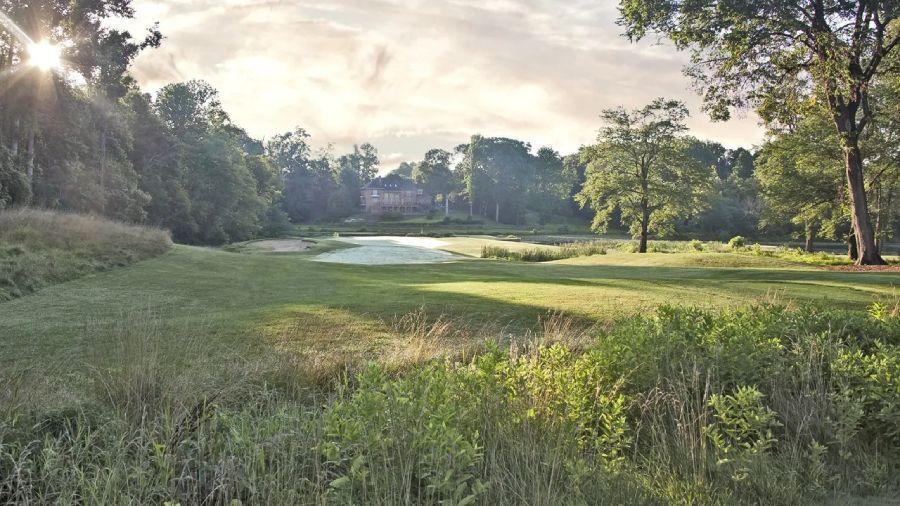
Hole # 14
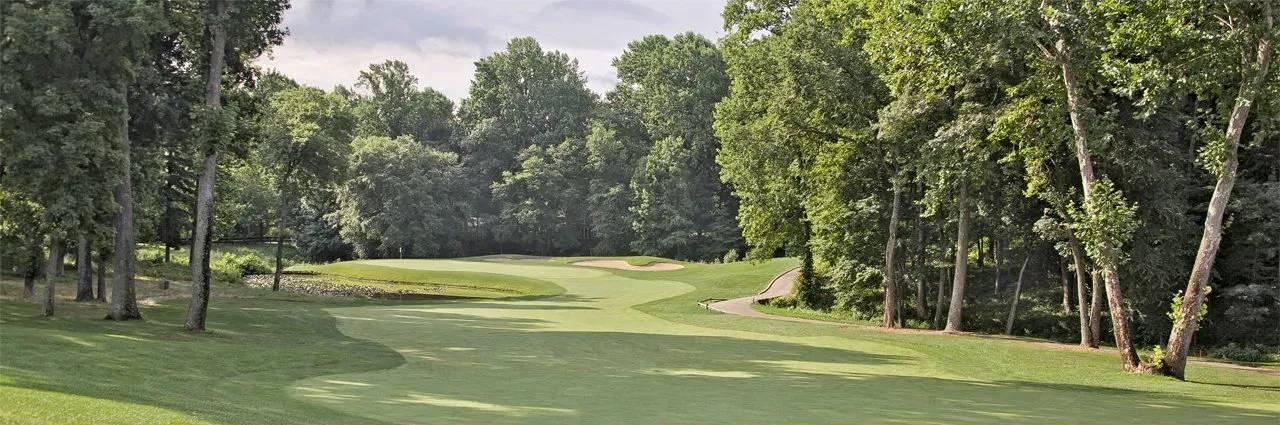
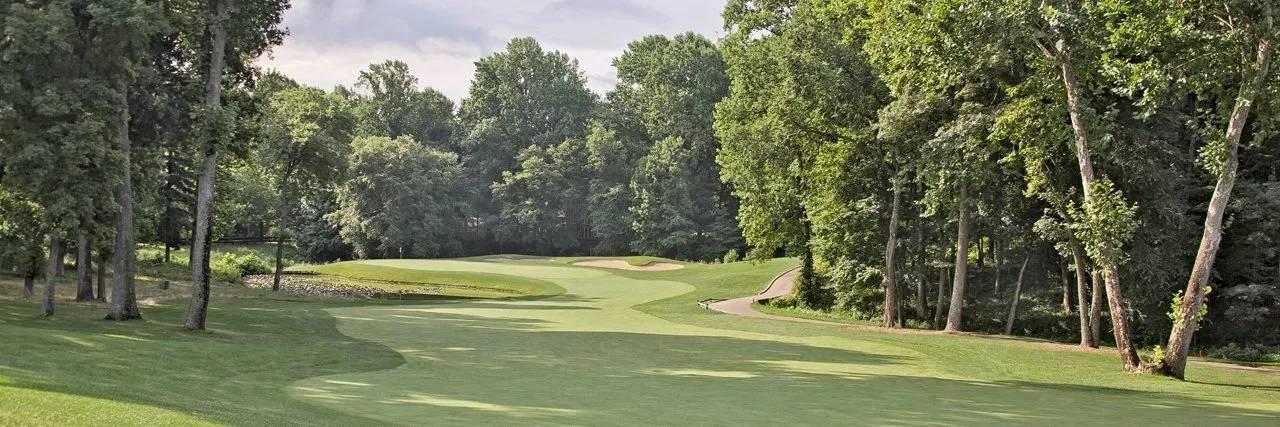
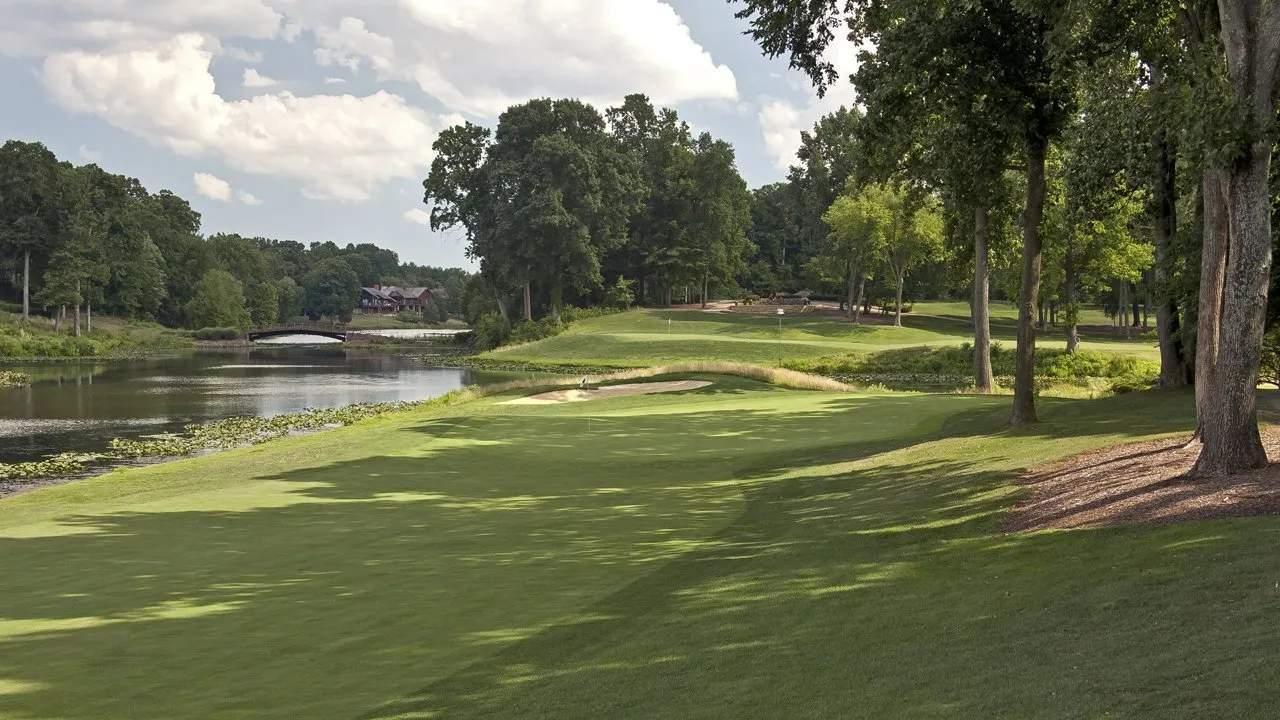
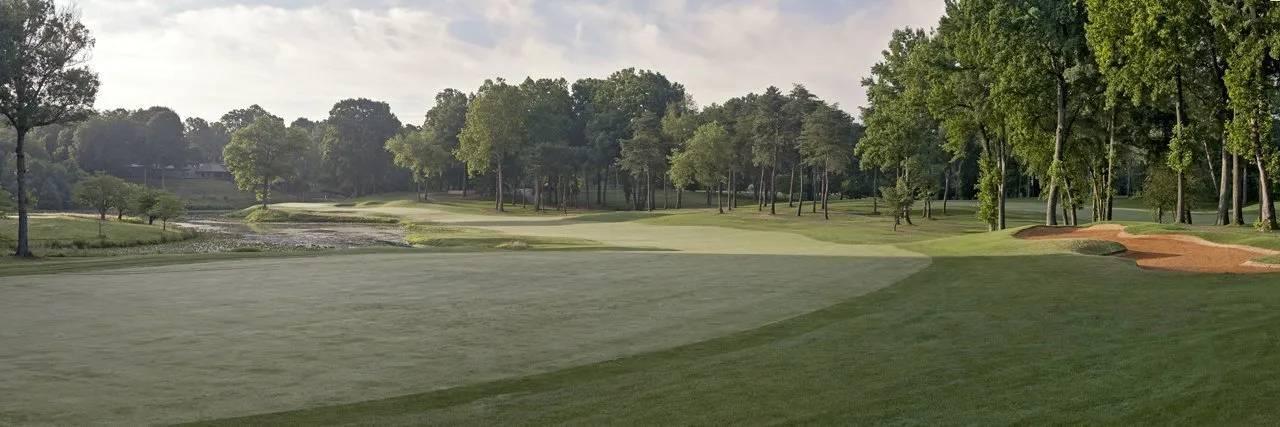
A gorgeous view from this elevated tee does not dull the challenge at hand. The 14th is a long and unforgiving par 3, with a small part of Lake Woodmore on the right and left of the hole. The only safety area is short of the green, so players must play conservatively or simply trust their swings and challenge the green in hopes of the most elusive score at the 14th hole - a birdie 2!


| Yardage | ||||
|---|---|---|---|---|
|
Championship 228 |
Maroon 195 |
White 175 |
Black 160 |
Women's - Black 160 |
|
Handicap (M/L) 9/16 Par (M/L) 3/3 |
||||
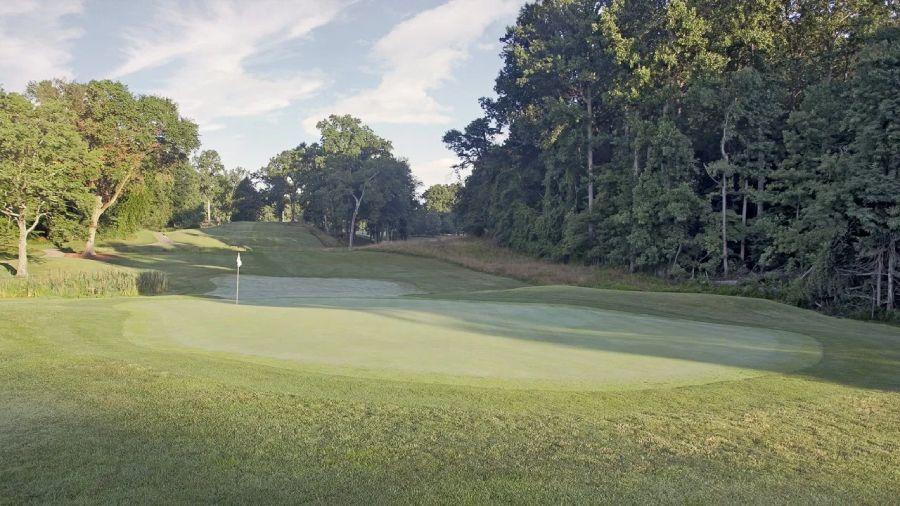
Hole # 15
The 15th hole is 400 yards of beauty, as it runs along Lake Woodmore, gently sliding to the left and out into the Lake. Players who play to the right side of the fairway will be rewarded with a dry ball, but a long shot to the green. Those who play more boldly will challenge the water and cut off yardage, leaving themselves a shorter club into this two-tiered green. Approach shots that slide to the right may kick off the hillside and onto the green, but anything left could roll into the hazard or into the back left bunker.


| Yardage | ||||
|---|---|---|---|---|
|
Championship 400 |
Maroon 360 |
White 308 |
Black 298 |
Women's - Black 289 |
|
Handicap (M/L) 13/14 Par (M/L) 4/4 |
||||
Hole # 16
The longest par 4 on the course completes one of the toughest stretches on the course, and provides a stern test from the tee and from the fairway. A long tee shot is required to get into position on the 16th; anything to the left will be blocked by trees or in the heavy rough. Once in the fairway, a long second shot is required to hit the green, which sits above a large upslope and gives the appearance of a severly elevated approach. Take plenty of club to get up to the green and run to the next tee if you make par!


| Yardage | ||||
|---|---|---|---|---|
|
Championship 458 |
Maroon 446 |
White 422 |
Black 325 |
Women's - Black 320 |
|
Handicap (M/L) 1/10 Par (M/L) 4/4 |
||||
Hole # 17
The longest par 4 on the course completes one of the toughest stretches on the course, and provides a stern test from the tee and from the fairway. A long tee shot is required to get into position on the 16th; anything to the left will be blocked by trees or in the heavy rough. Once in the fairway, a long second shot is required to hit the green, which sits above a large upslope and gives the appearance of a severly elevated approach. Take plenty of club to get up to the green and run to the next tee if you make par!
| Yardage | ||||
|---|---|---|---|---|
|
Championship 386 |
Maroon 365 |
White 350 |
Black 324 |
Women's - Black 314 |
|
Handicap (M/L) 7/8 Par (M/L) 4/4 |
||||
Hole # 18
The home hole finishes with a beautiful elevated tee shot into a generous fairway. Once the player is in position, a lay-up is required to leave an easy third shot to the green. The longest hitters can go for the green in 2 shots by challenging the fairway bunker on the left side of the fairway. If they can negotiate the bunker, they must then face an intimidating shot that partially carries Lake Woodmore to an elevated green with no margin for error on the left. Smart misses will be to the right, leaving a fairly simple up-and-down for the third shot. However it is played, good scores are very possible here, providing an enjoyable finish to the round.

| Yardage | ||||
|---|---|---|---|---|
|
Championship 564 |
Maroon 524 |
White 496 |
Black 417 |
Women's - Black 407 |
|
Handicap (M/L) 5/12 Par (M/L) 5/5 |
||||
